
The atmosphere of, “Overgrown Jungle Path Scene,” is mysterious and enchanting, like visiting a prehistoric Earth. We reached out to the creator behind this real-time scene to learn more about how to construct a strange and beautiful world of our own.
Meet the artist
Hey everyone! I am Artem Ostapchuk, a 3D Environment Artist currently working at 11Bit Studios in Warsaw, Poland. I have worked on several VR and PC UE4 projects, both realistic and stylized.
As a child, I drew and played a lot of games but never imagined I’d end up in gamedev. Years later, I discovered 3D art and immediately fell in love with it. It’s a pleasure to work in a creative industry where I can gain and share experience (and even get paid for it!) It’s a great community where people with unique stories come together under their shared interests.
Breaking Down “Overgrown Jungle Path Scene”
Concept Art and Research
When planning this environment I had a few goals in mind: I wanted to expand my foliage creation skills and test out Unreal Engine 5. After debating whether or not to make this environment stylized, like “Kena: Bridge of Spirits,” I decided to create a realistic scene.
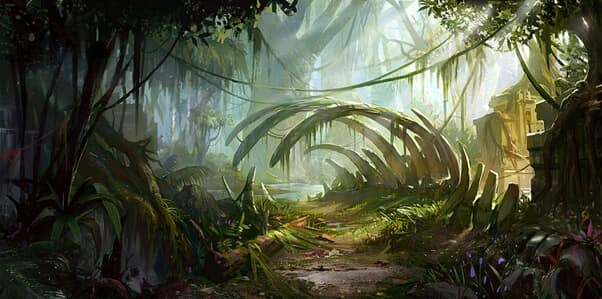
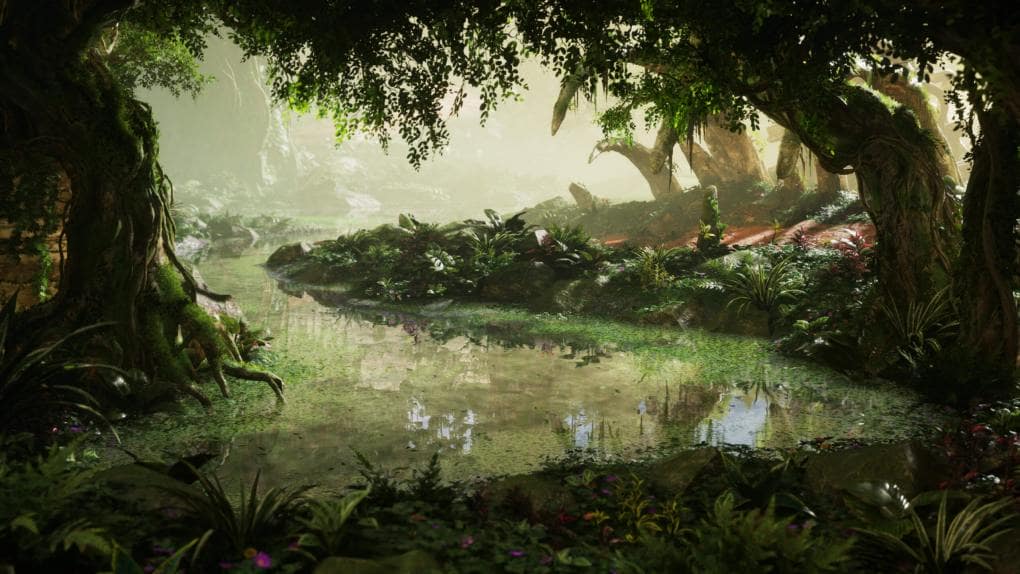
I started to search for eye-catching concepts as references for my environment using Pinterest, Artstation, and Google. The main reference I used was, “Dragon bone” by Dawnpu at Art vision studio: it captured my attention with its colors, lighting, and abundance of foliage, lianas, moss – a full spectrum of vegetation skills to work on.
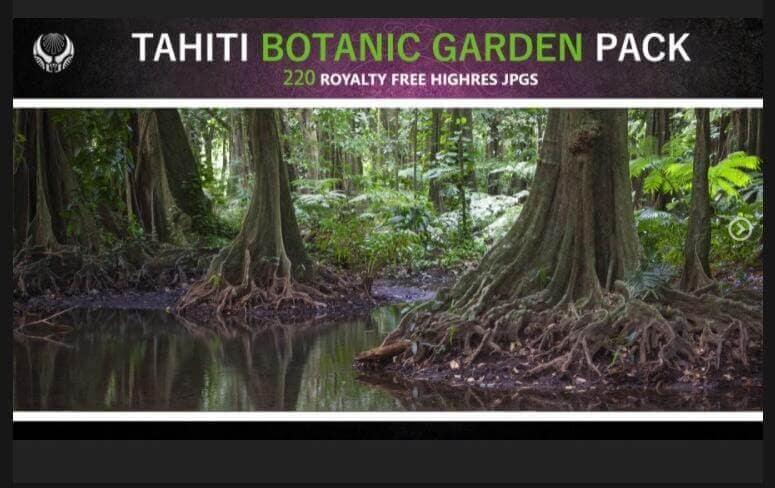
The most important part of replicating nature is understanding how it grows: it depends on the atmosphere, moisture, temperature, sun availability, etc. Different biomes will go by different rules so it’s very important to find as many references as possible and stick to them. Jungles have very high moisture levels and temperatures–perfect conditions for moss and small plants. The image references “Tahiti Botanic Garden Pack” and “Tropical Bark Texture Pack” by French Polynesian generalist Vaimiti Guesdon helped a lot.

Below is my main reference board and the smaller refboards I created for tasks I was working on.

Composition
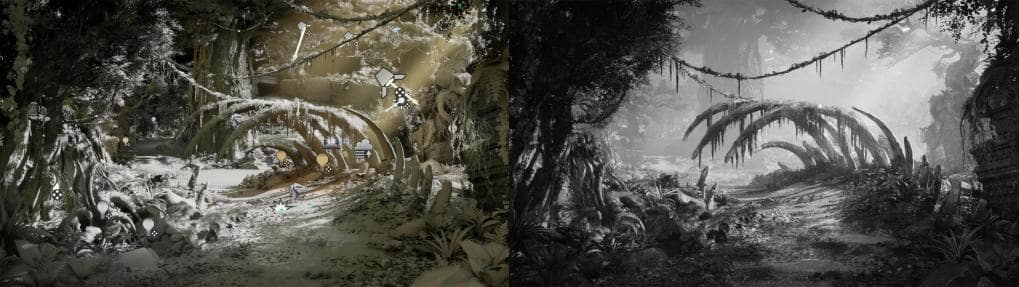
While I changed the composition and some elements to my liking, the main idea of strong directional light and detailed assets remained the same. I tried to create a somewhat radial composition where foliage guides the viewer from one point of interest to another. I also added a road to connect the foreground and background; from a game design perspective, it also made a good level path.
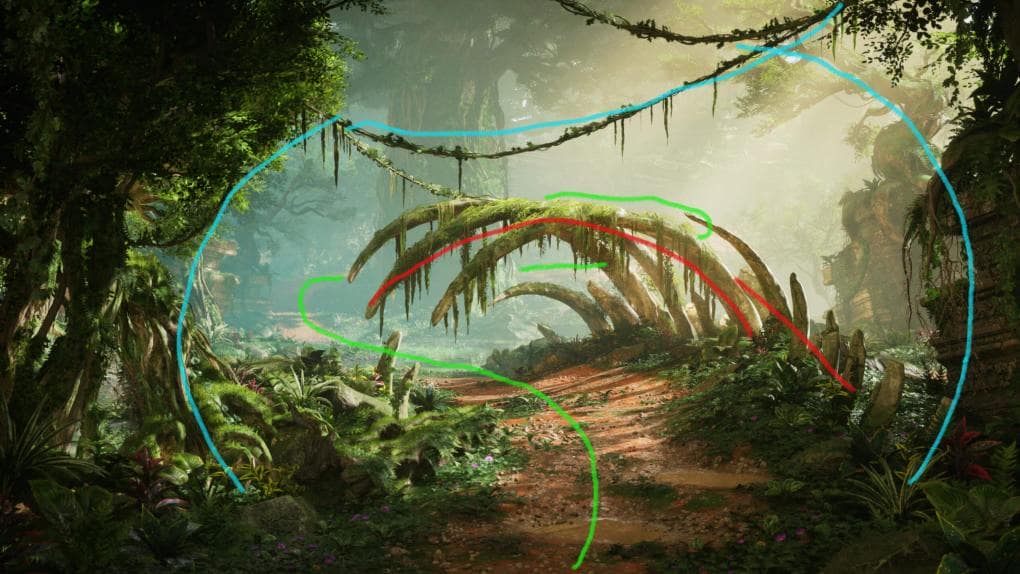
I outlined the main point of interest as red, view guides as blue, and road as green. I tried to rotate and place foliage in such a way that it drew attention back to the main point of interest. The curve of this focal point served as a bridge between the right and left parts of the scene.
Lighting Design
I really liked the warm yellow and green colors of the concept art so I pushed them further in my scene. Strong direct and indirect lighting helped achieve the feeling of a place long forgotten by anyone but nature. The angle of the directional light produces nice shadows and highlights. I add a few point and spot lights here and there to add; you can clearly see the bones in the middle of the scene because of the contrast.
Foliage Layout

There are 3 distinct layers of foliage, each with its own role in composition. The more impactful layer is colored in red: it contains trees and shapes large enough to be points of interest and form distinct silhouettes. The second layer, colored in yellow, consists of bushes and ferns: they serve as mid-size points of interest since they have distinctive shapes and colors. The last layer, colored in blue, consists of grass and flowers, helping to add small details and bridge the gaps between red and blue layers.
Project Pipeline
I used the samples included with SpeedTree to learn the program. Then I sought out different foliage pipelines to create a quality environment in a reasonable amount of time. You can find a lot of useful information and examples on SpeedTree’s YouTube channel, especially the livestreams!
For my pipeline, I mainly used Substance Designer for materials (sometimes Substance Painter and ZBrush), SpeedTree, Blender for meshes, and Unreal Engine.
I remade some assets a couple of times; it’s very important to not stick to the first iteration of your work. With each iteration you can see what’s working, what’s not, what you can add, and what you should definitely remove.
Below is my foliage creation workflow for this scene.
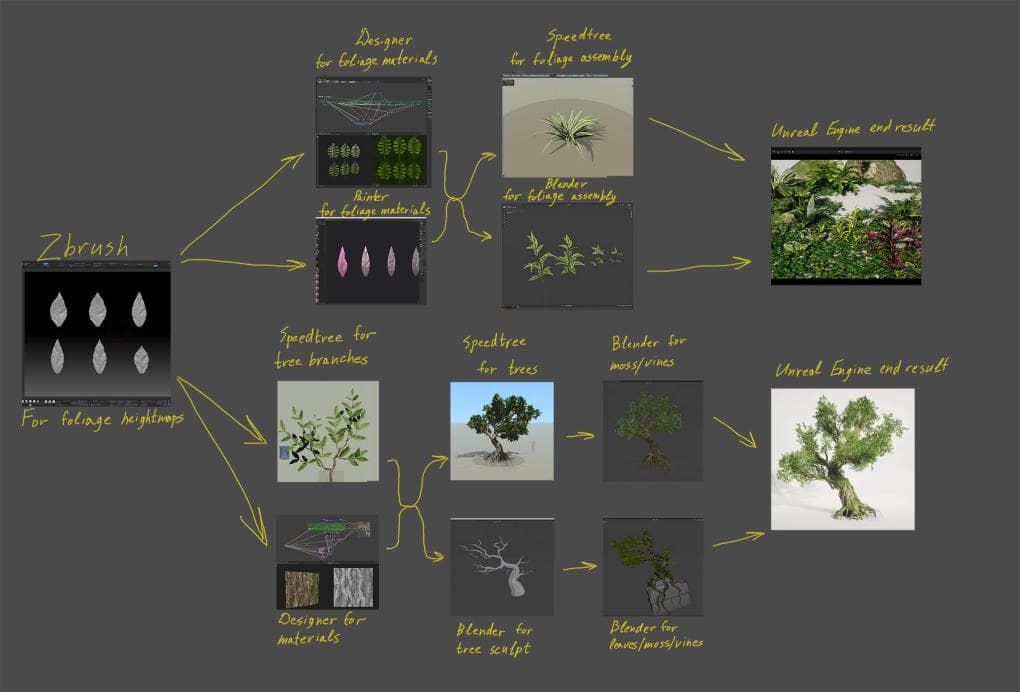
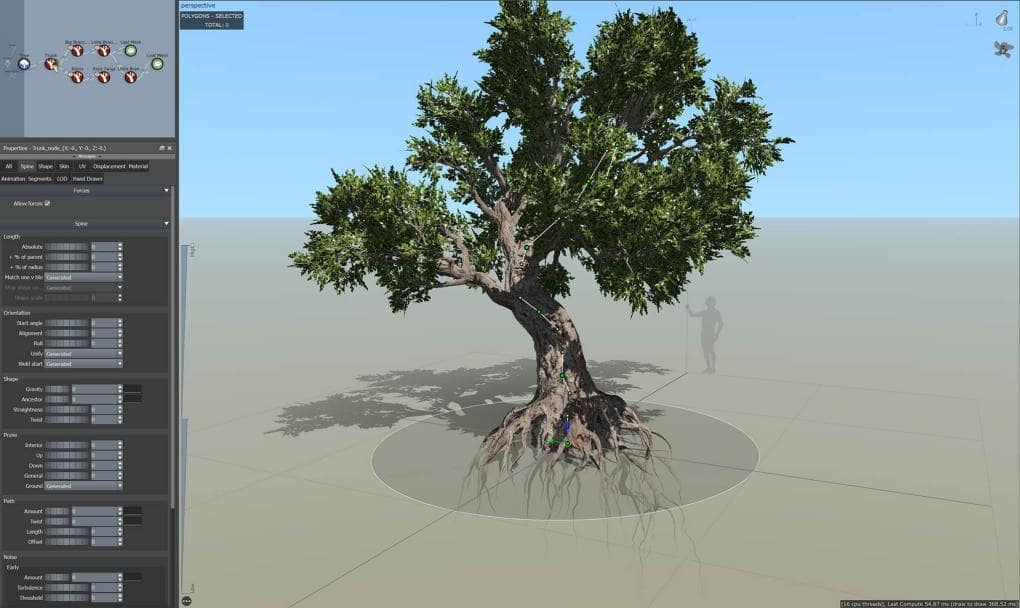
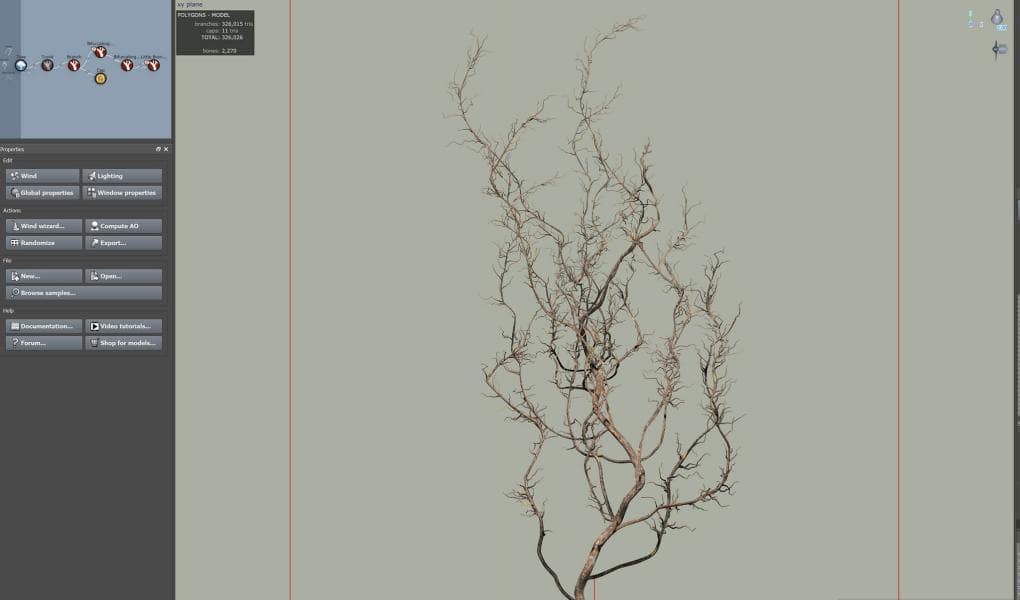
Almost all of the big trees were created in SpeedTree; here I used curves to modify my trunk.
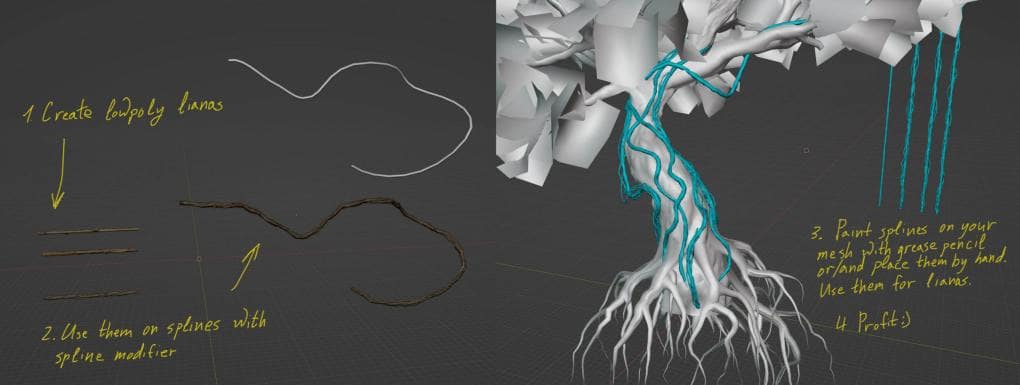
When it comes to set-dressing the trees, there’s a great tutorial by Tyler Smith on creating overgrown foliage. While he mainly uses ZBrush for this process, Blender was a better choice for me. You can create lianas, the woody, climbing plant commonly seen on jungle trees, in SpeedTree as well, but since I did the moss placement in Blender, I switched to Blender for the lianas as well.
First, I created low-poly lianas, then I generated them on curves around trees.
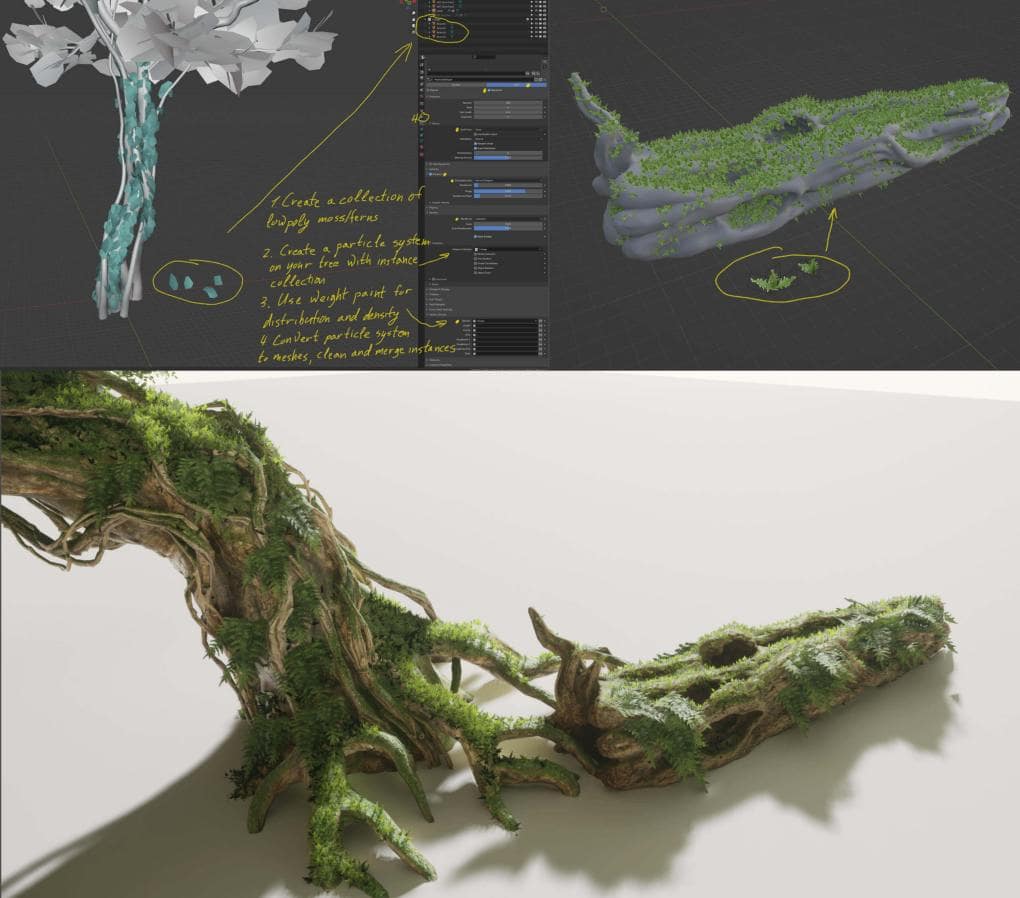
For moss and small foliage, I used Blender’s particle system; the new geometry nodes system will have an even better result, can’t wait to check it out!
First I create low-poly moss, leaves, and ferns, placing them in separate collections. Then I create a particle system on my tree and connect my low-poly collections to the particle instances. You can also draw on your mesh with vertex groups if you want some areas on your mesh to have more or less dense foliage cover.
SpeedTree Foliage Creation
SpeedTree was a great timesaver when it came to creating complex foliage like vines and root system. For roots, I started with a simple SpeedTree cluster template and added my textures. When I was satisfied with the result, I exported it as a material to have diffuse, normal, roughness and opacity maps.
For my vines, I used a similar approach: I made a high-poly model exporting it as a material, created branches the same way, then combined those two materials.

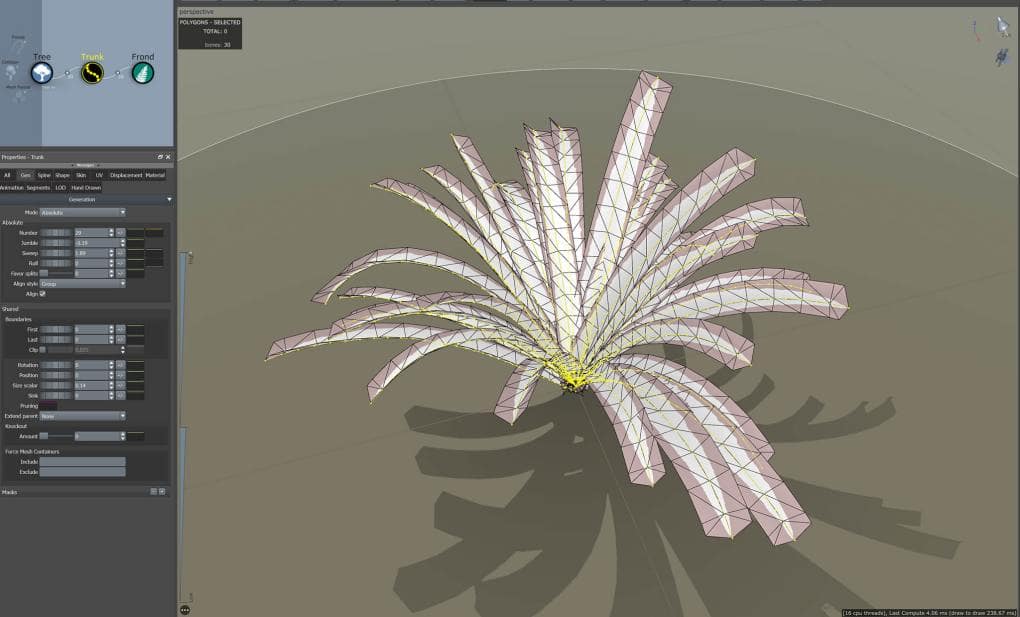
SpeedTree was also very helpful in creating foliage like bushes. All you have to do is create a template with trunk spines and use them for fronds. Then you can import your foliage atlas, adjust frond settings, and you have your plant! I recommend saving templates like these so that you can use them later on by switching textures atlases out on your frond meshes.
Did you encounter any new challenges on this project?
For me, the most interesting challenge on this project was making sure everything worked well with UE5’s new lumen lighting system and lumen reflections. Since I had a lake in the scene, I had to place a planar reflection, but other reflection captures didn’t work with it. So I removed all reflection captures besides the planar reflection, and tweaked the roughness and specular values on foliage.
What advice would you offer to aspiring environment artists?
The most important thing you can do is to start. If you don’t know where to start, start with the most simple thing. Don’t spend too much time on one thing, keep changing tasks – this way you’ll notice details you couldn’t have seen while working on one thing alone. Take breaks, search for additional references, information, and share your knowledge with others. I would also recommend getting off social media sometimes. Sure, it can be a great source of inspiration and information, but it’s important to clear your head from time to time.
And that’s all from me for today! I want to thank the SpeedTree team for their efforts in bringing intuitive and powerful foliage tools for all the creators, and for the opportunity to share a tiny bit of my knowledge with their readers. There might be some topics that I have not fully covered so, if you have questions, you can send me a message. Thank you for reading!