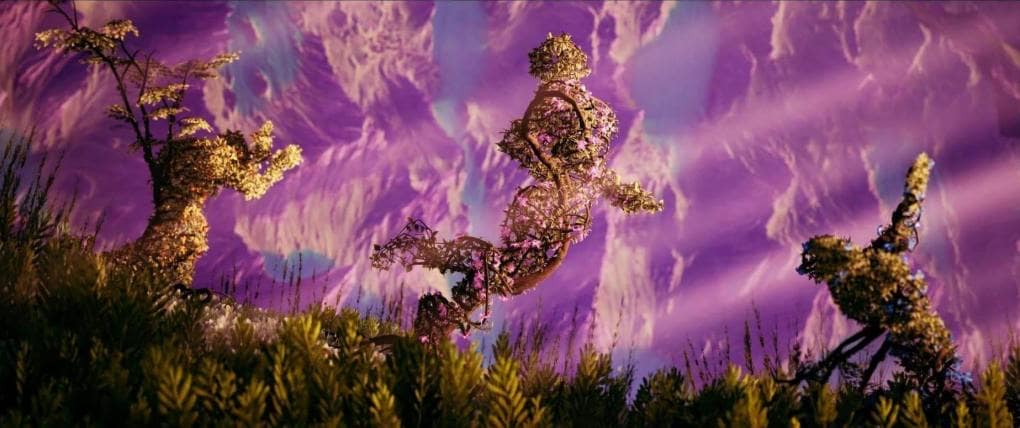
With bountiful color, varied biomes, and stunning compositions, “The Aorta Valley,” won first prize in The Rookies’ “World of Real-time Discoveries” challenge and stole our hearts. Read on to learn more about the artist behind this mammoth real-time scene and their vegetation modeling process!
Meet the artist
My name is Arnaud Claudet and I am an aspiring 3D environment artist. I have just finished my BA in Game Art and Management at Rubika Supinfogame, France, and next year I will attend the University of Hertfordshire’s MA Game Art and Design program. In the future I would love to work in a AAA video game company where environment art is pushed to its limits and where creating realistic and detailed assets would be a real challenge.
In the past I have had a lot of opportunities at school to participate in game-development group projects and on personal projects like “The Scavenger’s Colony,” a 3D environment showcased in the Unreal Engine News and Community Spotlight as well as their Student Reel in Fall 2020.
Did you know you wanted to be an environment artist when you enrolled?
I actually enrolled at Rubika in their Game Design section (which does not include game art; it is more about programming, lore, balance, and rules creation for games). By working with game artists during group projects I discovered how much I loved it; I was passionate about many fields in the industry but found being an environment artist would be the most suitable path for me. I prepared a portfolio and asked to change my major the following year.
How would you summarize the story behind “The Aorta Valley”?
The contest prompt asked us to create a vast, untouched planet, full of mystery and places to explore. The longer I worked on the project, the more I imagined a new story for this planet. I decided then to expand the mandatory dialogue from the prompt with new lore explanations to accompany the visuals showcased on screen.
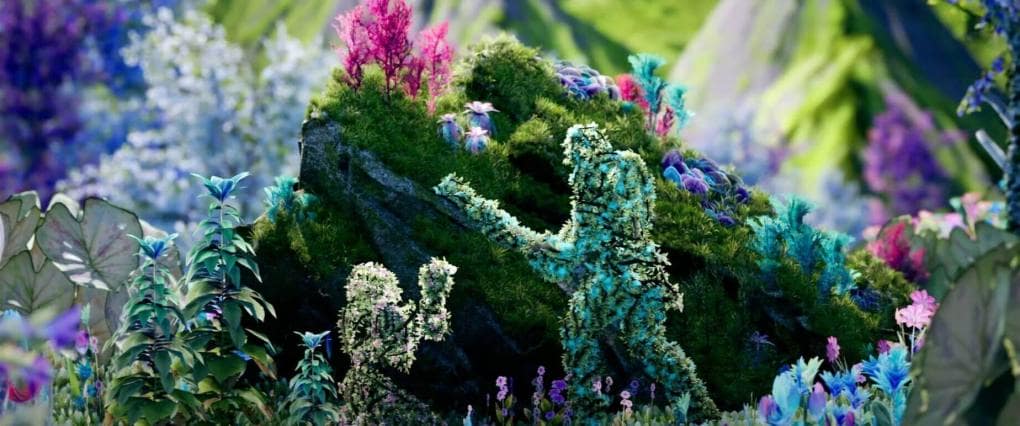
I employed environmental storytelling through destroyed giant robots, forgotten ruins, deity statues, and long-forgotten flower-people civilization to create mysteries and intrigue the player. What could have happened in the past on this planet? What will happen to those two lost travelers? These are questions I would like to expand on in my future projects.
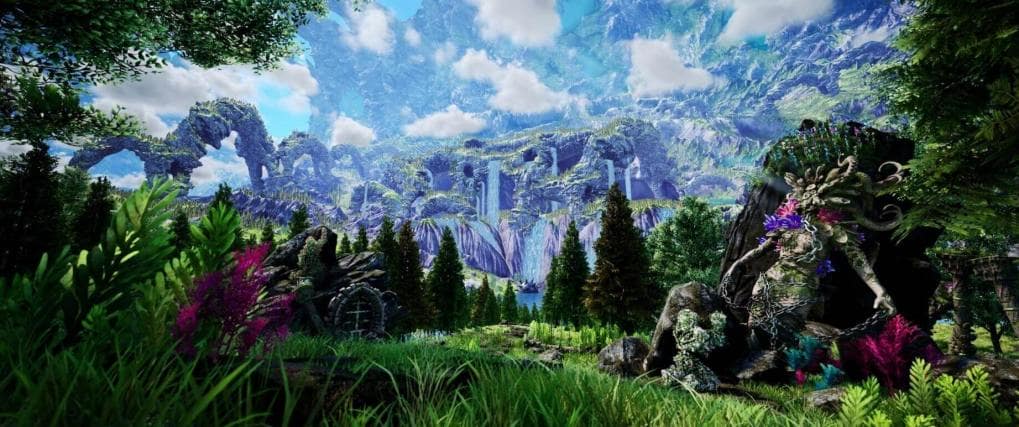
What are the distinct biomes within “The Aorta Valley”? What inspired them?
The biomes encountered throughout the scenes are inspired by my hometown, Grenoble, in the French Alps. I created a coniferous forest, a beech grassland, a birch forest, and an alien-like fantasy swamp. I had the opportunity to go outdoors during different vacations to find and shoot references for colors, trunks, and leaves.
How long have you been using SpeedTree? How did it fit into your workflow on this challenge?
I started learning SpeedTree in October 2020 because I had seen on your game reels that major AAA companies were using it for their impressive environments and I thought that it would be an important skill to develop.
Speedtree, as a procedural software, fits well in my workflow because I use it in tandem with Substance Designer. I am able to quickly iterate, switching from one software to the other without having to struggle with everything else.
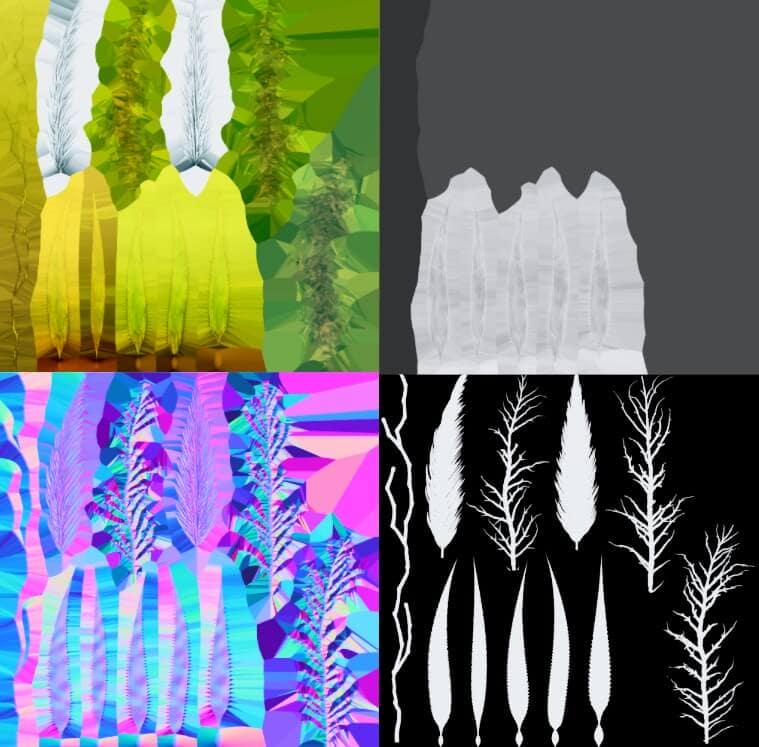
I can create a specific coral shape in SpeedTree using non-destructive generators, then use the “Export Material” button to transfer the normal and alpha maps of the foliage into Substance Designer as “Linked Resources” with specific names. If I need to change the plant shape on the fly, I can do it in SpeedTree, re-export the normal/alpha with the same name, and it will update inside of Substance Designer.
It’s the same the other way around too: I can transform my normal/alpha maps inside a group of nodes to create the color/roughness/subsurface map of my coral. Then I am able to export it with a specific name to my SpeedTree project. If I want to change the color inside Substance Designer, I just make the change and click on the re-export button, and it will automatically update in SpeedTree.
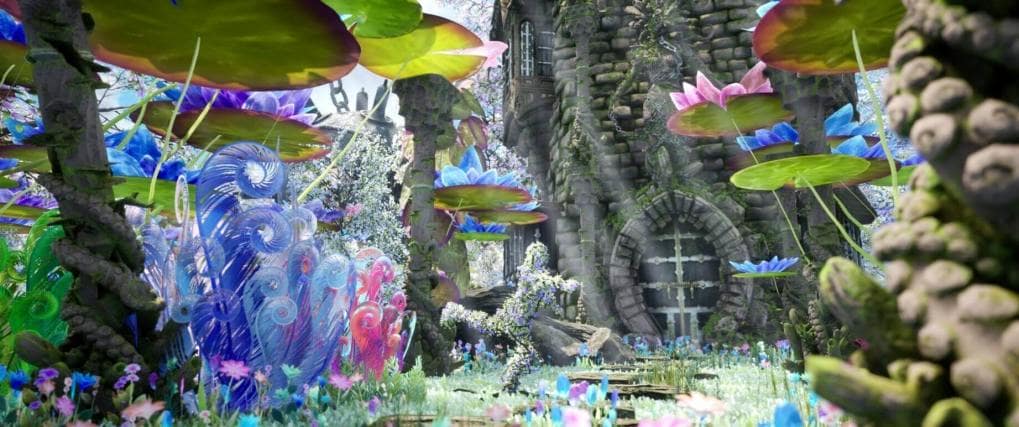
Vegetation Breakdown
For each plant, my goal was to learn something new in SpeedTree. I aimed to create these plants entirely in SpeedTree and Substance Designer without any other external resources (like Megascans, scans, etc). I start by listing interesting features I’d like to test out as well as ideas that would make the plant original. Let’s start with this river plant.
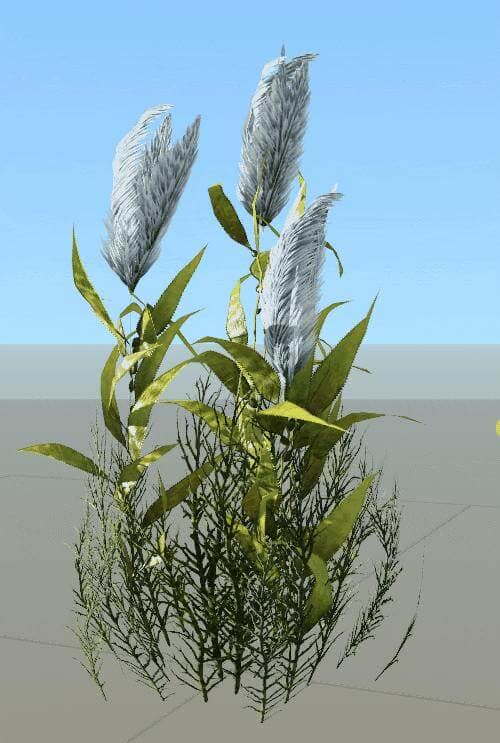
I usually start from either a real-life reference or with a quick sketch. I allow myself to diverge from the initial idea to try different variations throughout the process.
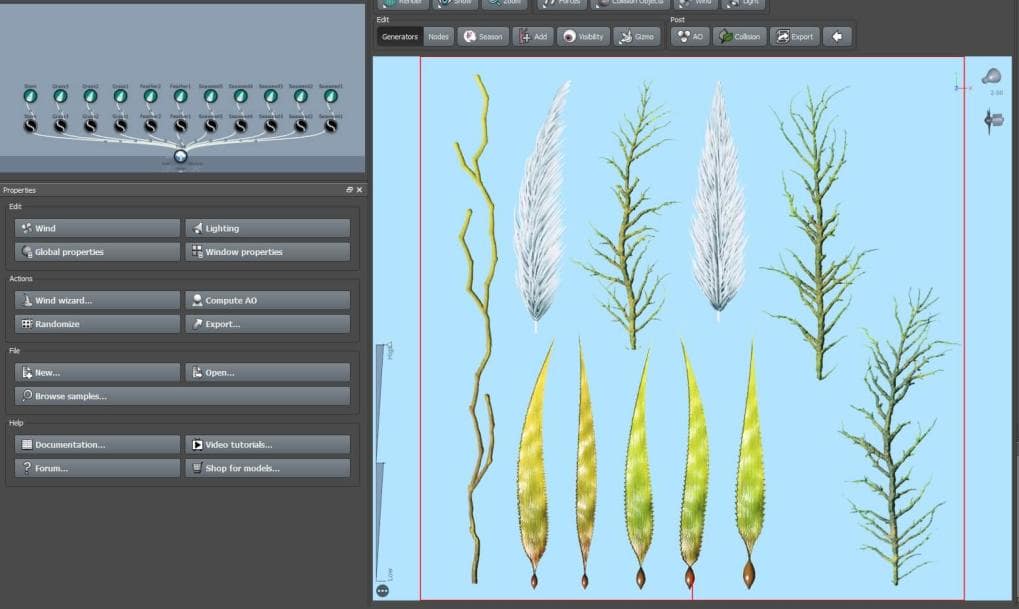
I wanted to create the feathers inside of SpeedTree and use anchor points to grow leaves at specific spots on a long stem. To make it interesting, I replace the leaves with seaweed.
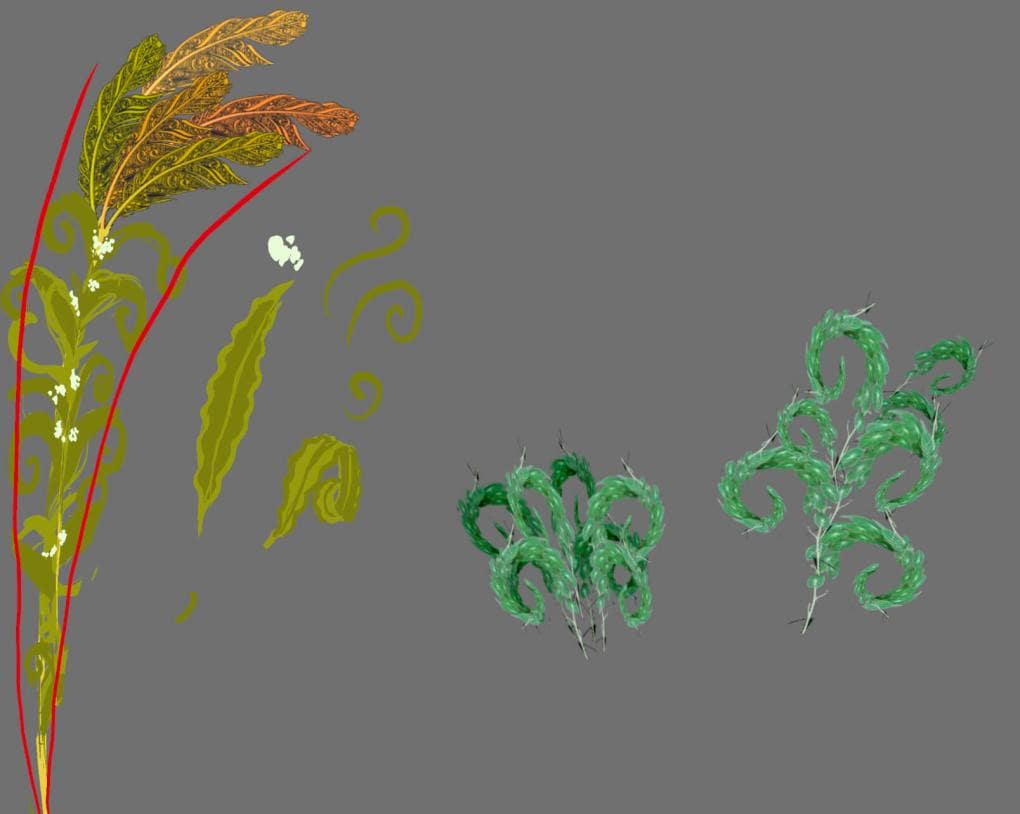
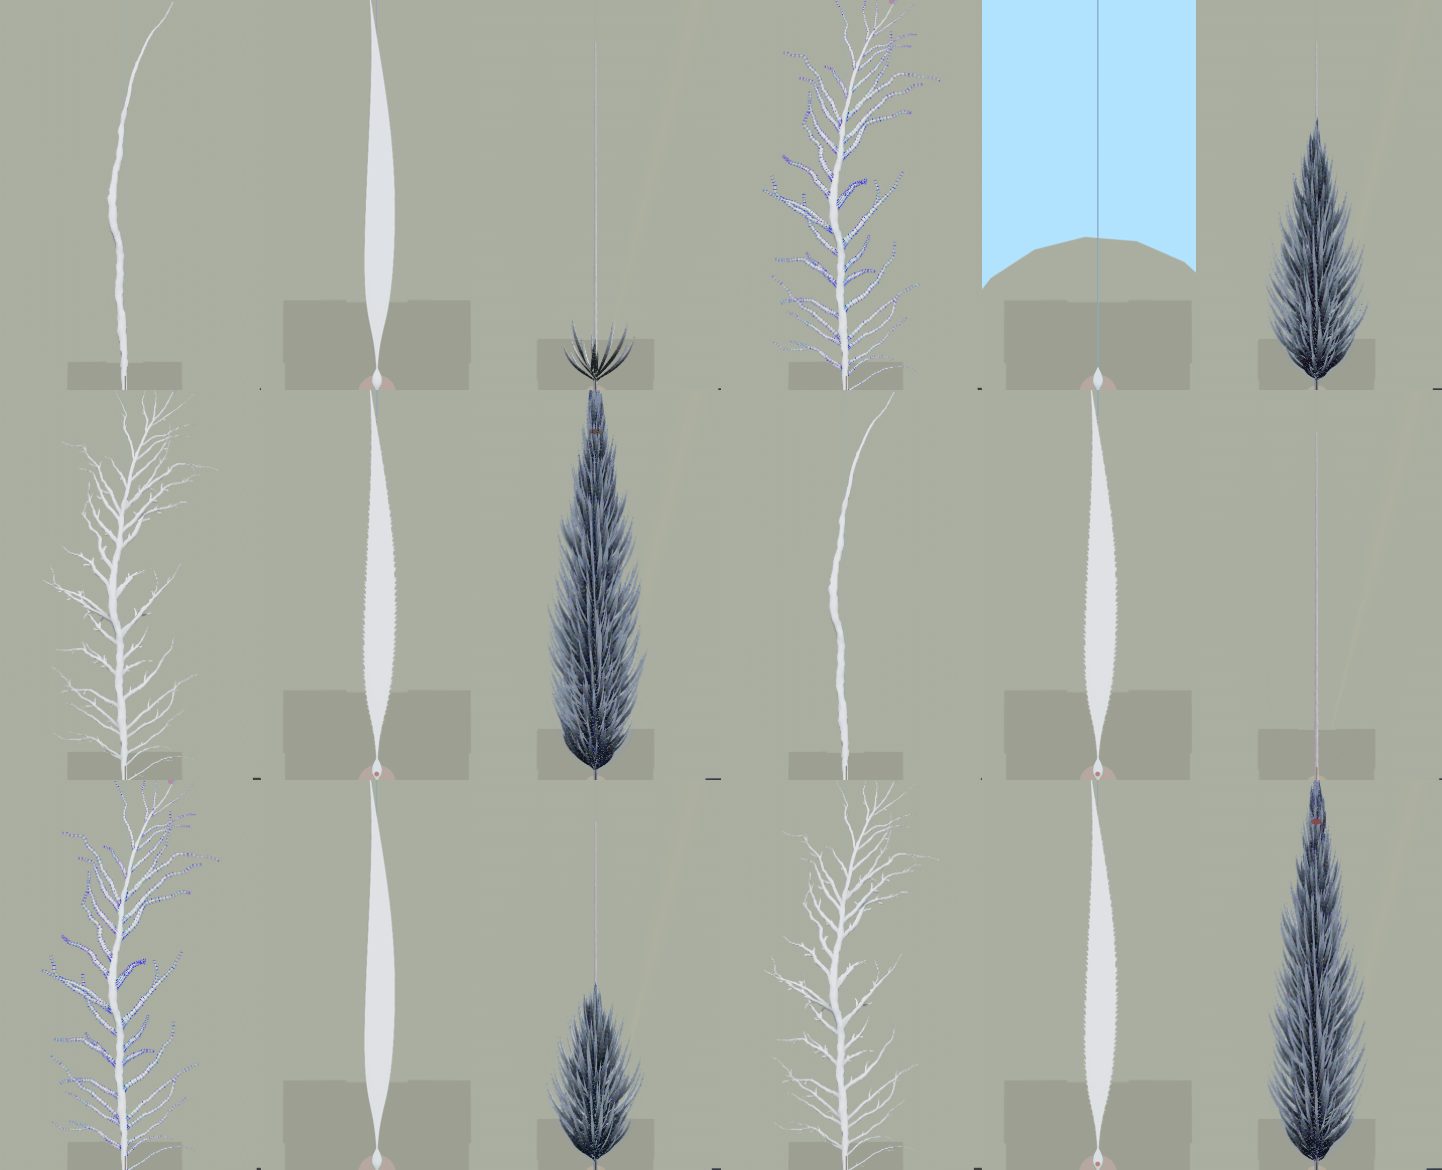
First I create all of the shapes I need for each element of the plant inside of SpeedTree.
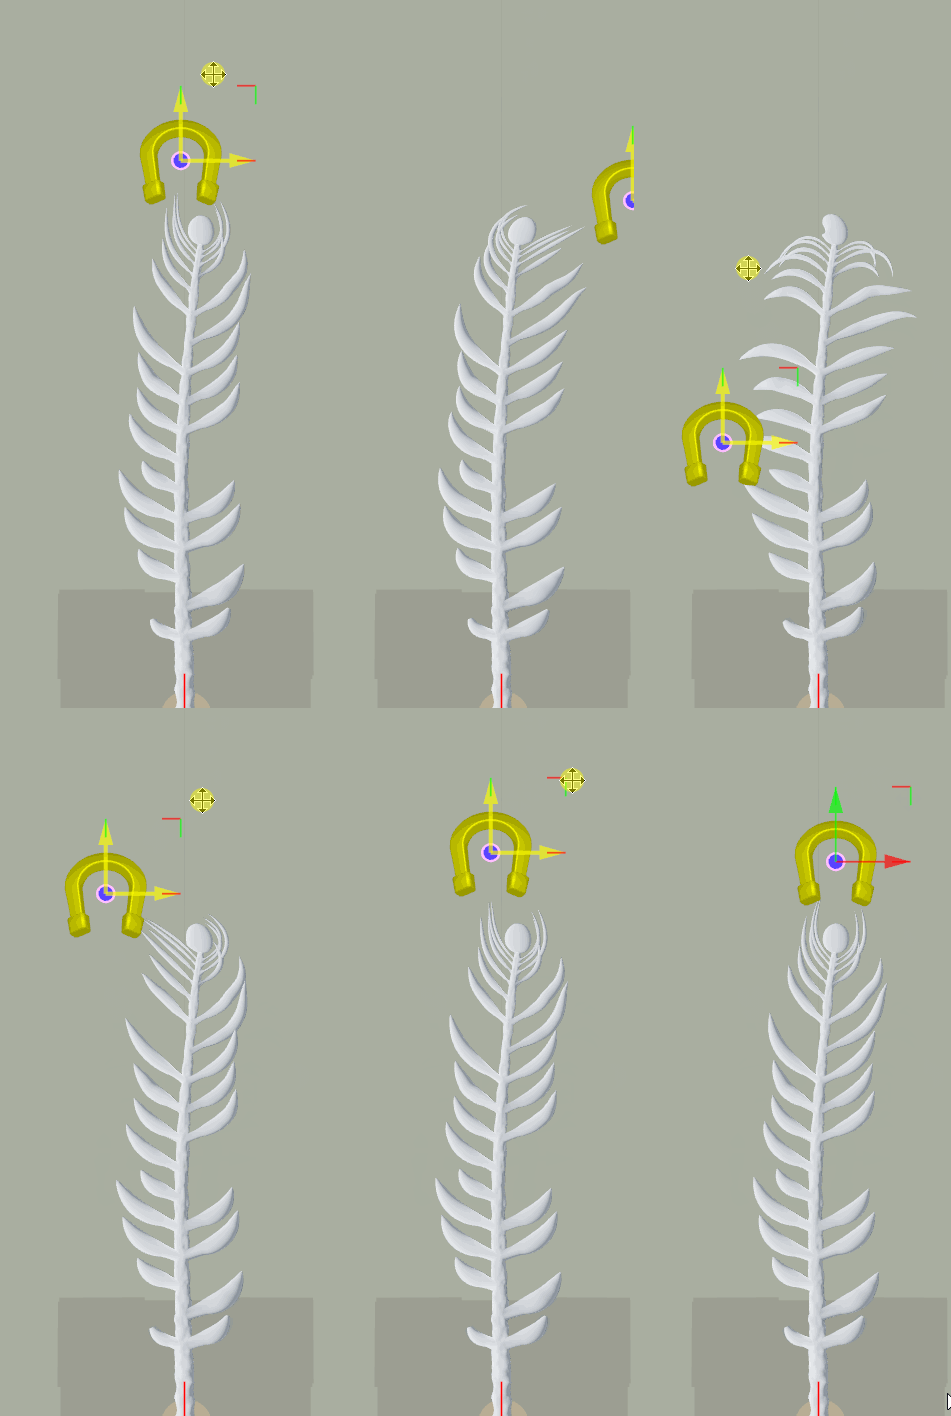
On top views, I usually start with a simple branch that I modify to obtain the desired organic shapes using the blue skin radius profile curve and displacement amount, then I add a final touch with a magnet force.
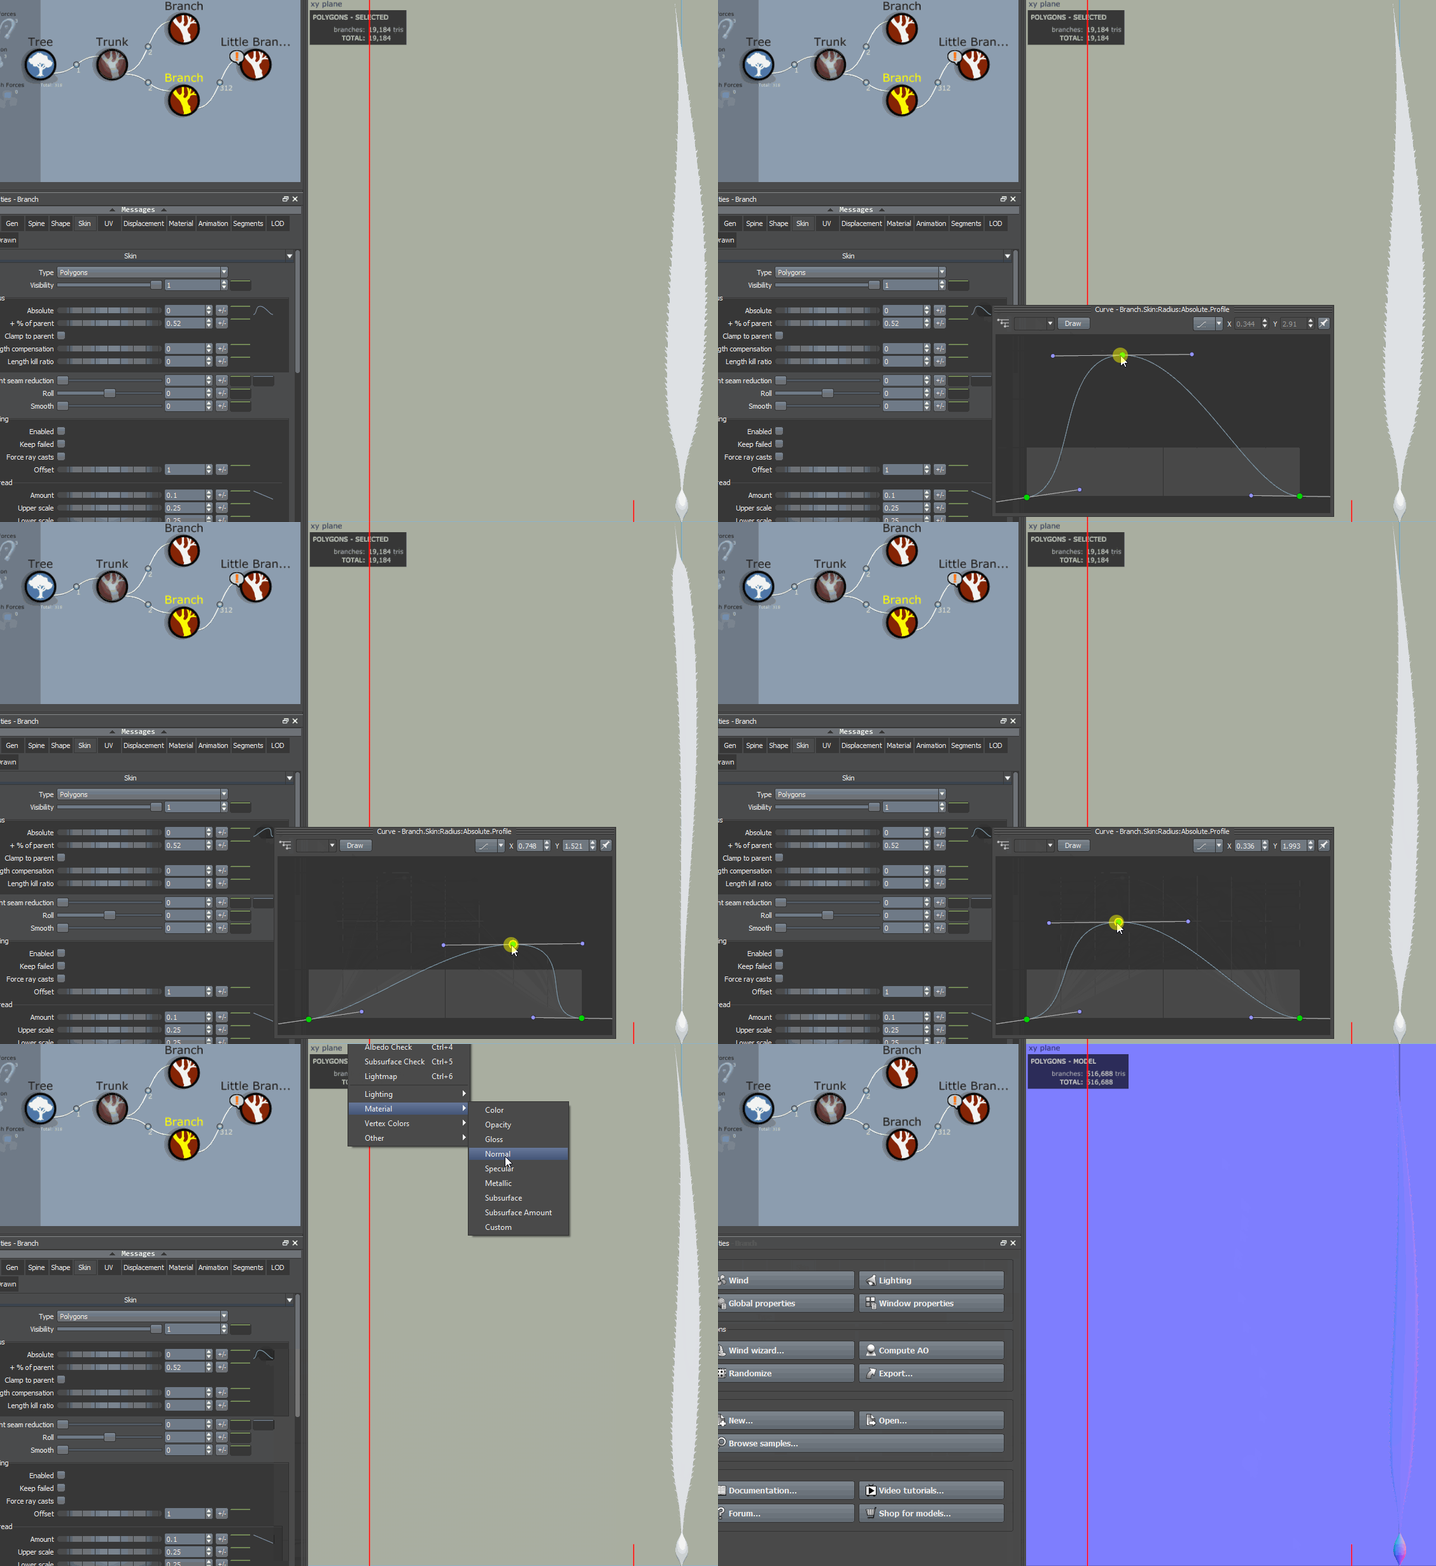

Use of Skin Radius Profile Curve to create seaweed shapes
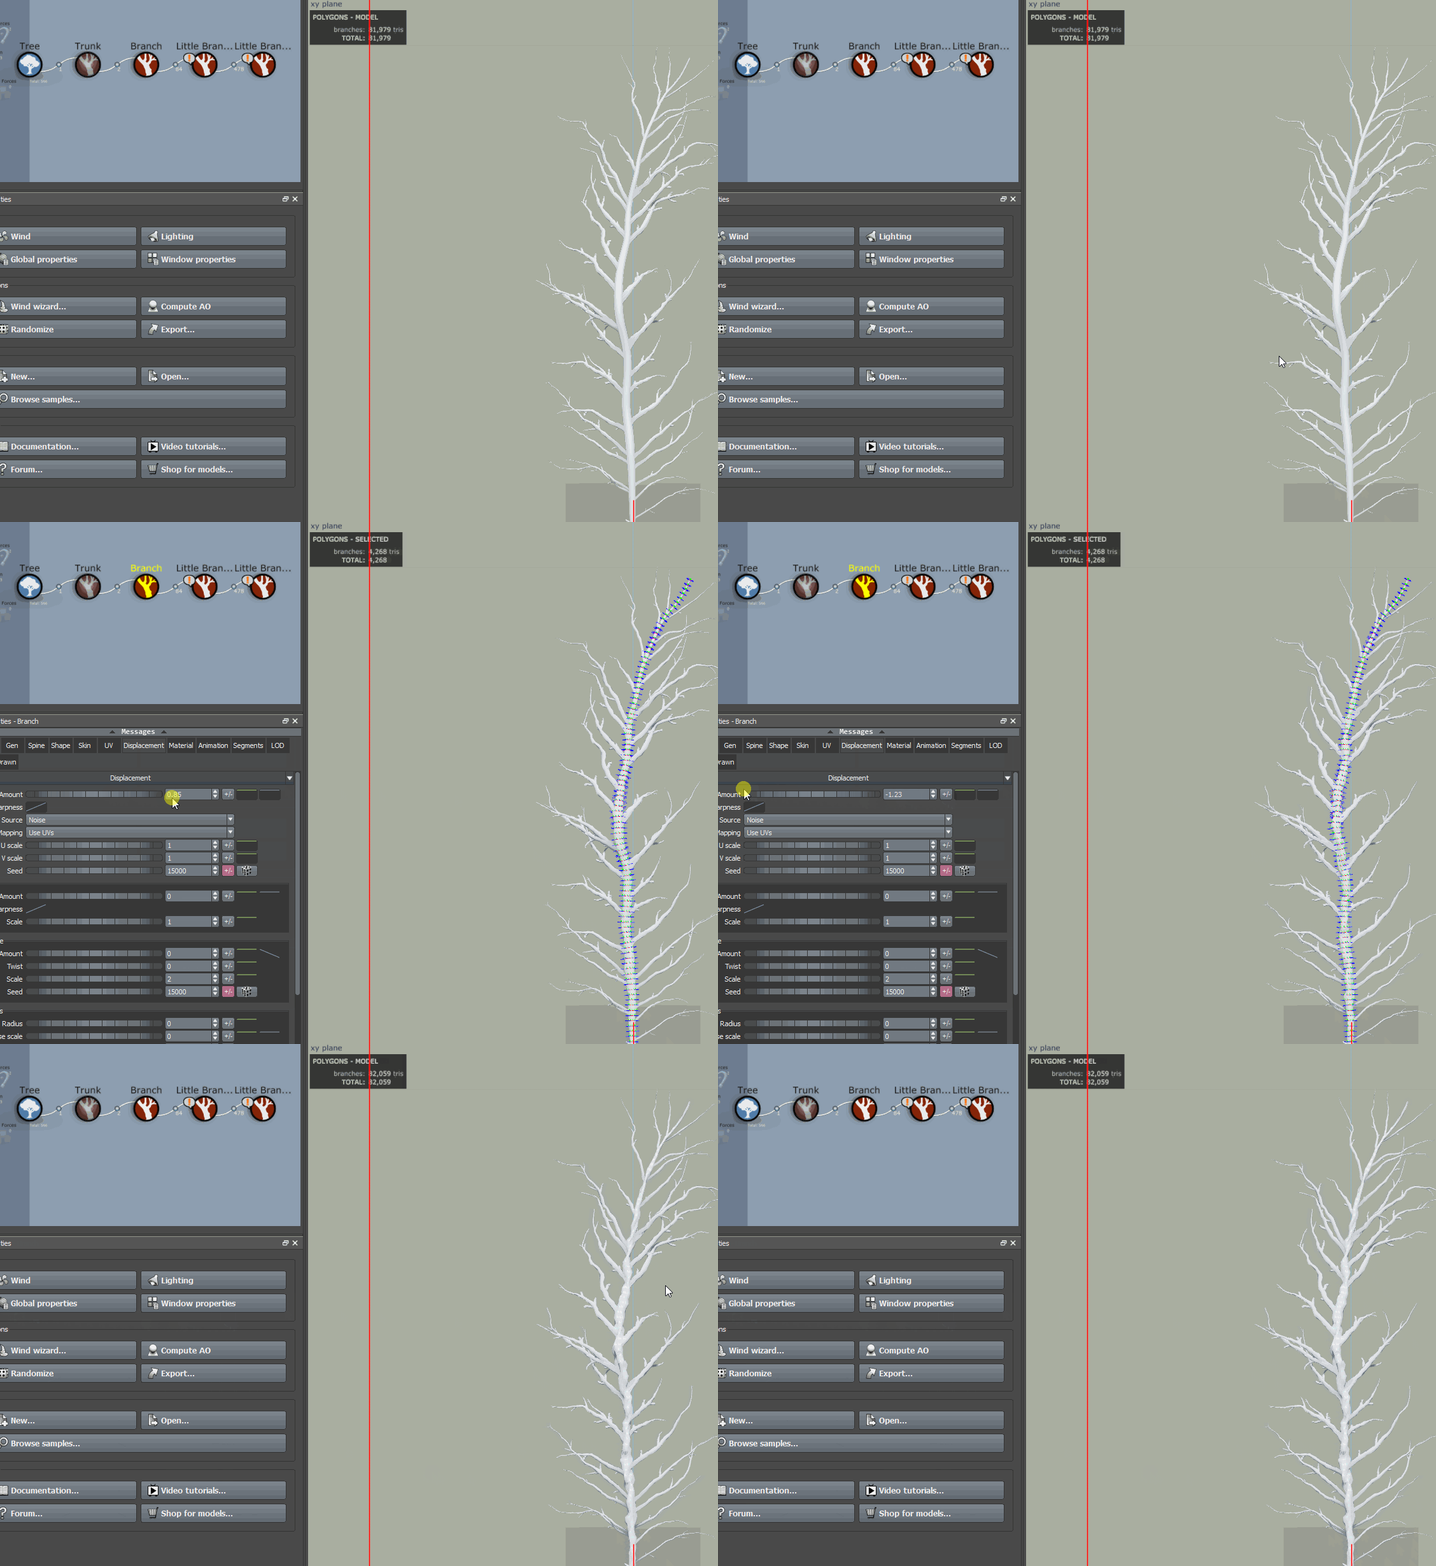
Displacement amount and Magnet force to add details
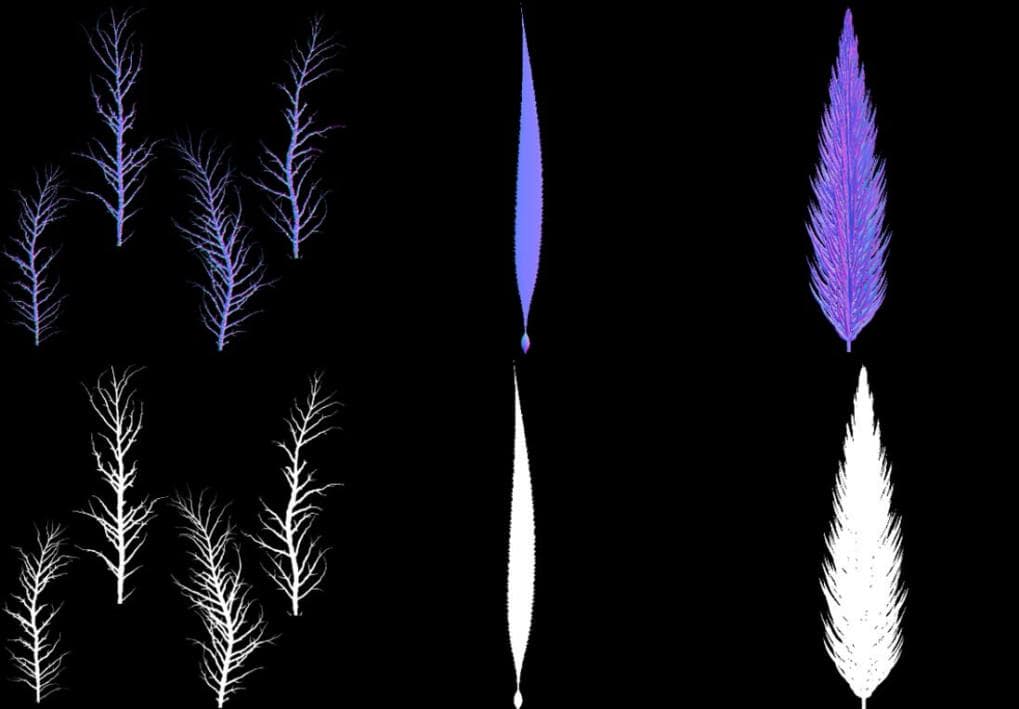
SpeedTree is really useful for creating organic shapes like growth along the length of a stem, something that would be very hard to achieve in Substance Designer. I can also retrieve a precise normal map and crisp opacity map by using the “Export Material” feature.
I import these materials into the beginning of the substance graph to generate node after node, a new, more-detailed normal, base color, and subsurface map.
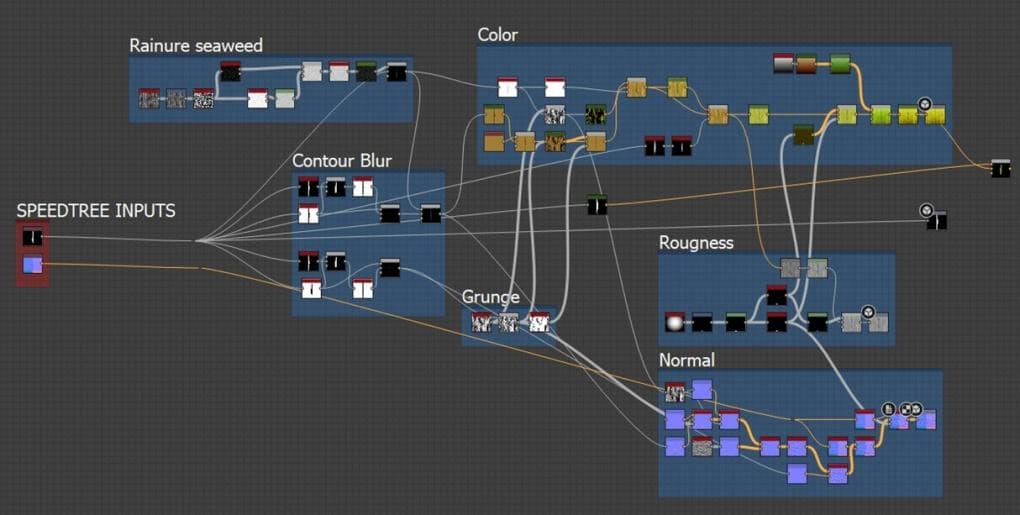
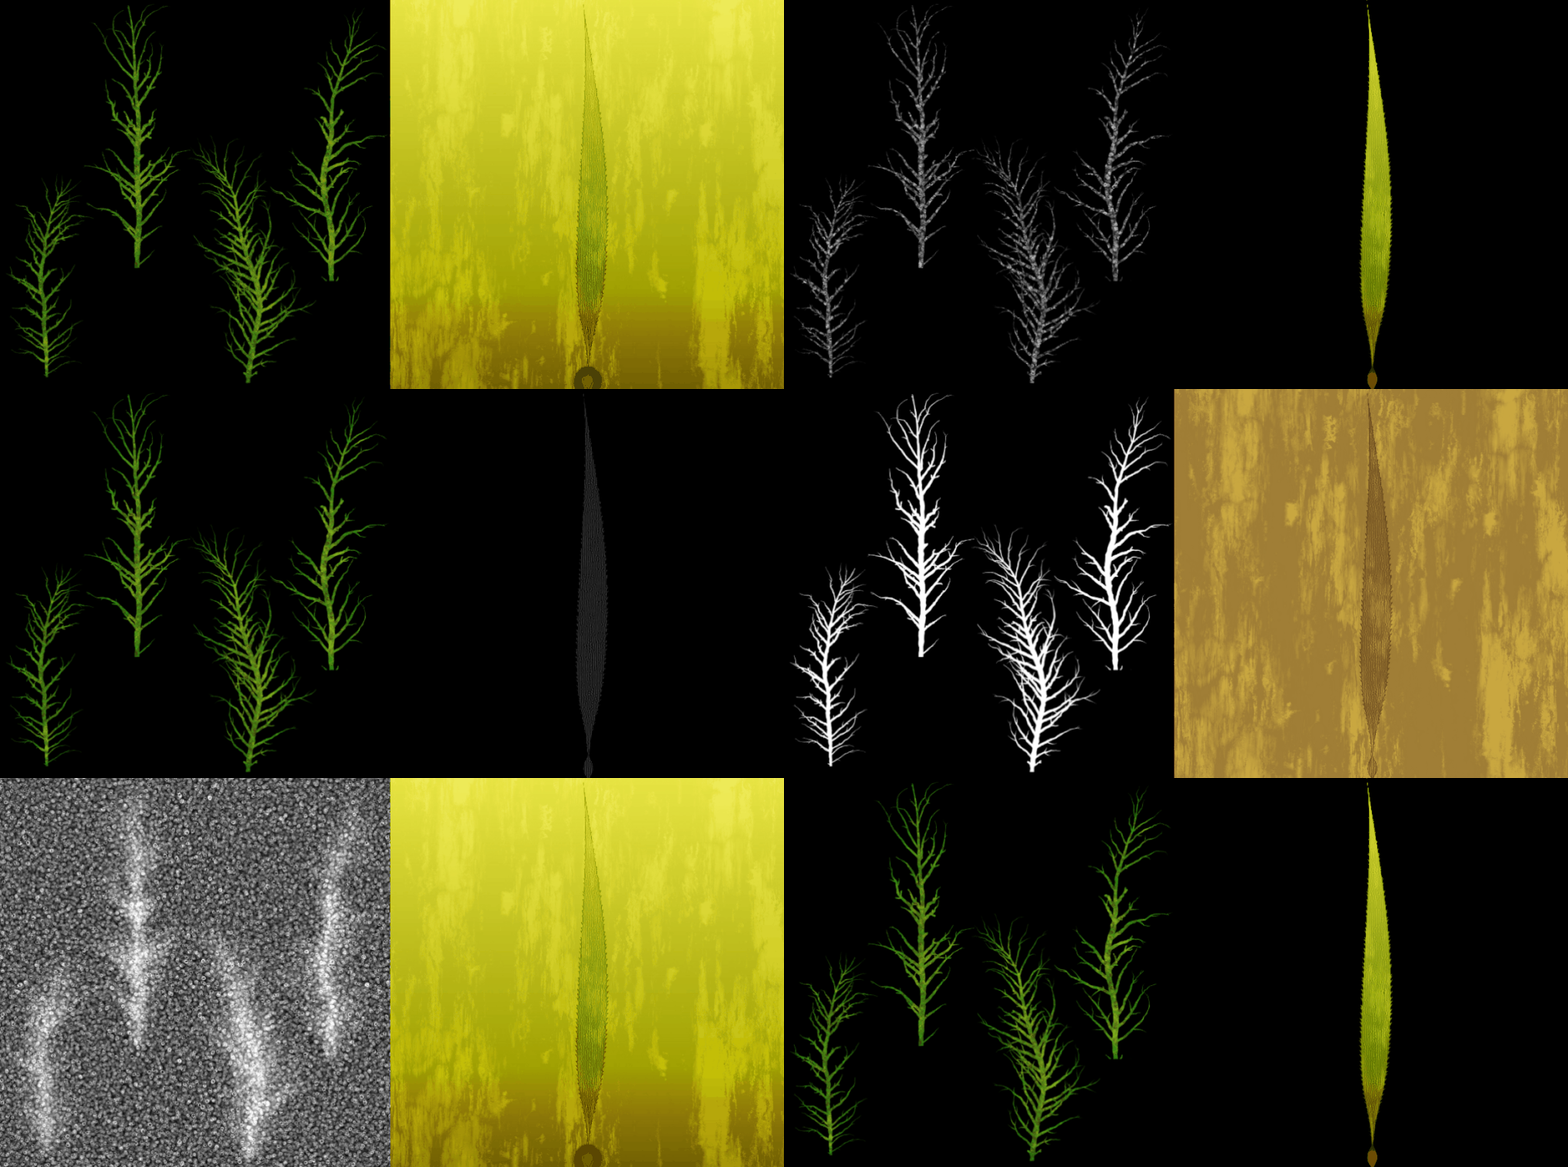
Time-lapse of how an Opacity map is turned into a Base Color map
Finally, inside SpeedTree, I align the exported textures from Substance Designer in the top view to create an atlas containing all the elements that will be needed to create my plant.

For the second plant,
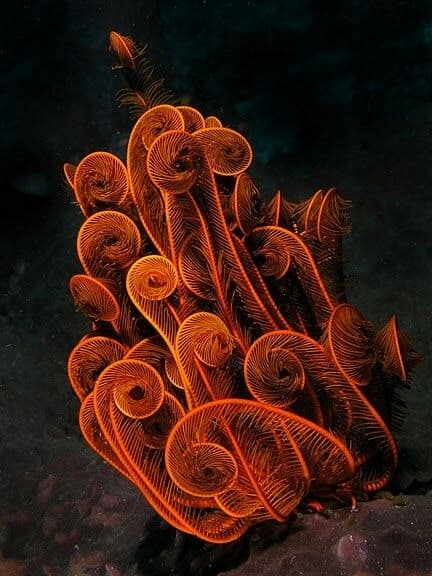
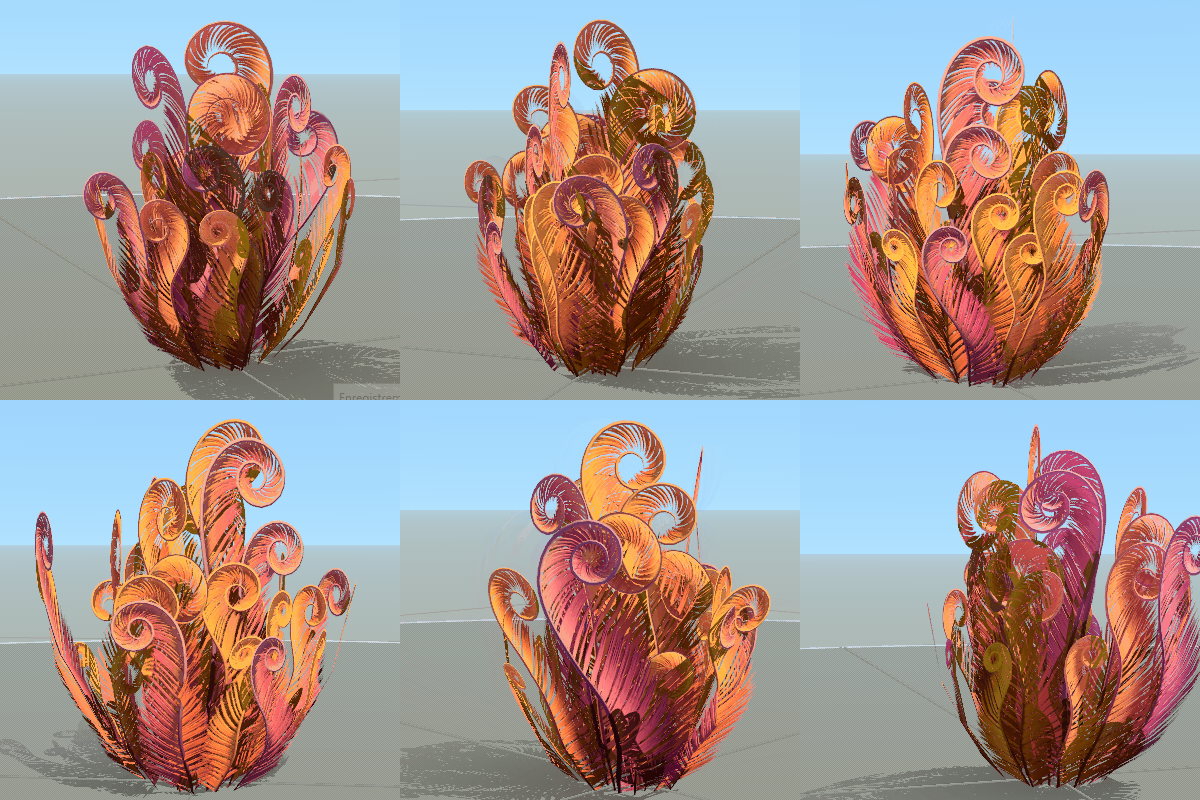
I chose one that was a bit more challenging to me because it was inspired by the Crinoïde, a species of starfish with long and detailed elements.
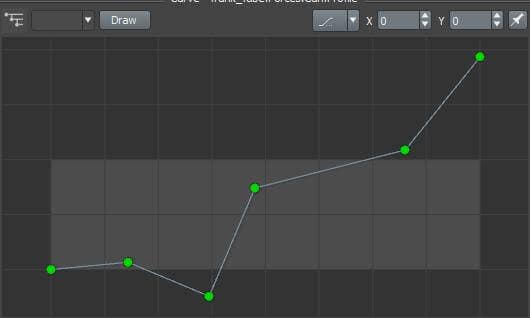
Like the first plant, I start by building its overall shape using a simple branch node, then I use a curl force and experiment with the blue profile curve to iterate on different shapes.


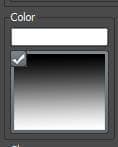
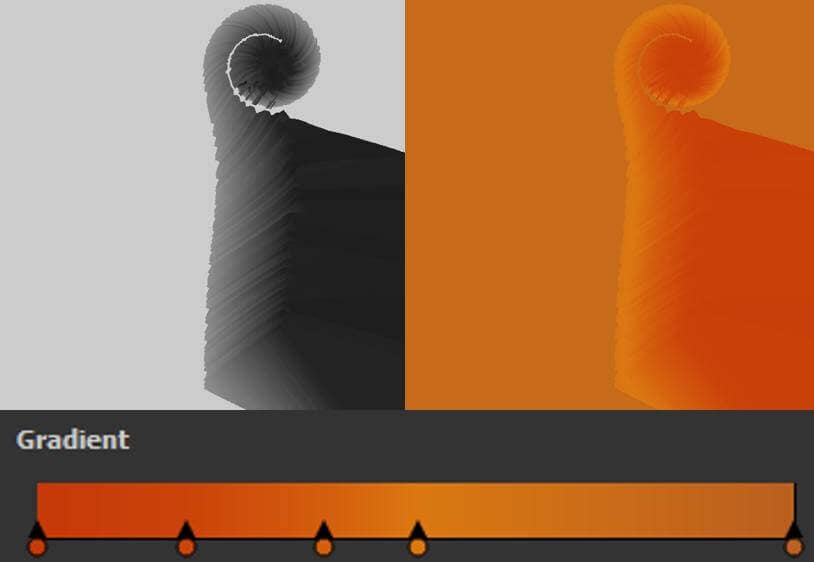
Meanwhile, I created the feathery part in another scene, giving it a White to Black Gradient as a texture that I would later use as a base for a Colored Gradient Node during the texturing process in Substance Designer.

On one side, Brightness and Contrast helped me obtain the right gradient’s progression
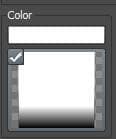


On the other side, scale and offset allowed me to tile the texture along the specific parts

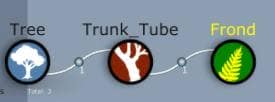
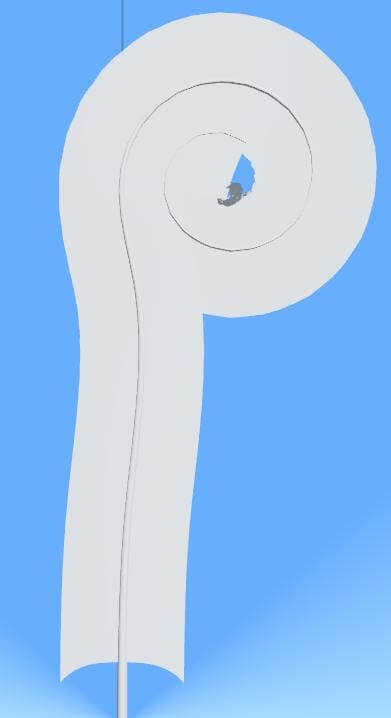
Finally, in the main plant scene, I added a Frond node that follows the main curve.
I created a variety of shapes and exported them as textures.
Below we can see that the black and white gradient is now following the plant’s curvature.
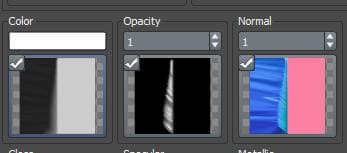
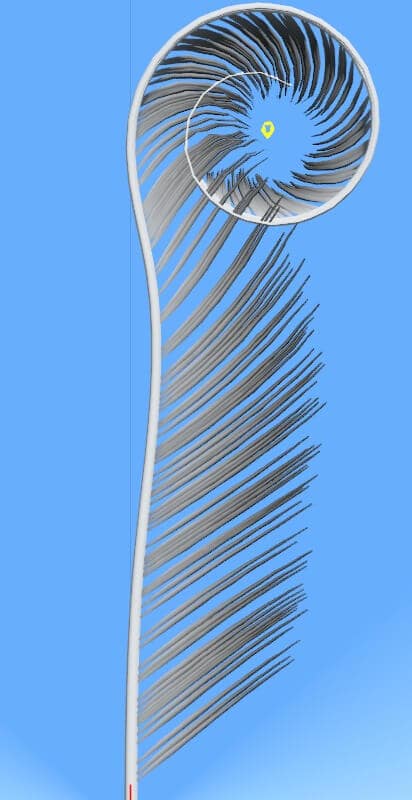

Inside of Substance Designer I used this black and white curve to create a colored gradient.
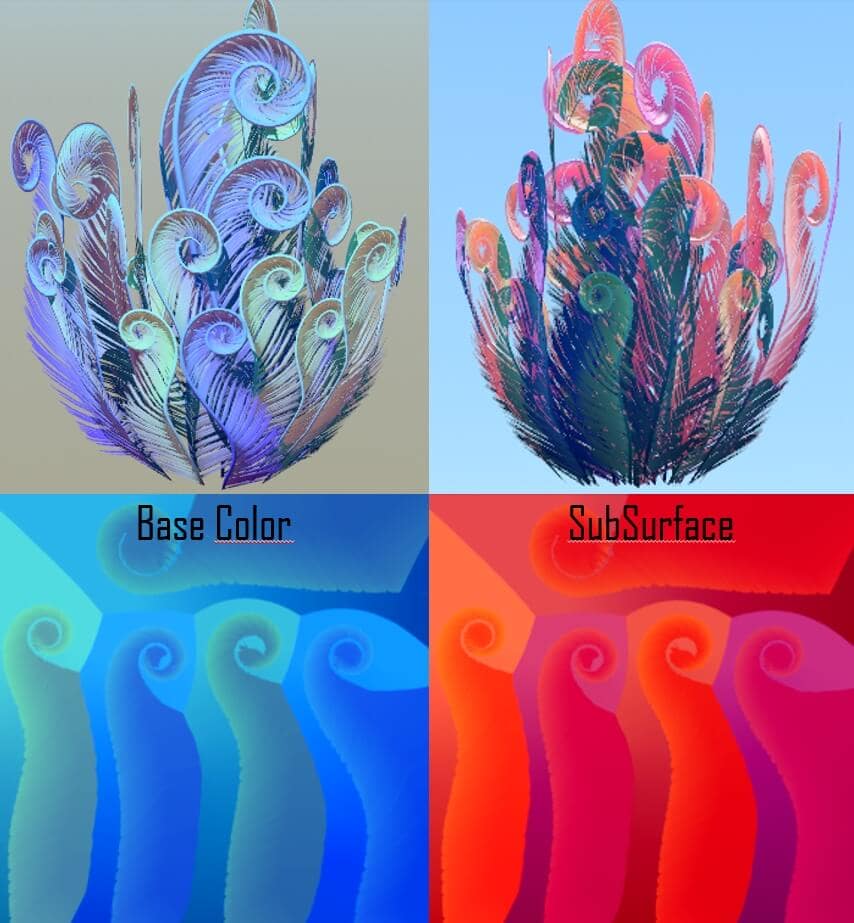
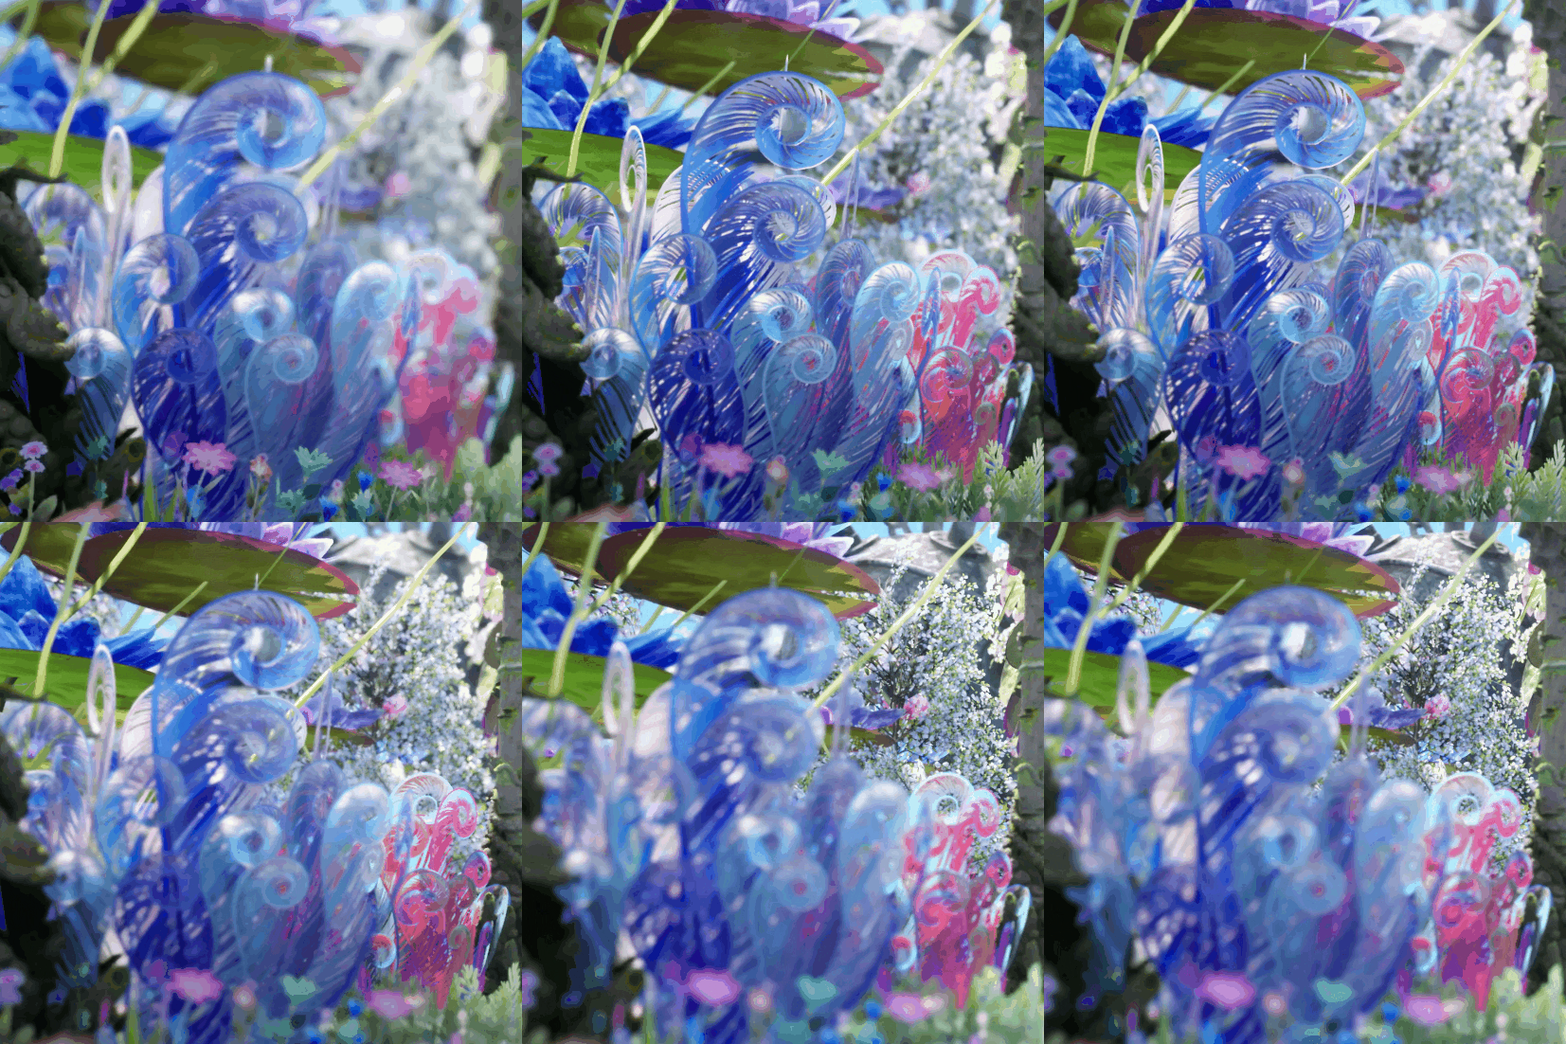
To add an otherworldly effect, I made sure to use opposite colors for the Base Color and Subsurface texture. I used those inside Unreal Engine to create a changing-color effect depending on the sun’s direction.
Now for the trees
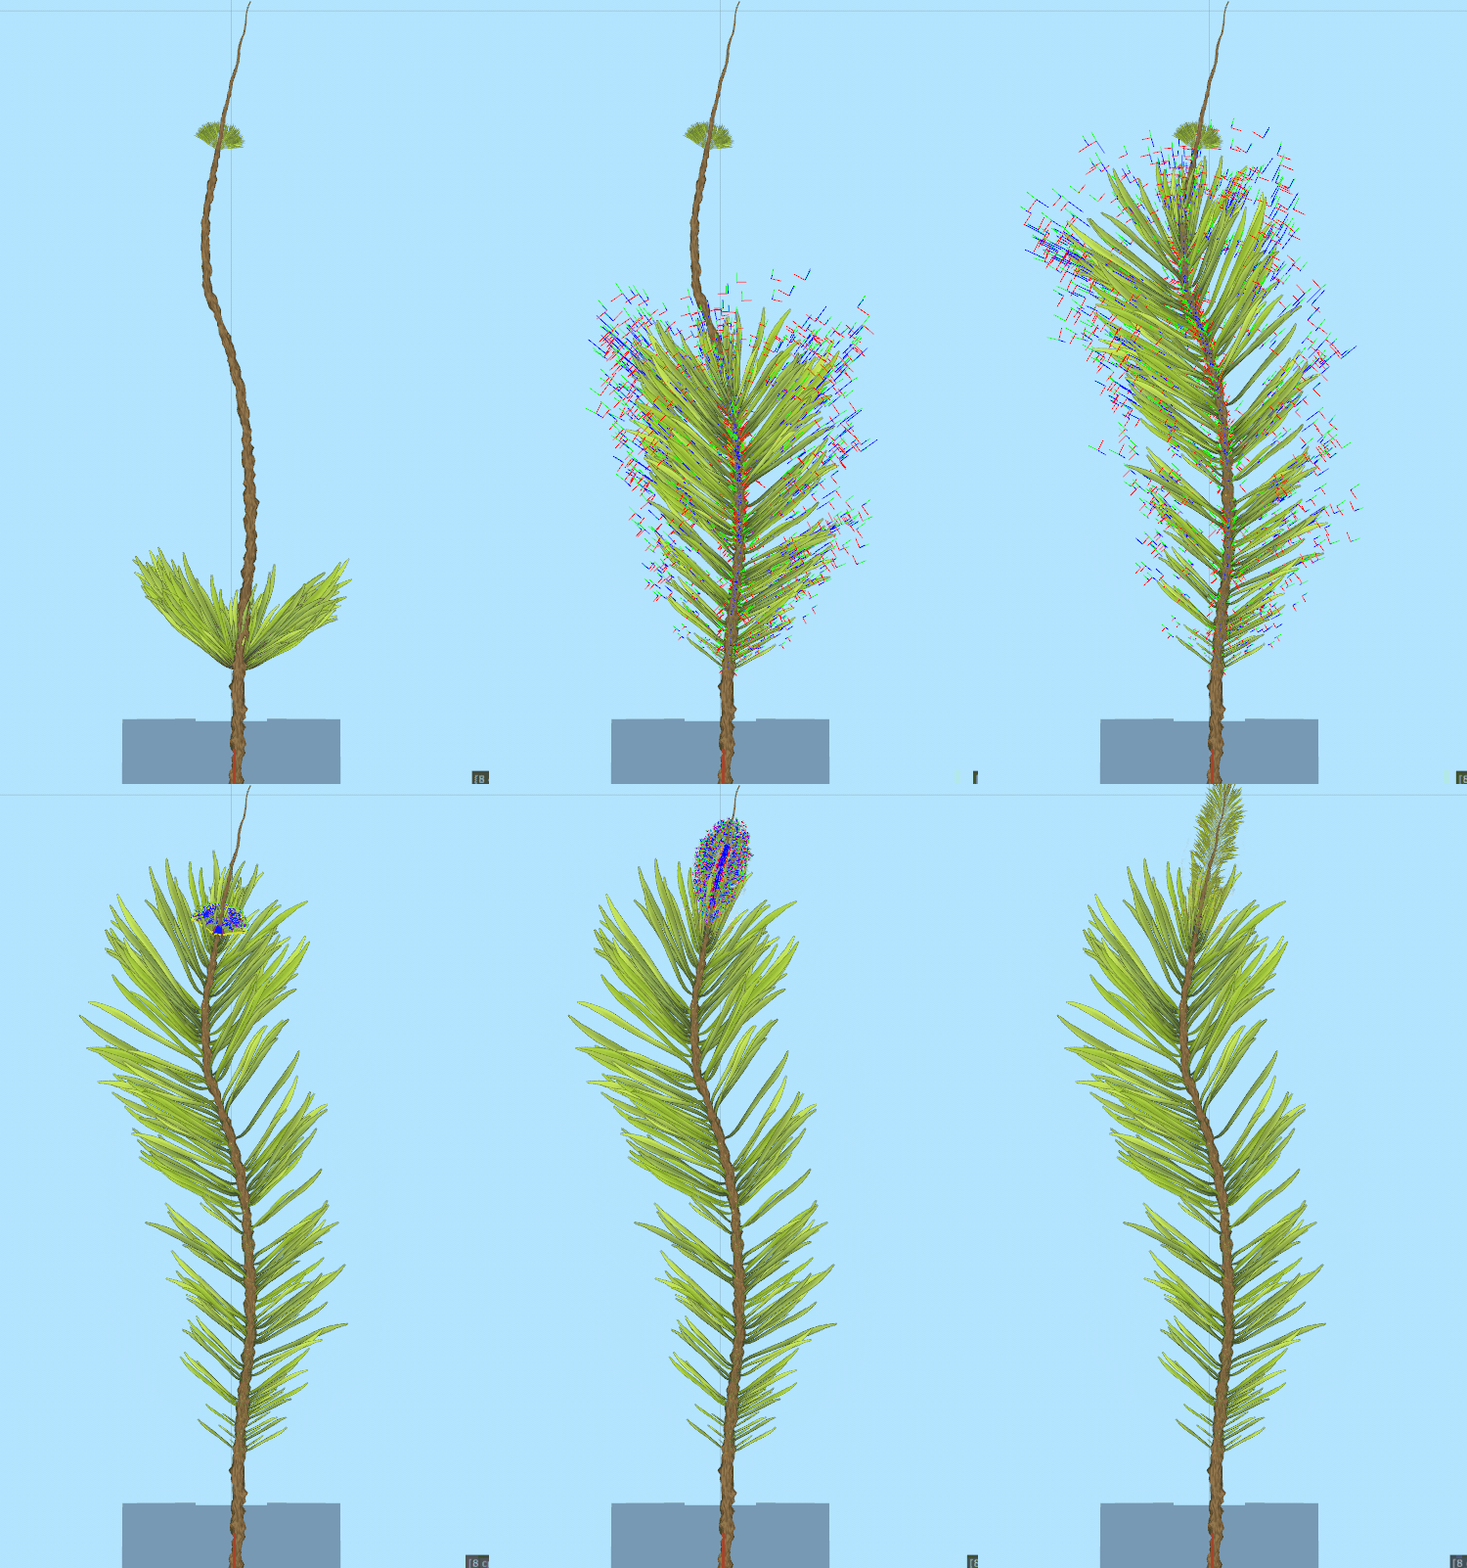
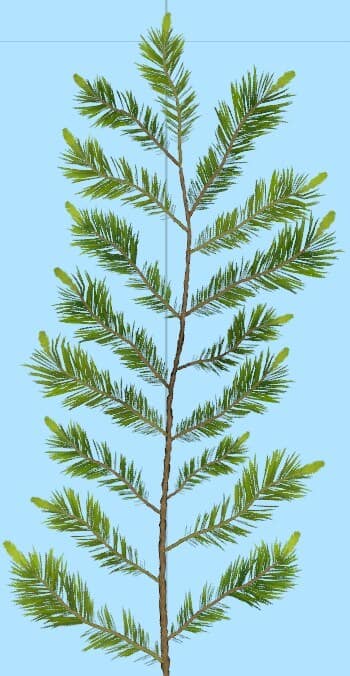
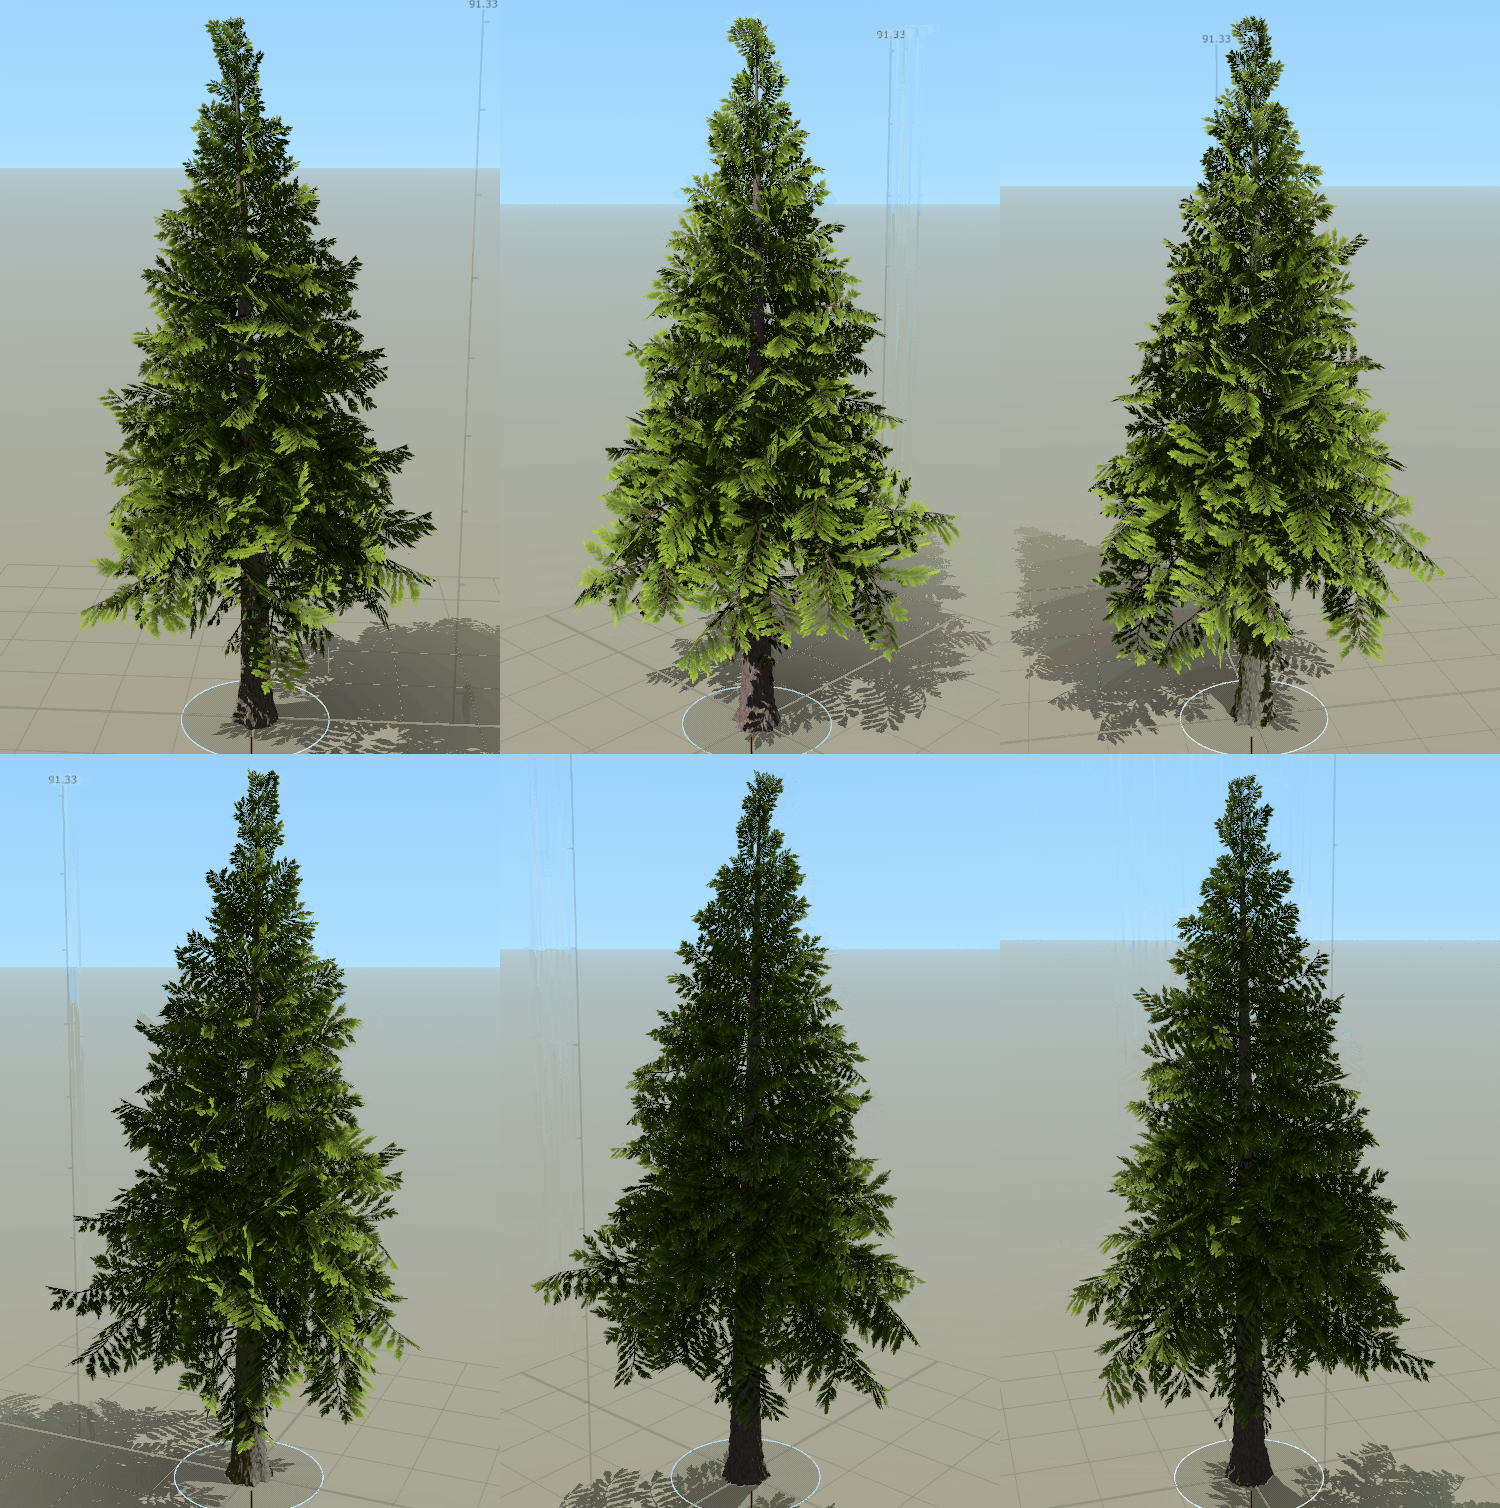
Some trees can be easily made from scratch. For this coniferous tree, I only had to draw one pine to create a little branch, then a bigger one, to finally obtain a whole tree.

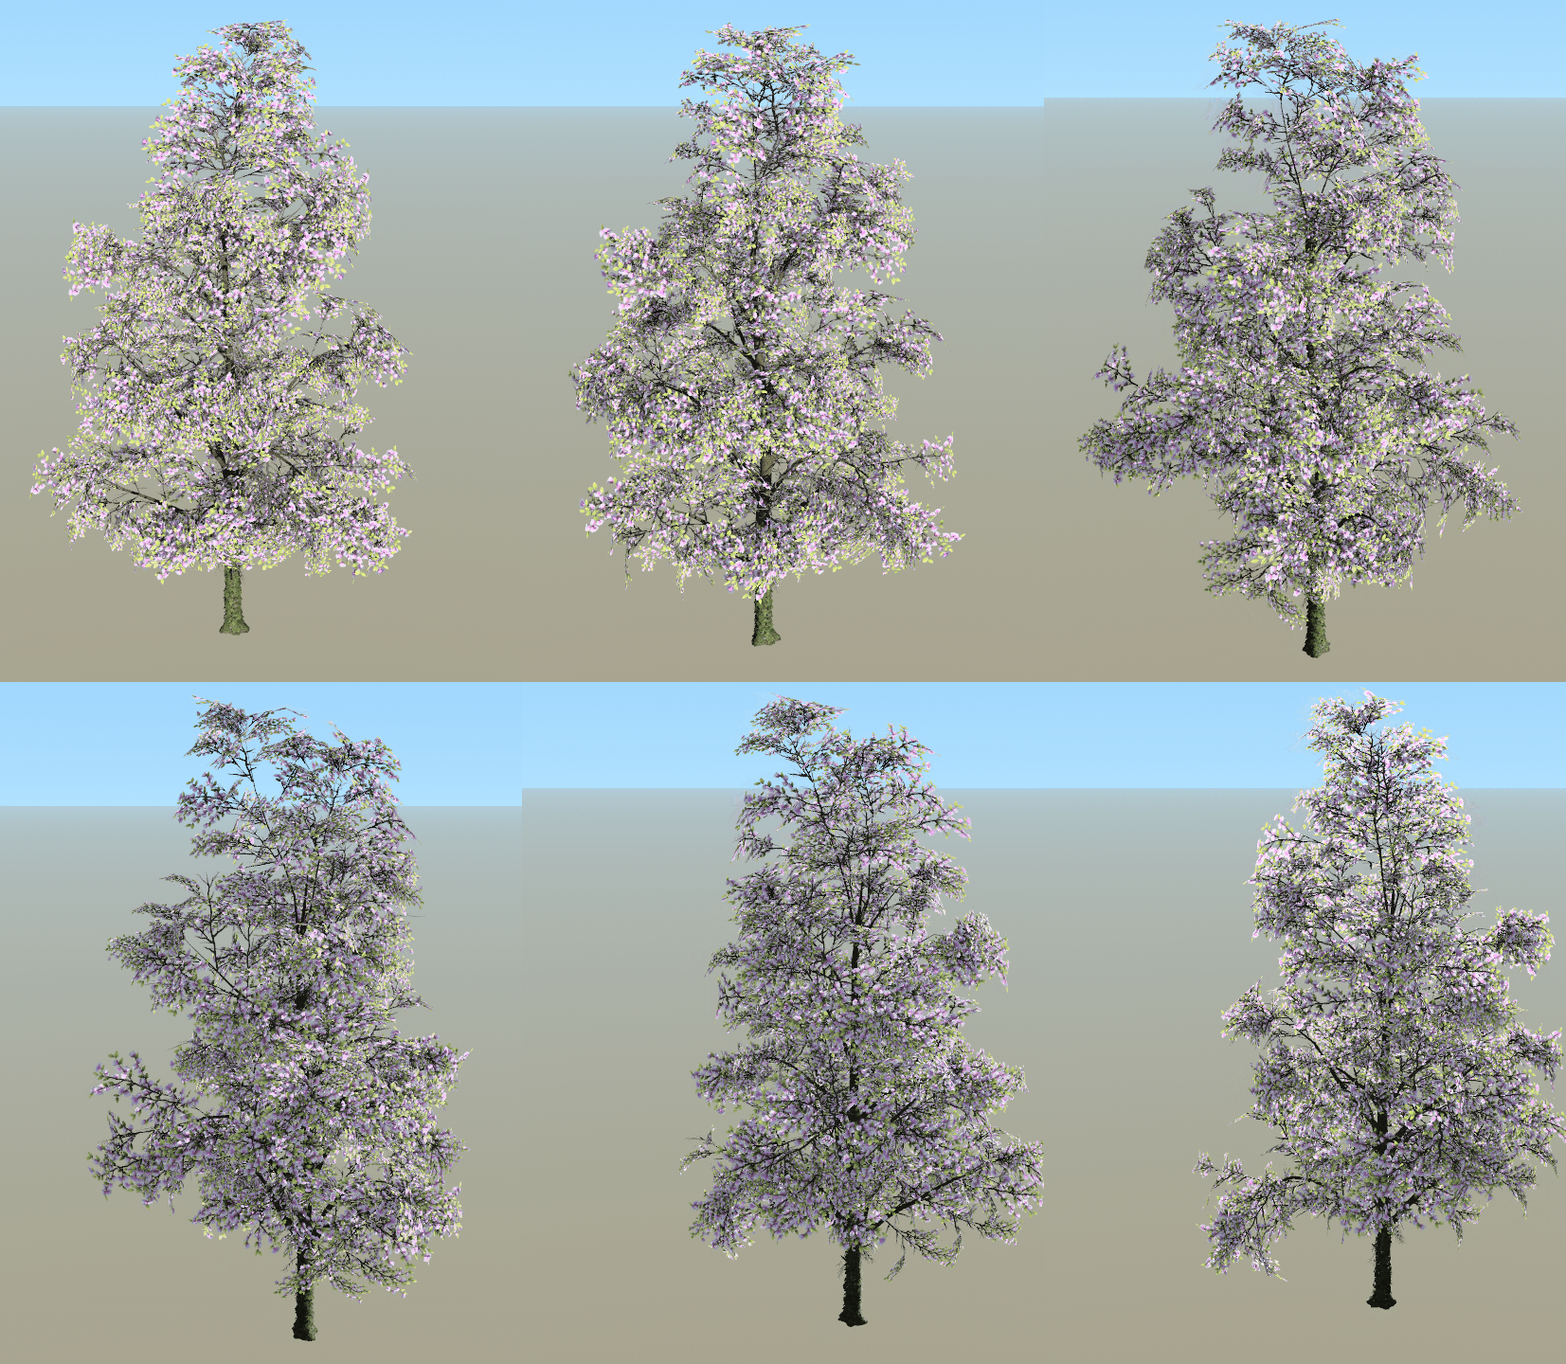
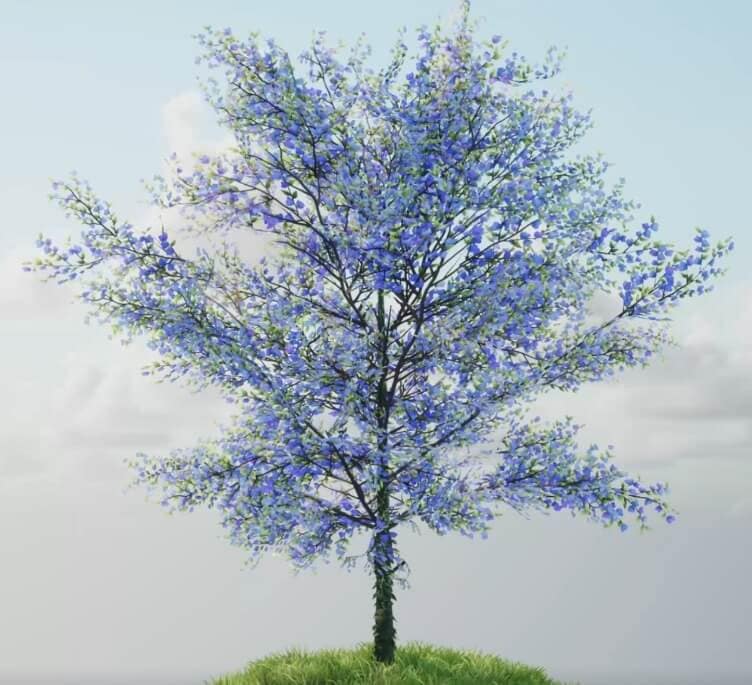
Others can be more challenging, like this flower tree
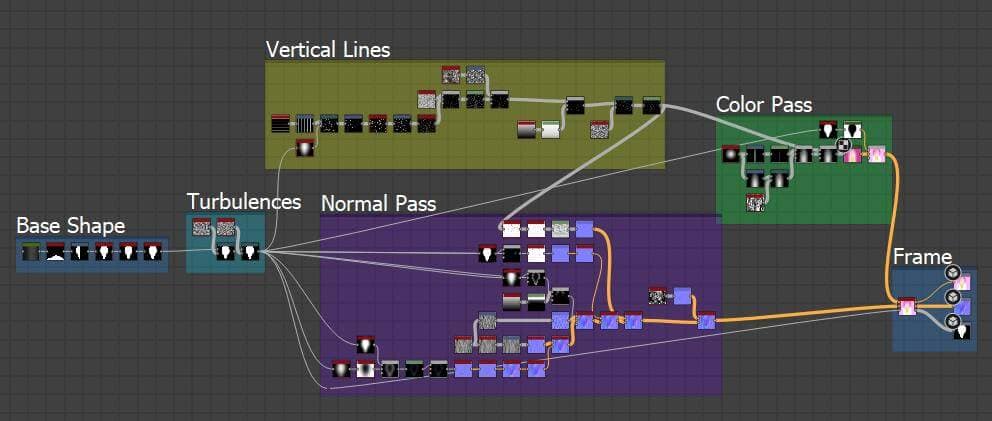
I started by creating different substance graphs to produce a variety of petal and leaf shapes. Each colored box you see are groups of nodes with specific functions that I was able to duplicate on different graphs depending on my productivity needs.
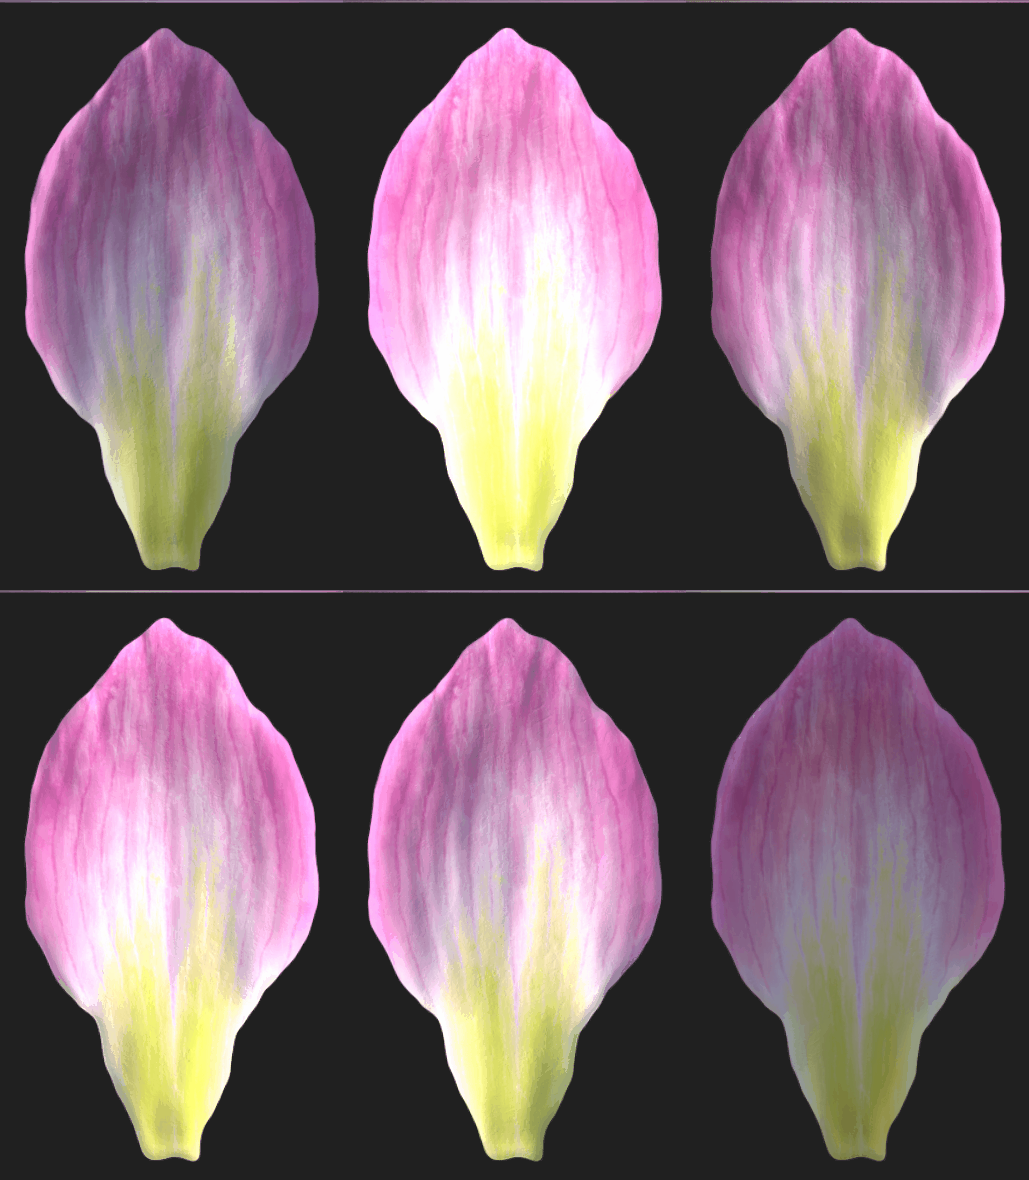

Timelapse of a petal’s normal and BaseColor authoring
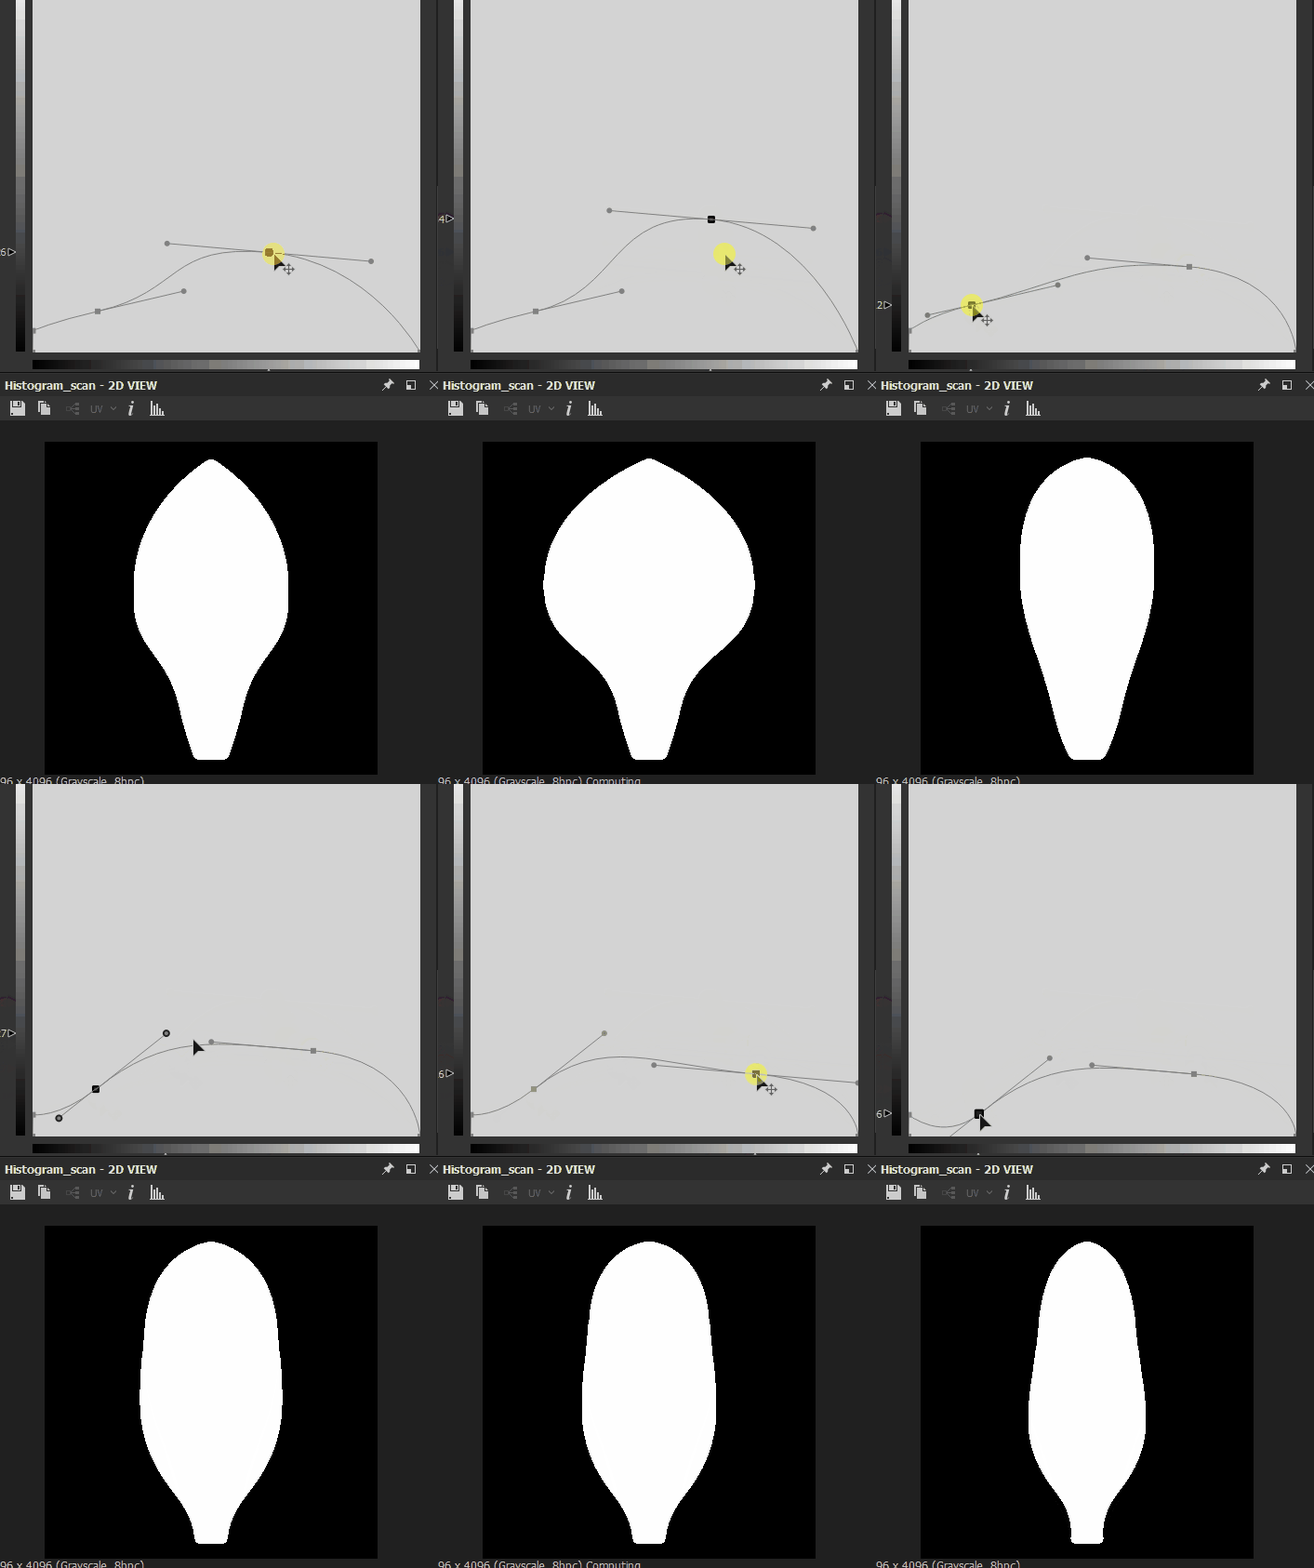
The 2020.2 update added a new node, “Cross-section,” that allowed me to create petal shapes with curves much faster than my previous foliage workflow.
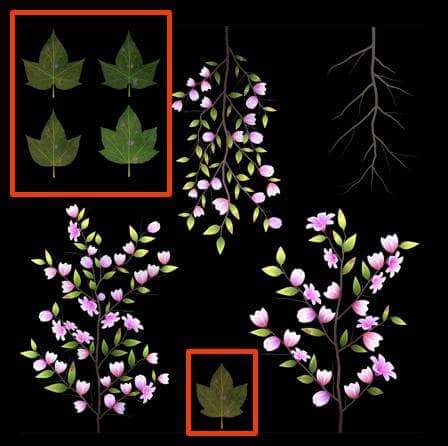
Once the petals and leaves were created, I regrouped them inside an atlas.
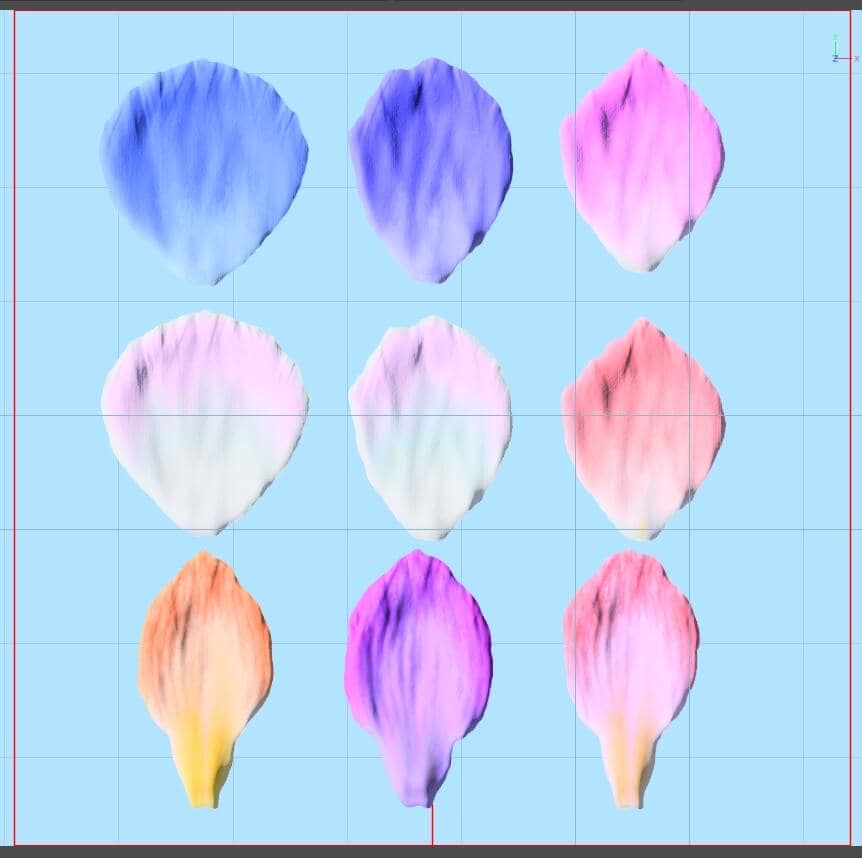
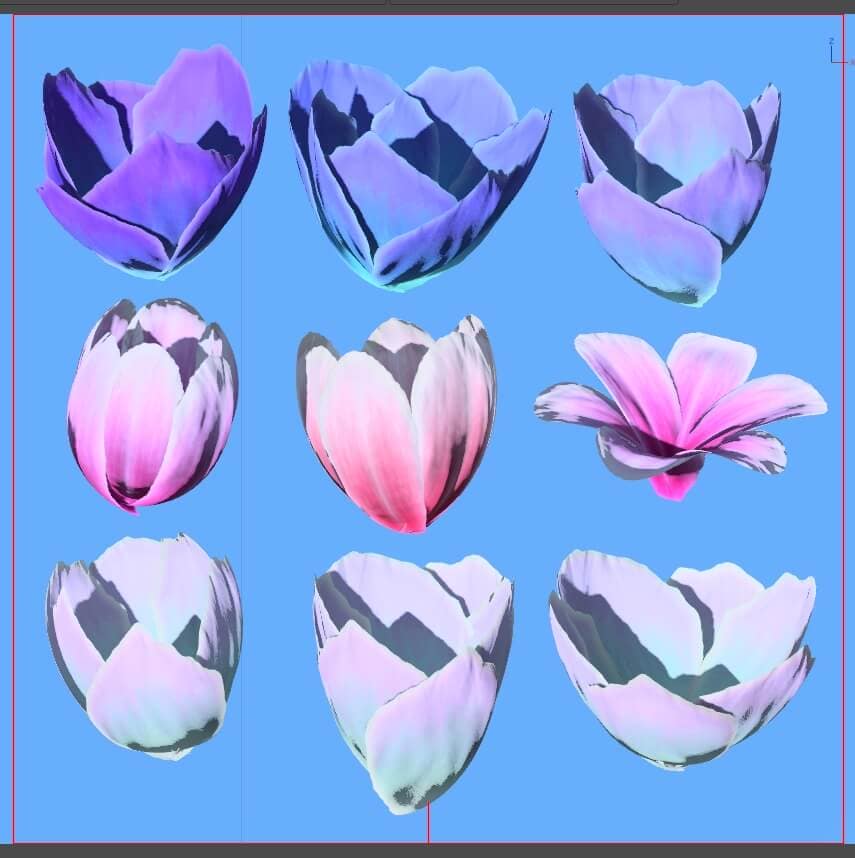
In a new scene, I gathered the petals to form flowers by creating leaf meshes at the top of spine-only twigs.
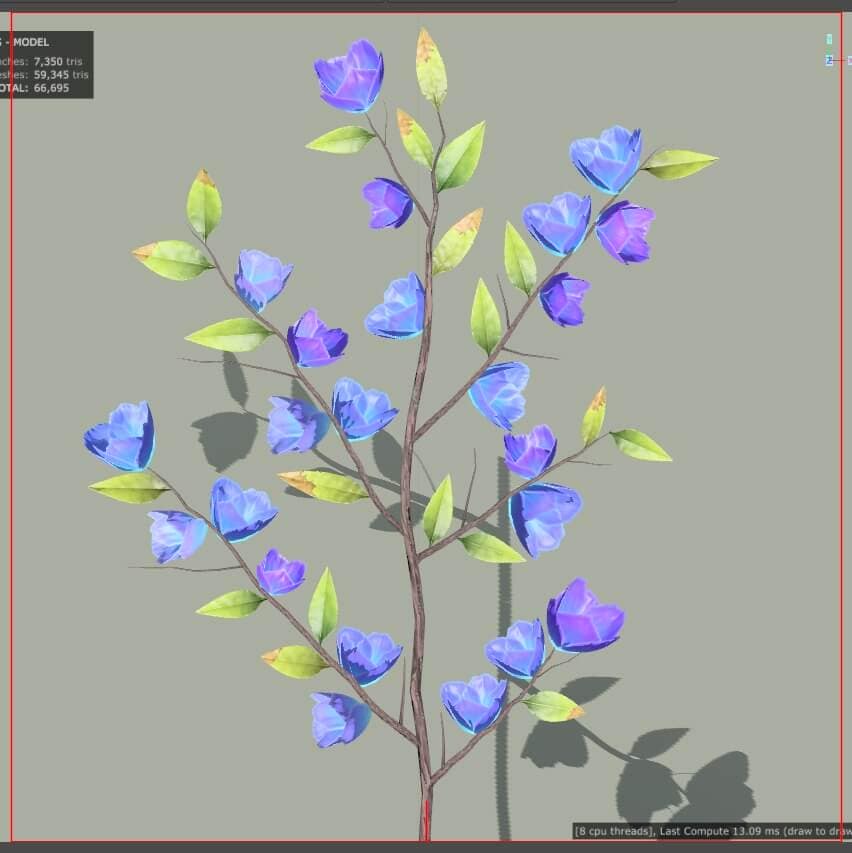
I finally export the top view as a texture and use it to scatter flowers on different branch clusters that I use in my final tree.
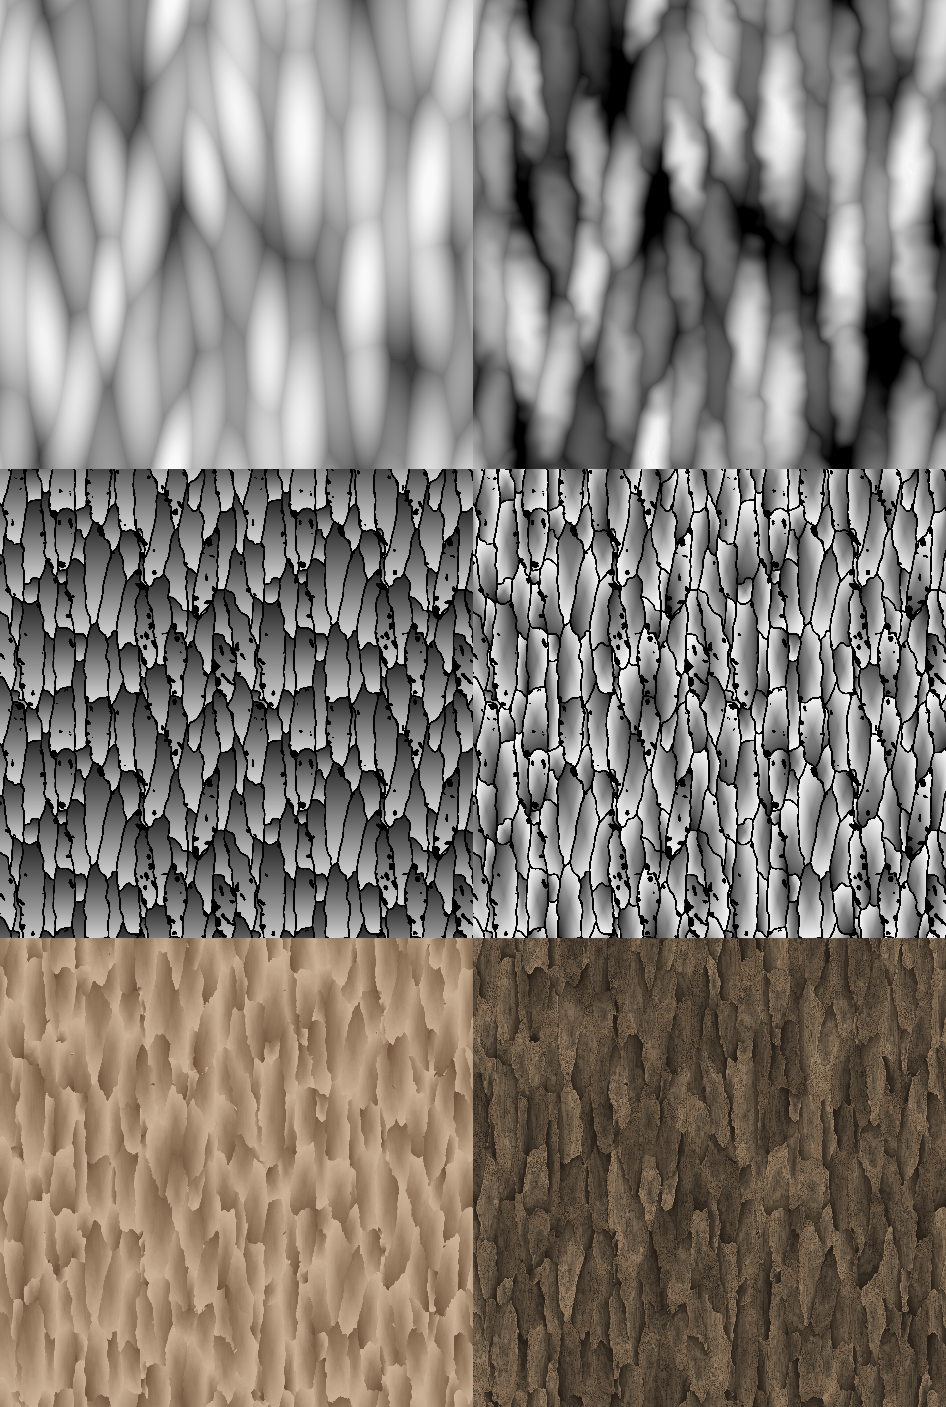
To create the texture used both for the twig and trunk, I created several bark generators in Substance Designer.
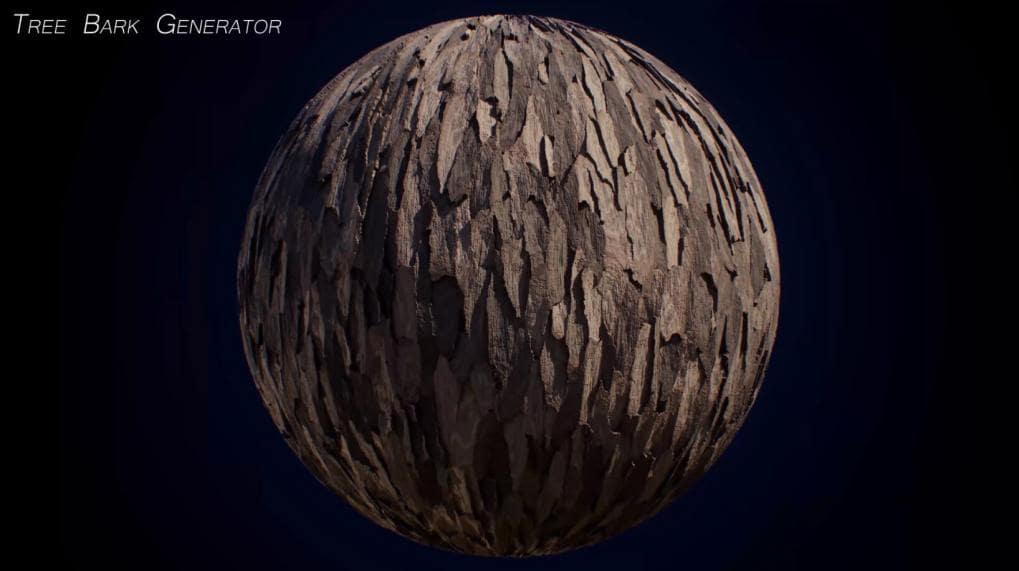
A mistake I made was to create them in a square map. Even though the texture tiled perfectly, once displayed along branches and long trunks, it created visibly repetitive patterns. Next time I will create rectangular tiling maps while keeping them in a power-of-two ratio to use MipMaps inside of UE4.
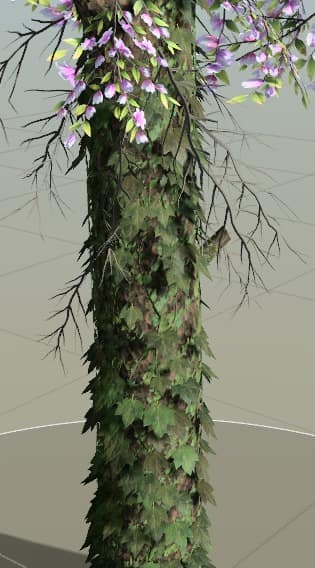
Since I wanted to add more depth and details to these naked trunks while not pushing their polycount with Subdivision and Displacement (which can drive numbers high very quickly), I decided to add some vines onto it.
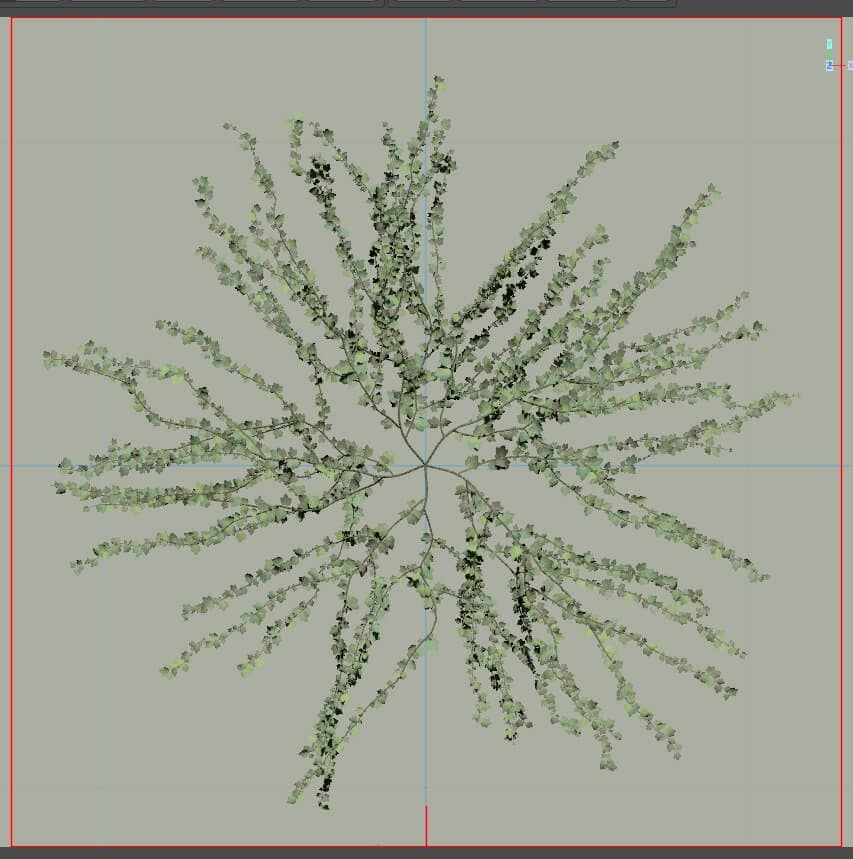
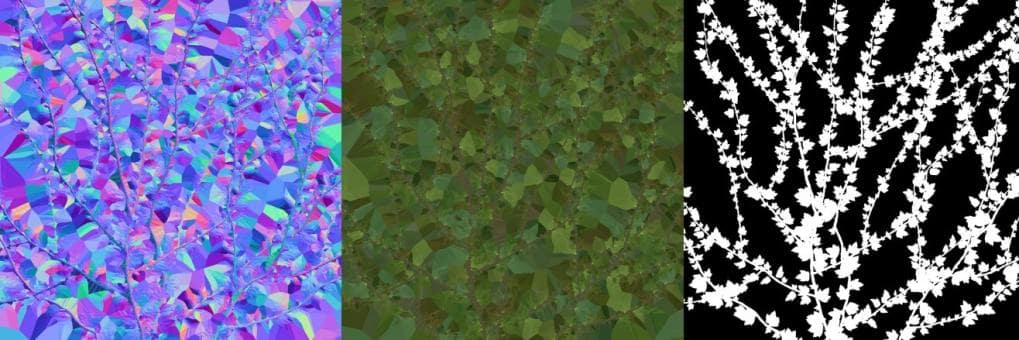
I first scattered some vines with homemade leaf textures attached to them in a new scene. I exported a square part of them from the top view as a texture.
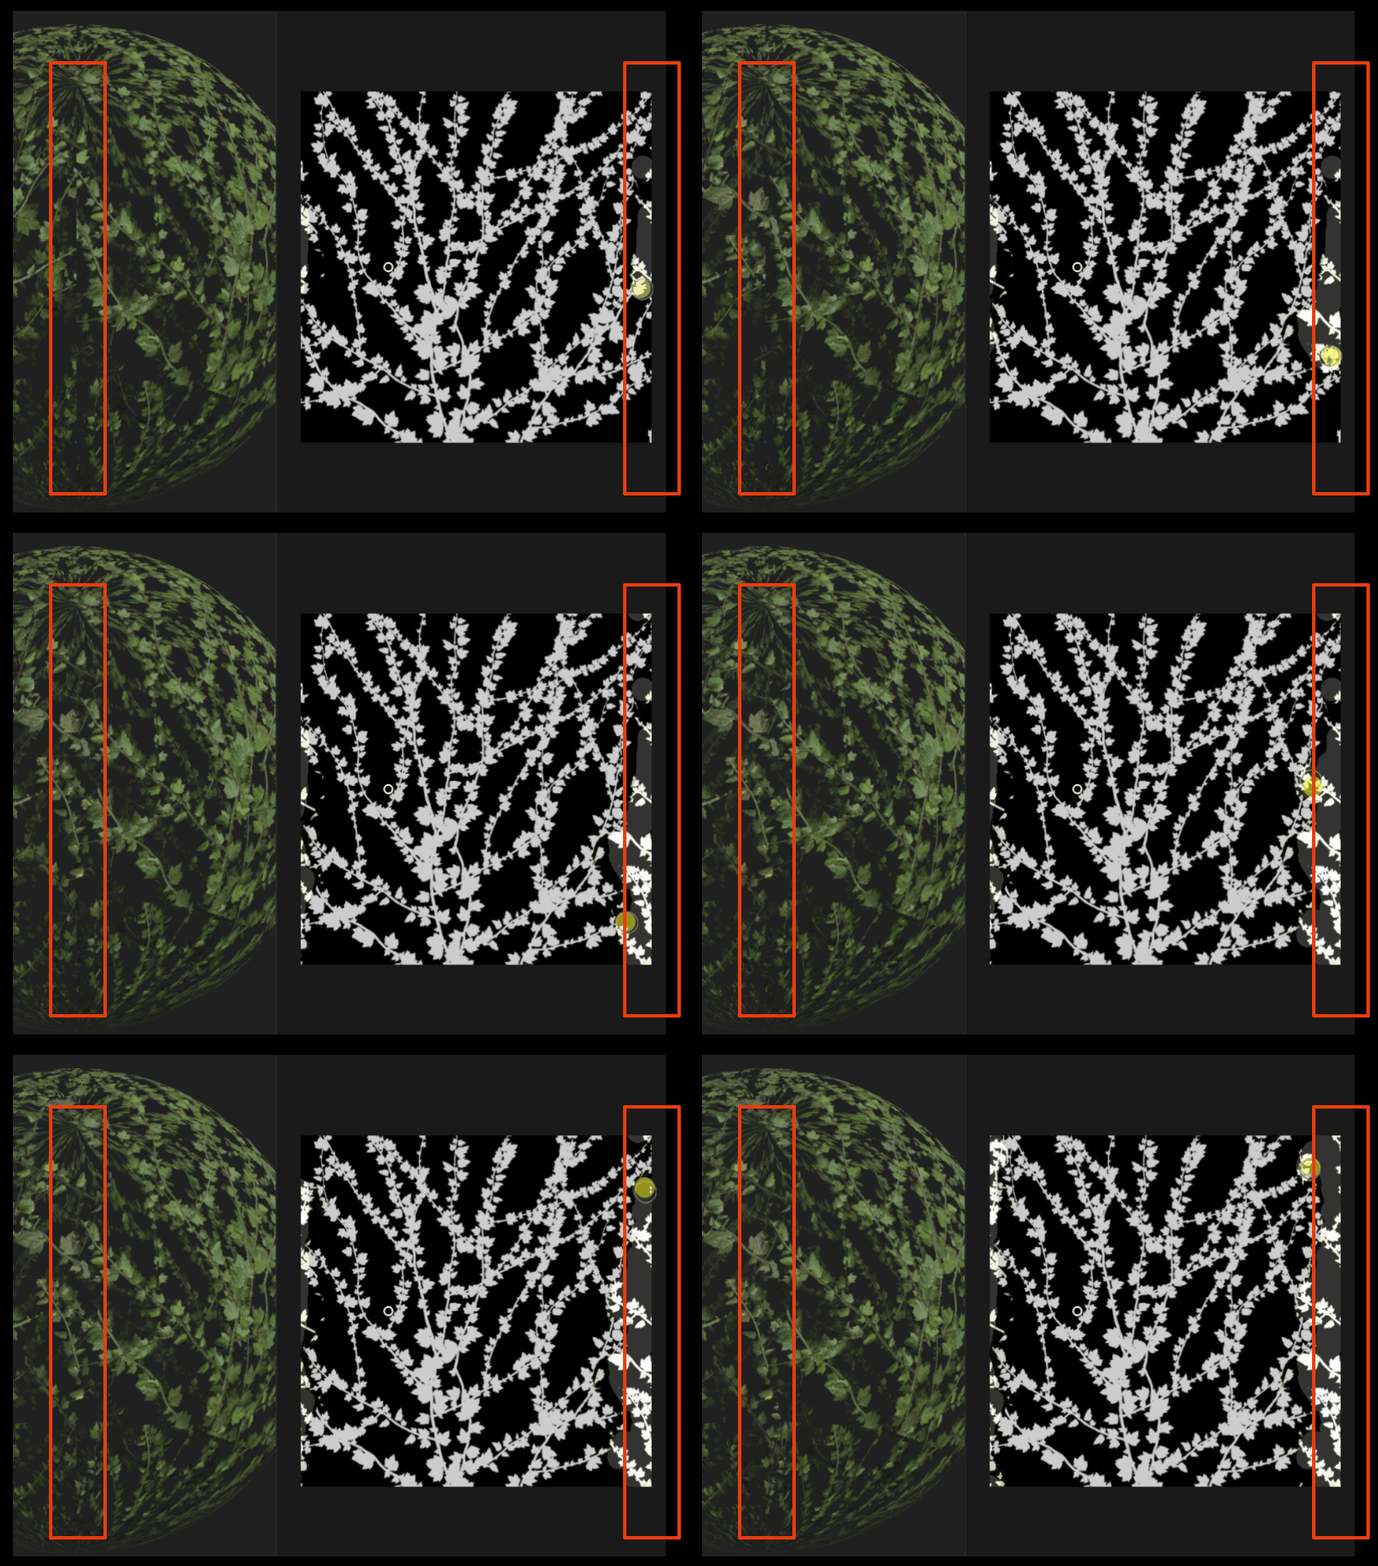
In Substance Alchemist, with the Clone Patch Layer, I made the vine textures seamless. I used them in SpeedTree as a low poly Shell on top of the low poly trunk.
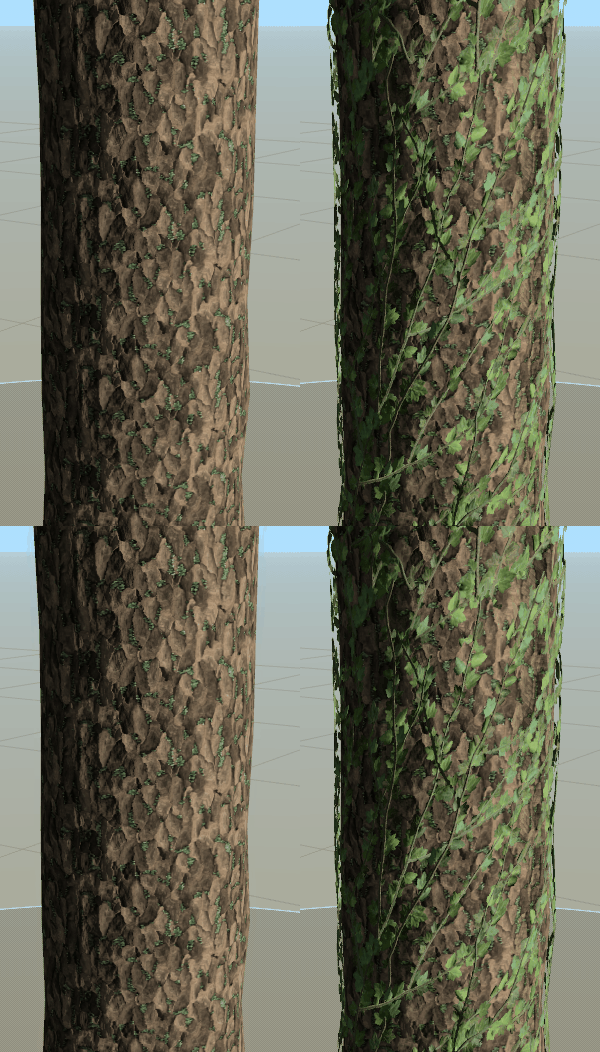
With some space left on my branch atlas, I added vine leaves that I spread at the bottom of the trunk. Altogether these elements created three layers of trunk detail with vanishing decorative elements in lower LODs to maintain real-time performance.
Finally, I wanted to talk a little bit about the Foliage People
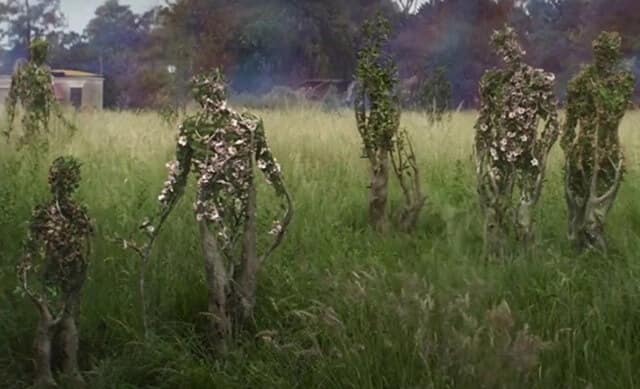

The foliage people were inspired by the movie Annihilation. I used them to create different scenes, add environmental narration, and build a mysterious atmosphere where the viewer could come up with their own theories about how this civilization had ended.
To create them, I posed the Unreal Character inside UE4, then exported it as an fbx. to use it as a Mesh Asset, created a Collection from it and used it as a Mesh Force to make vines grow around it. I then added flowers and leaves.
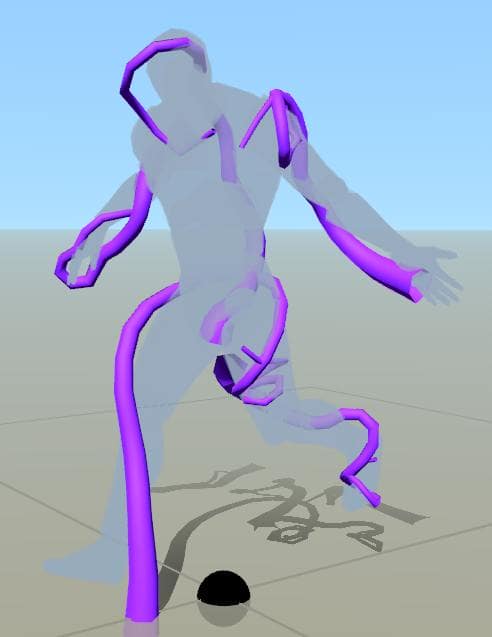
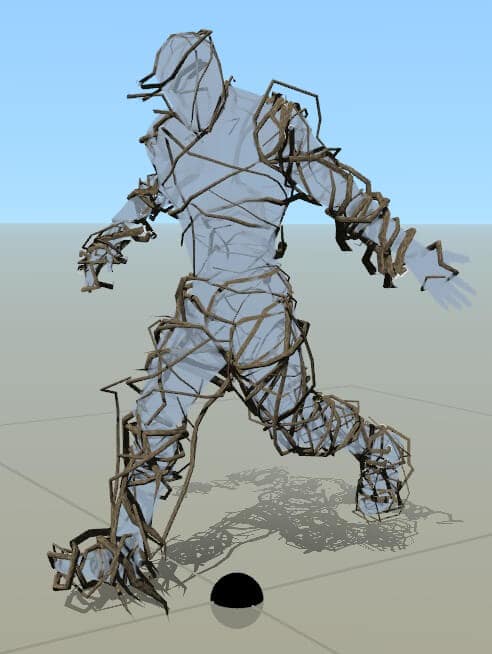
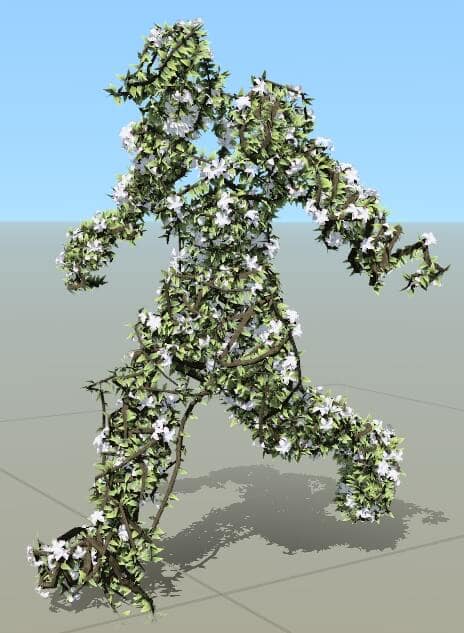
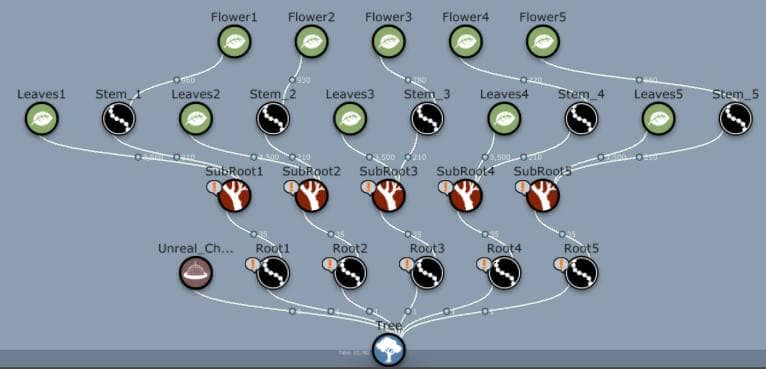
I used 5 spine-only generators with manually adjusted position and rotation to make sure that the whole body was covered by vines from those starting points.
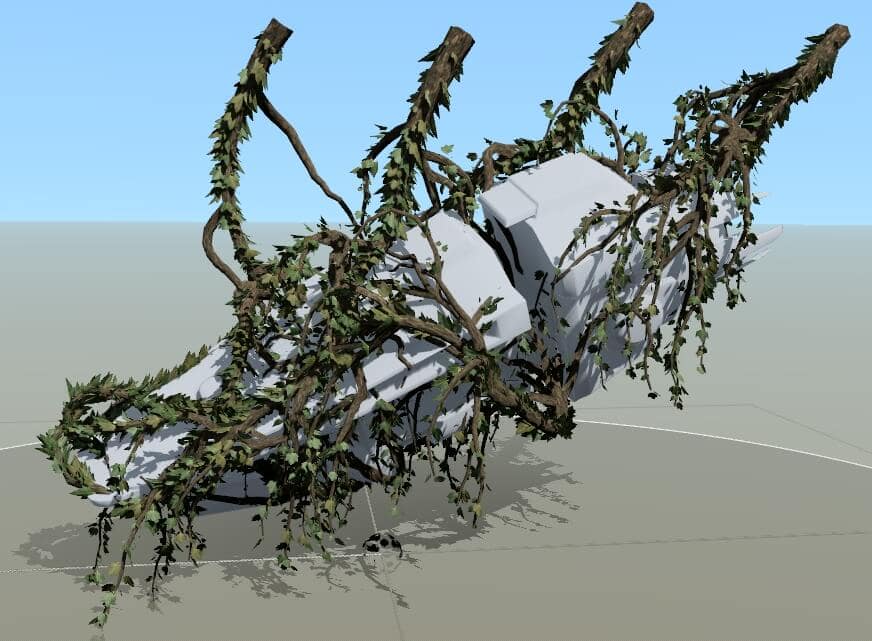
I used the same technique for the spaceship
Some flowers required special shapes imported from other software. To create this one, I imported the texture map of the flower on a plane inside of 3ds Max from which I cut, bent, and twisted different parts to create the final model that I imported into SpeedTree.
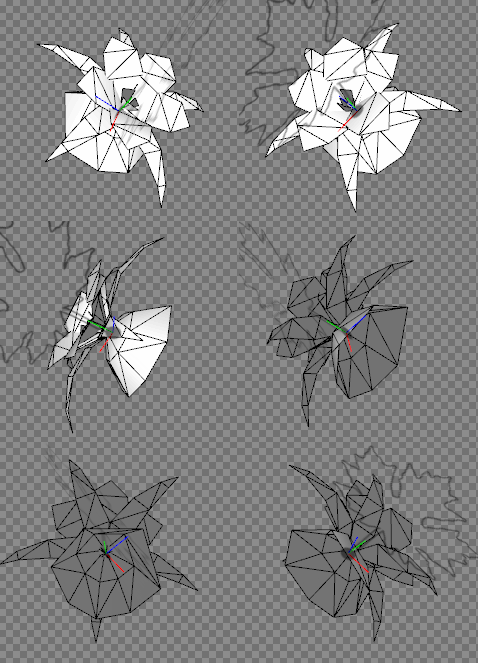
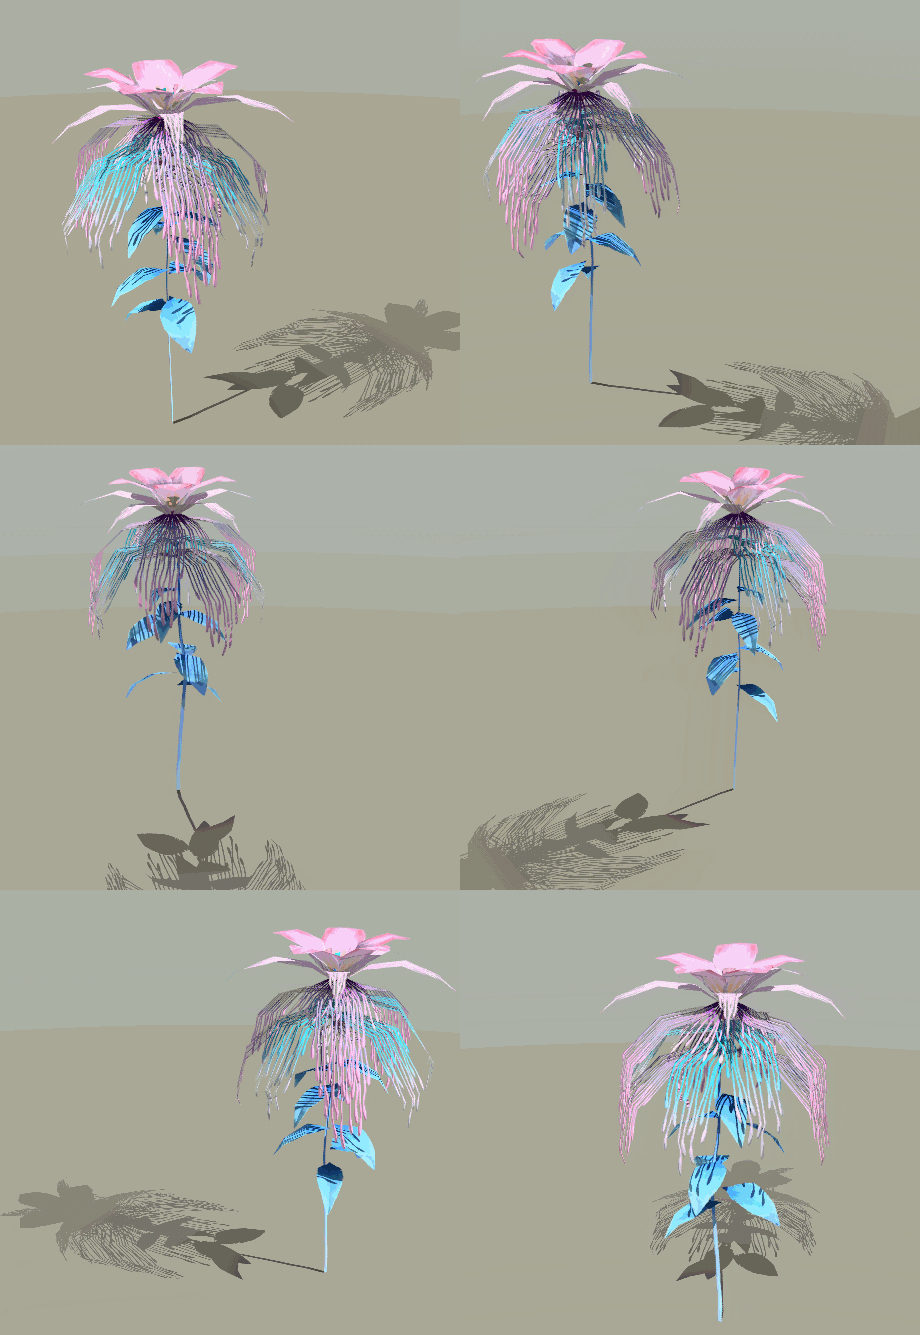
I’ll finish this breakdown by talking about the moss I created to implement details on the LOD0 of some rocks in my cinematic.
First I created a procedural moss generator in SpeedTree:
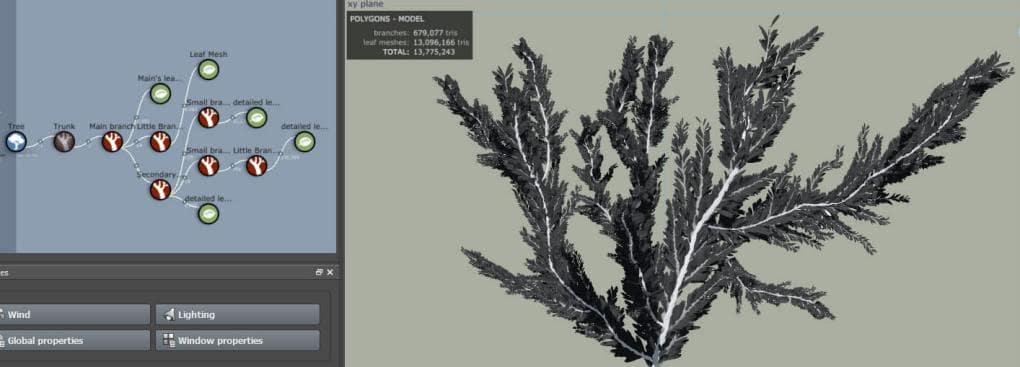
I made sure that each element had a different grayscale value so I could get more precise texturing passes by separating them as different masks using the Histogram Scan Node inside of Substance Designer.

I added them with other elements onto an atlas.
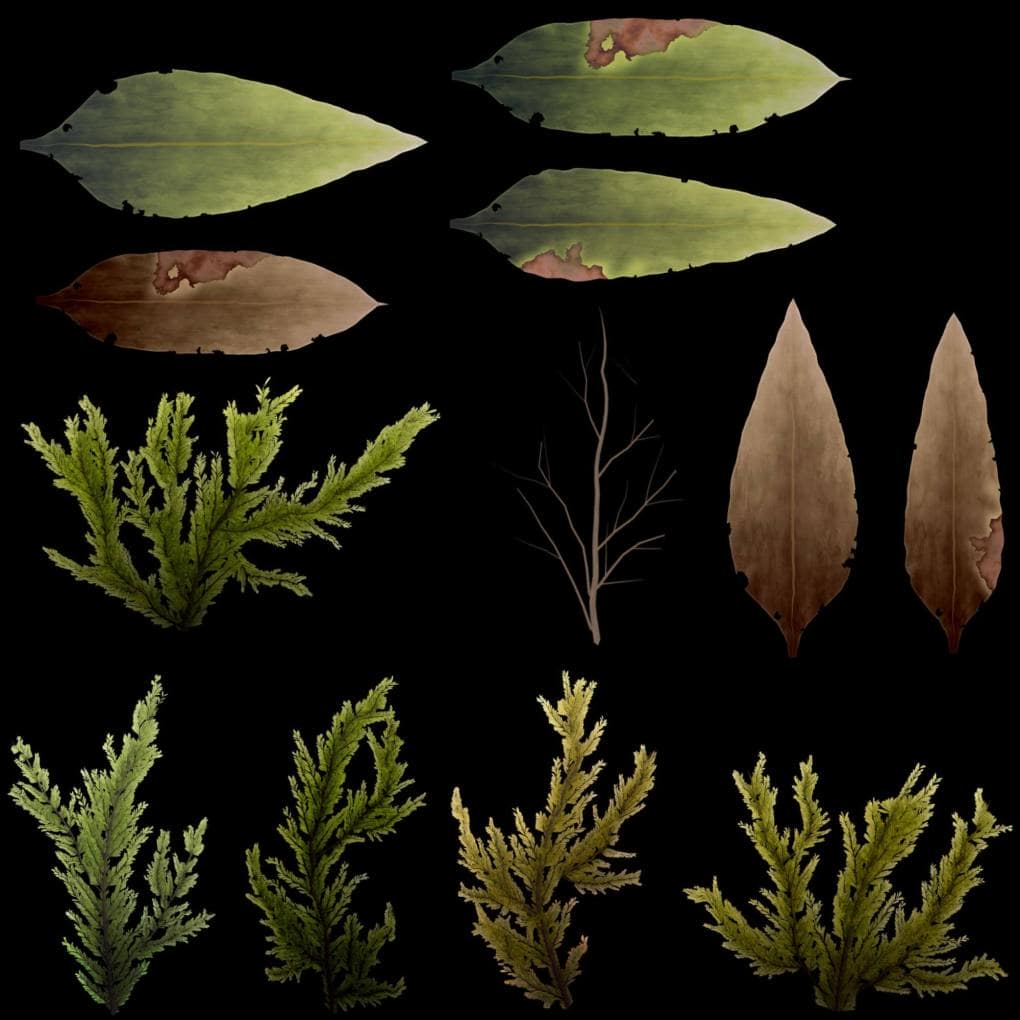
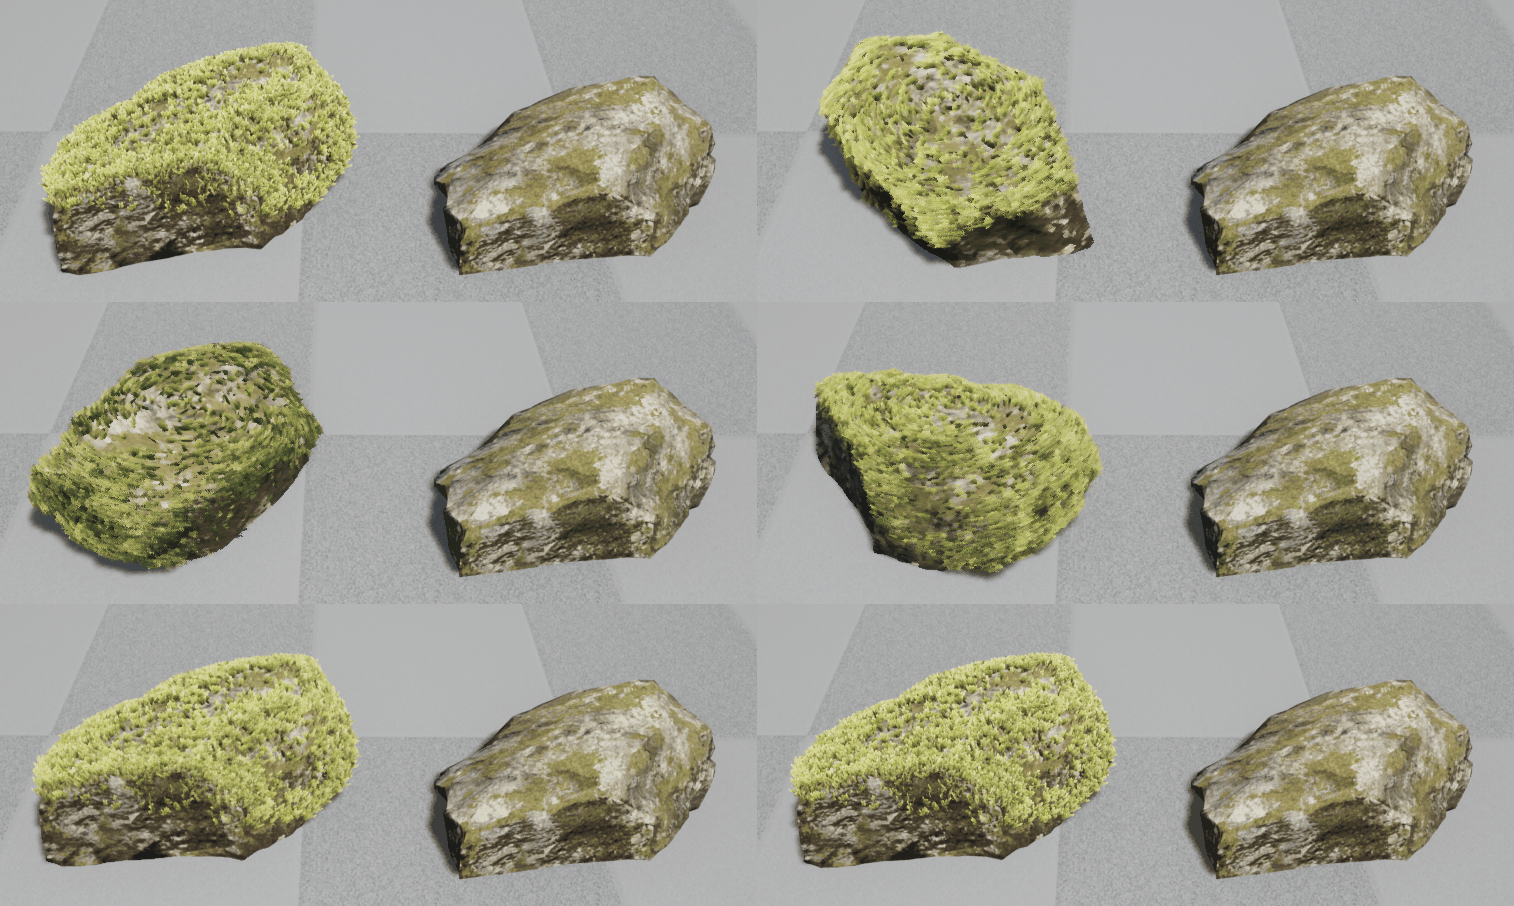
Then I scattered all of them onto the skyward surfaces of my rocks. Scattering in SpeedTree turned out to be a lot more efficient than the 3DsMax object-paint feature that I first tested.
What were some of your biggest challenges on this project? How did you overcome them?
Because the scene is huge, I needed a lot of trees and foliage to make it believable,–but the lack of optimization in the middle of the project made my scene laggy. I had to find solutions and ended up with each scene running at 60+ fps.
First: I was unable to bake my scene’s light due to its size. I tried using ray-tracing, but, due to the far rendering distance, it created inconsistent lighting across wide scenes.
To obtain dynamic ambient occlusion and lighting, I modified all of my textures in Photoshop and added a bright yellow gradient in Color Dodge mode on top of them and dark-blue AO gradient in Linear Burn mode at the bottom. This allowed me to render trees with much more readability and depth.
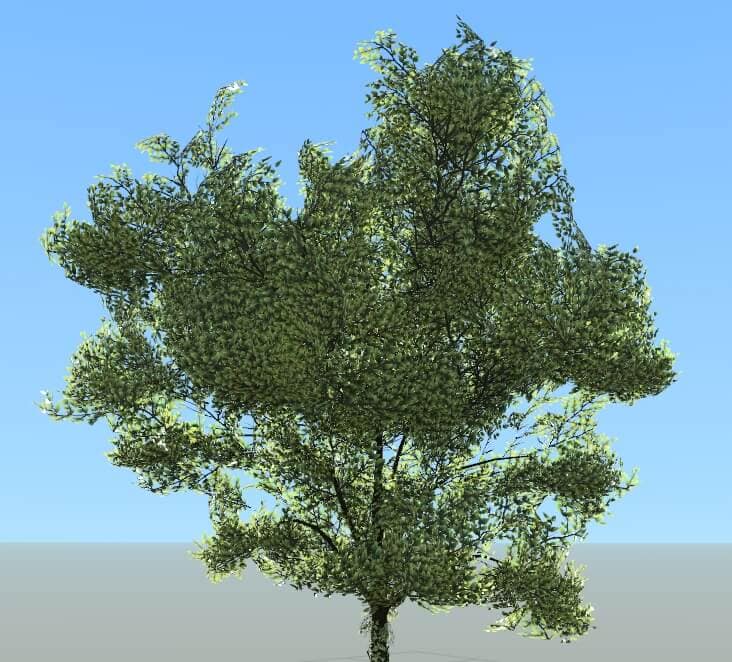
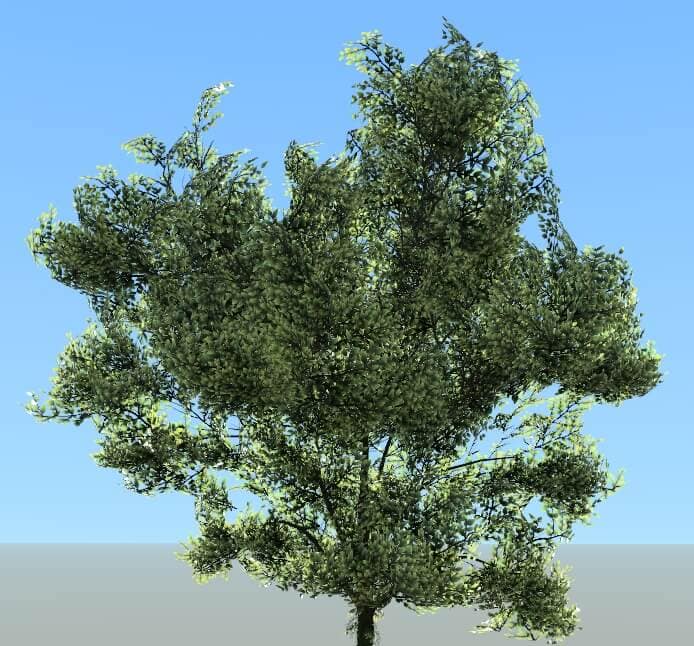
Test tree: without and with gradients on branch clusters
To further optimize the scene, I made sure that some plants would be gathered on an atlas (depending on their size and appearance in a scene); this helped increase performance as one-draw-call would summon multiple plants in the game engine at the same time.
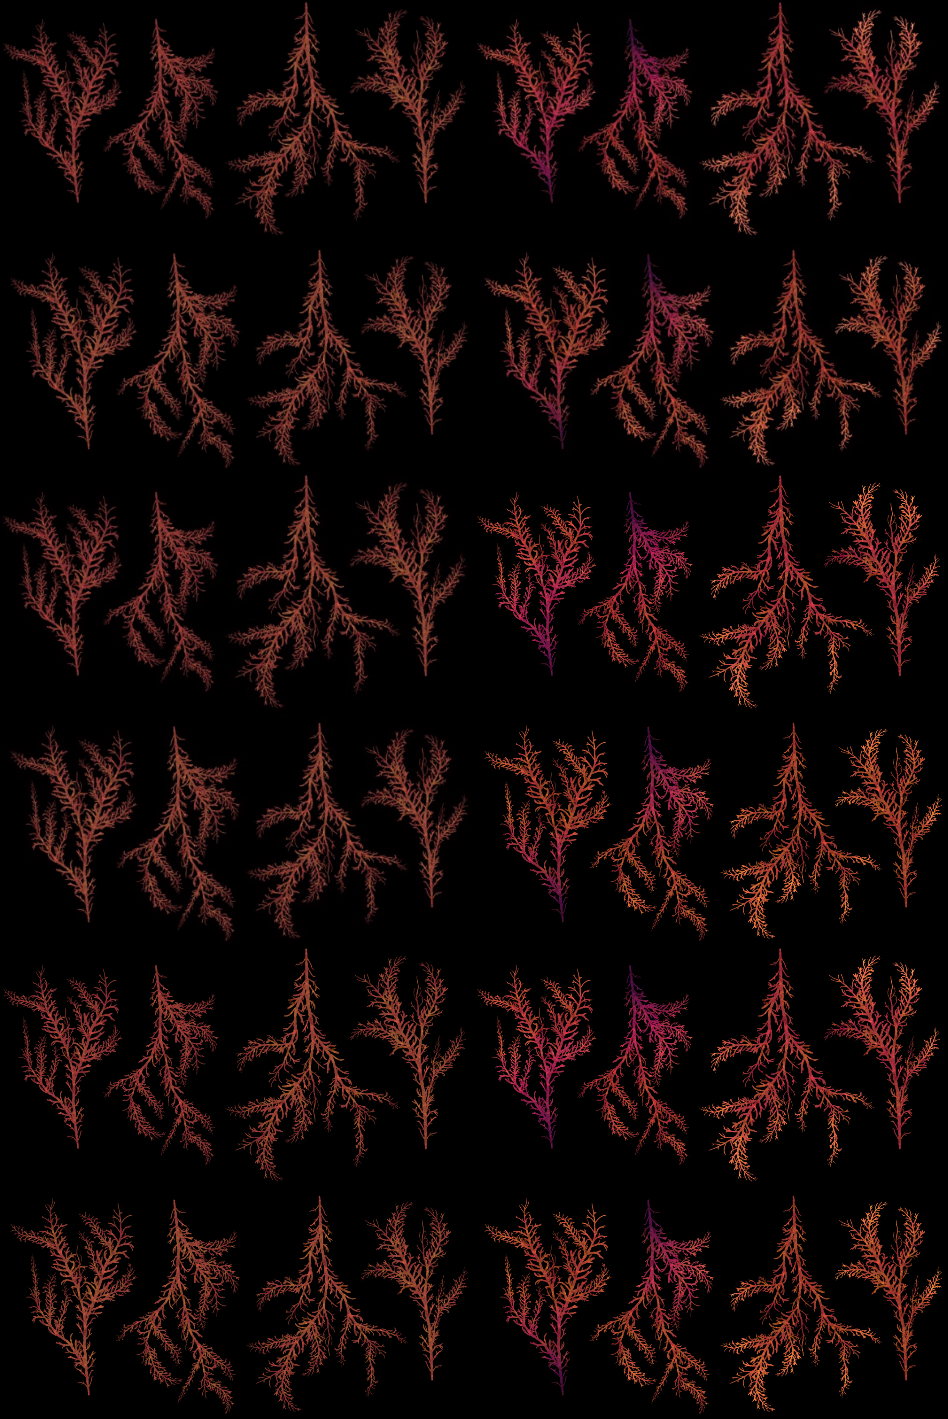
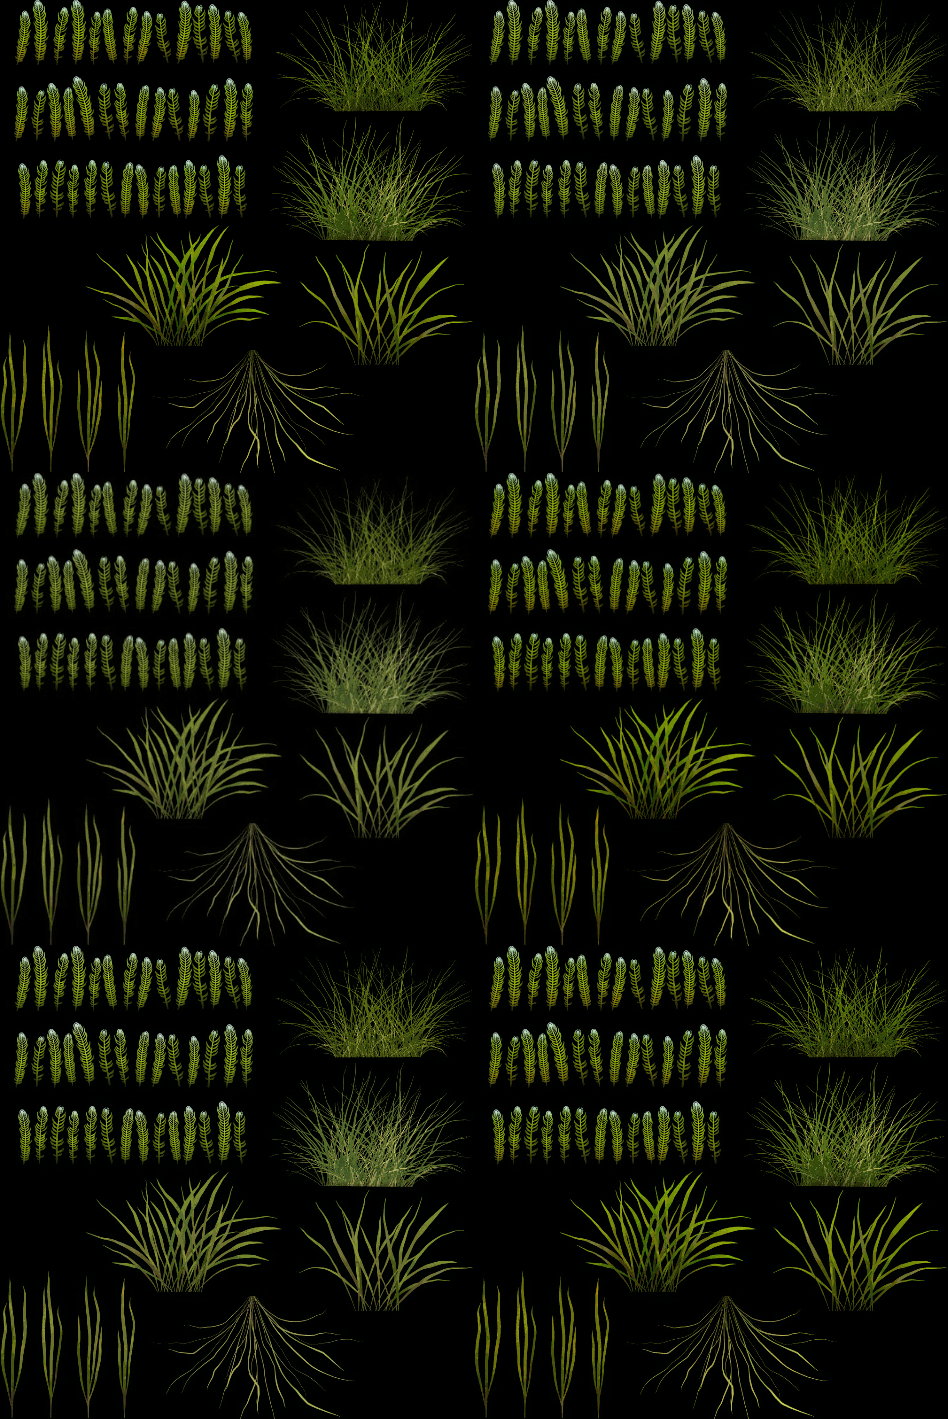
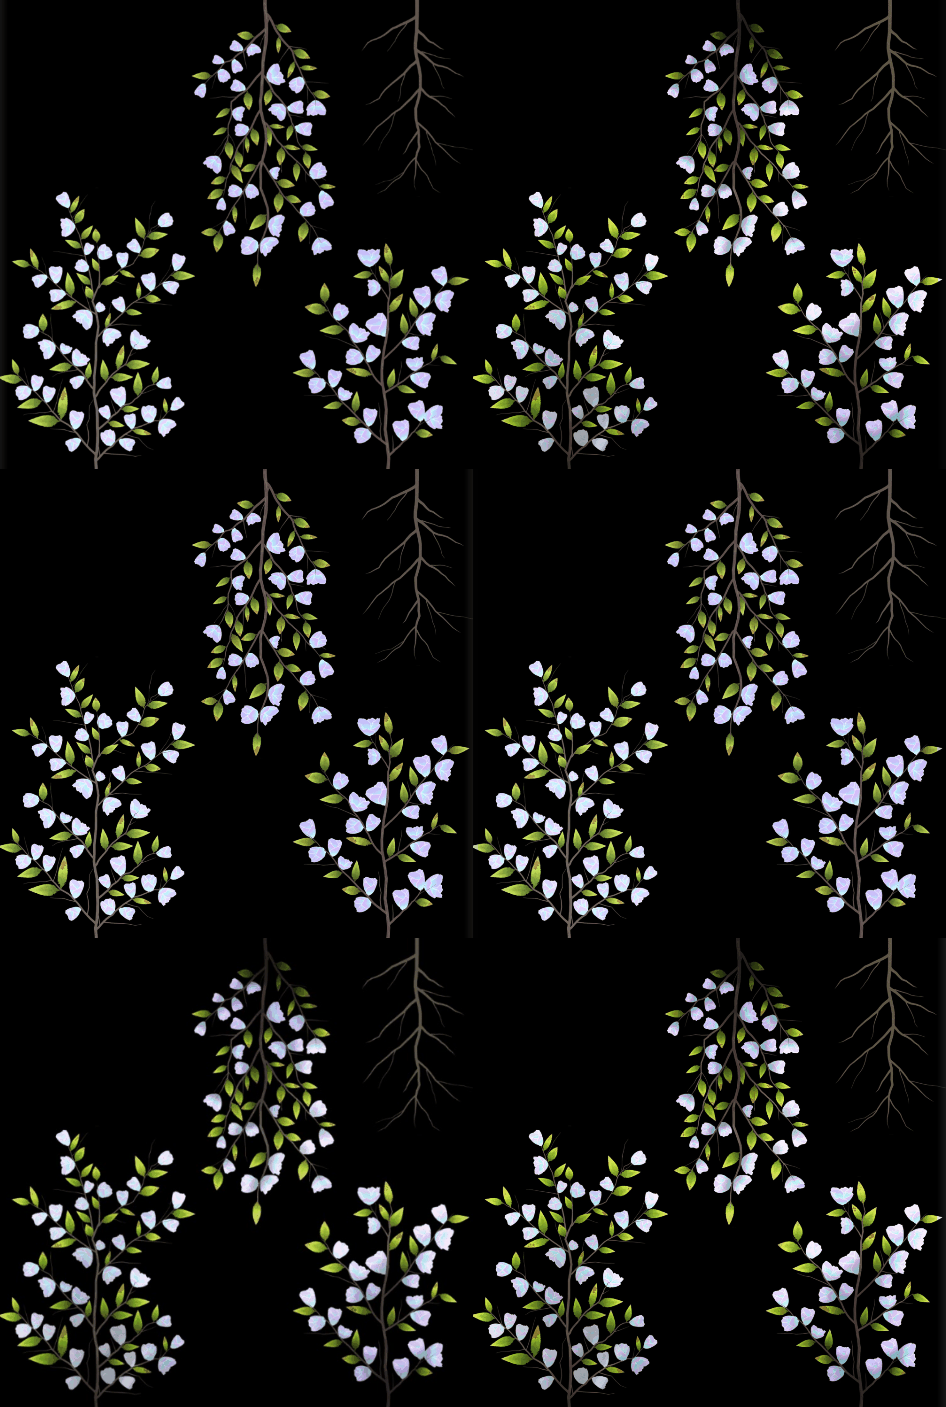
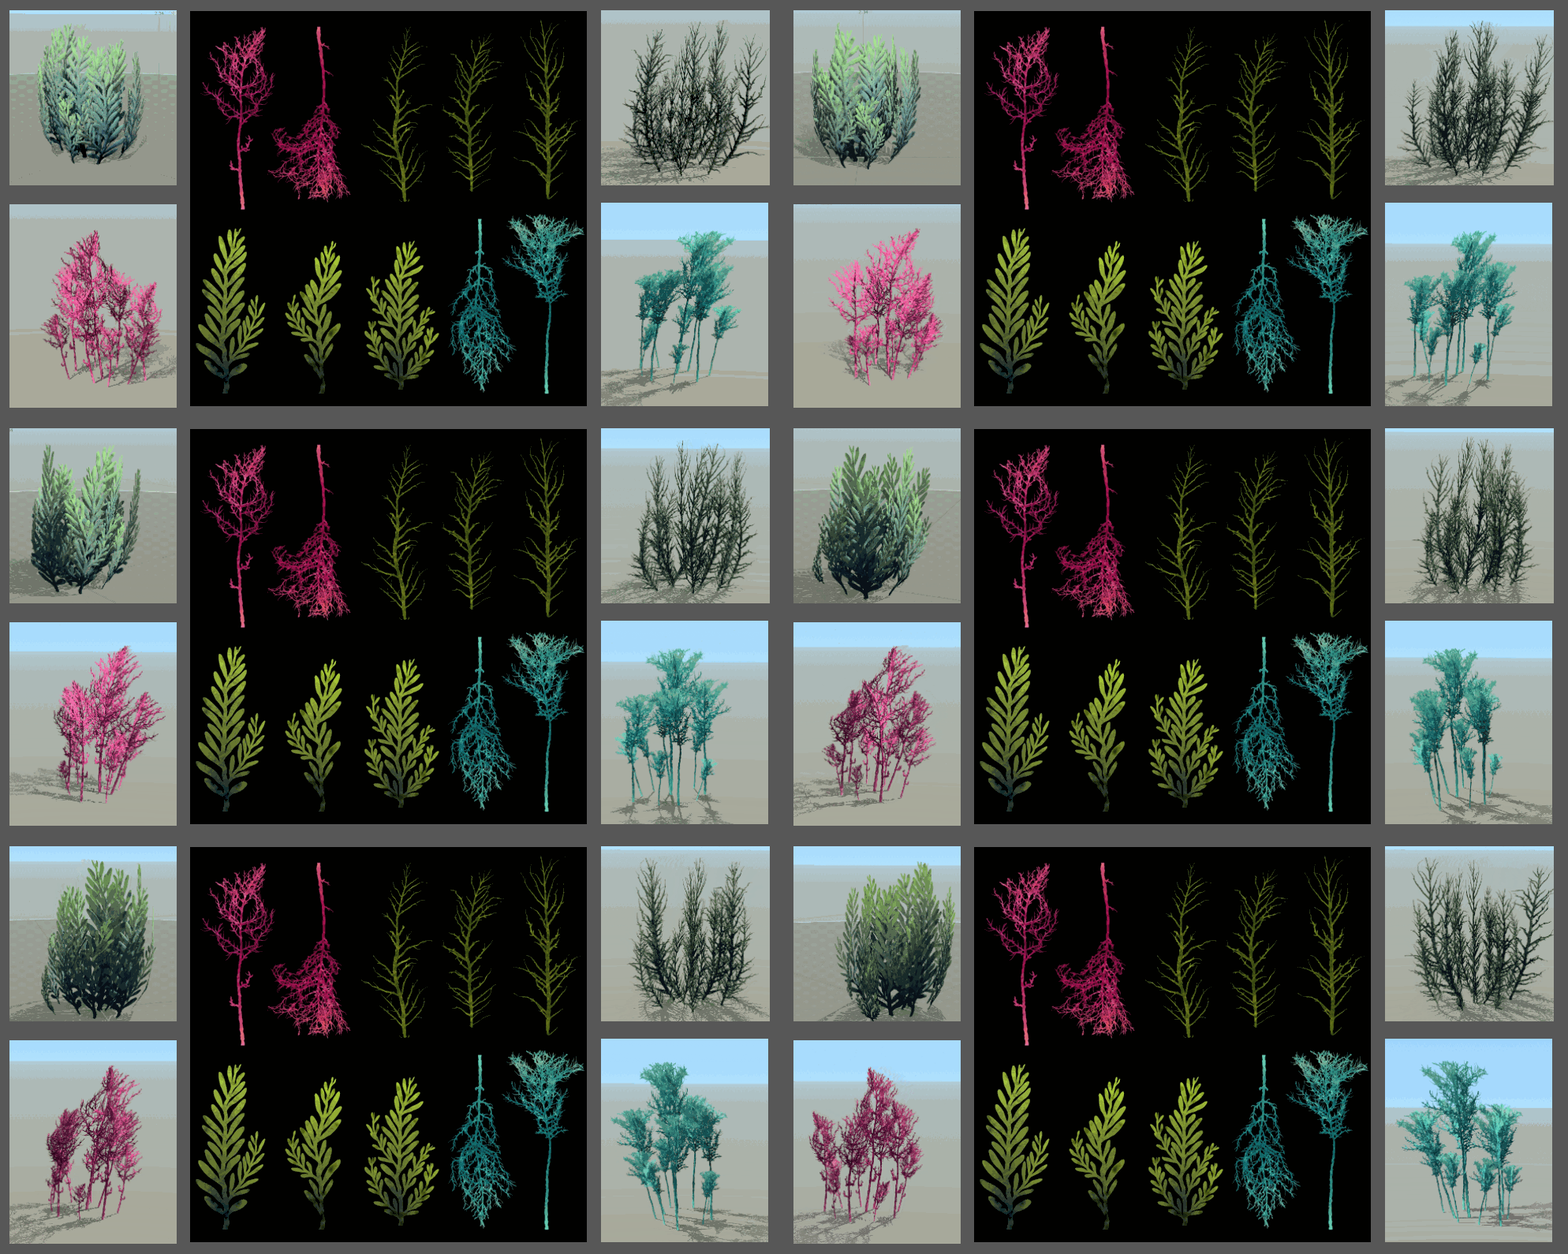
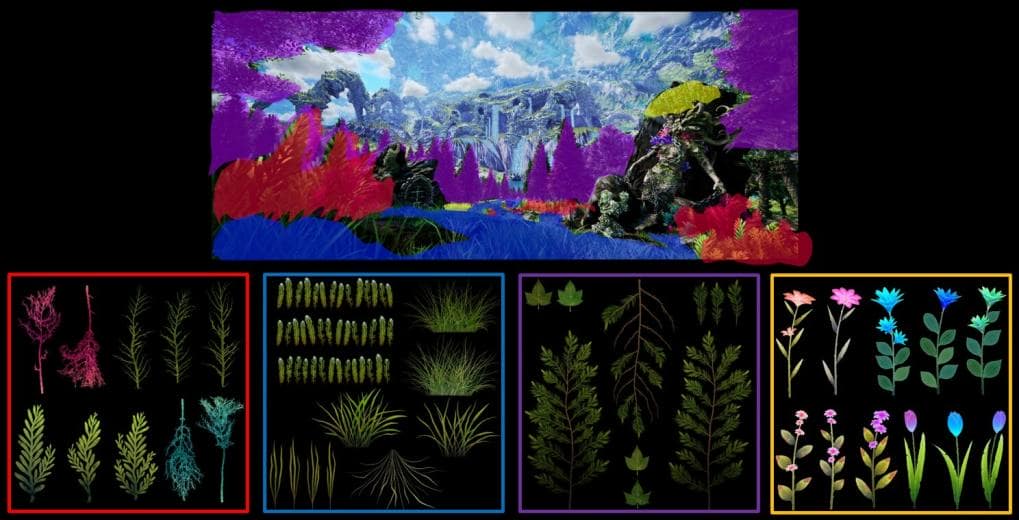
I also divided each of my scenes into biomes that would each receive a limited number of atlases composed of several plants with matching colors. This allowed me to keep everything running in real-time while displaying a variety of foliage and pushing me to pay attention to color coherence and biome composition.
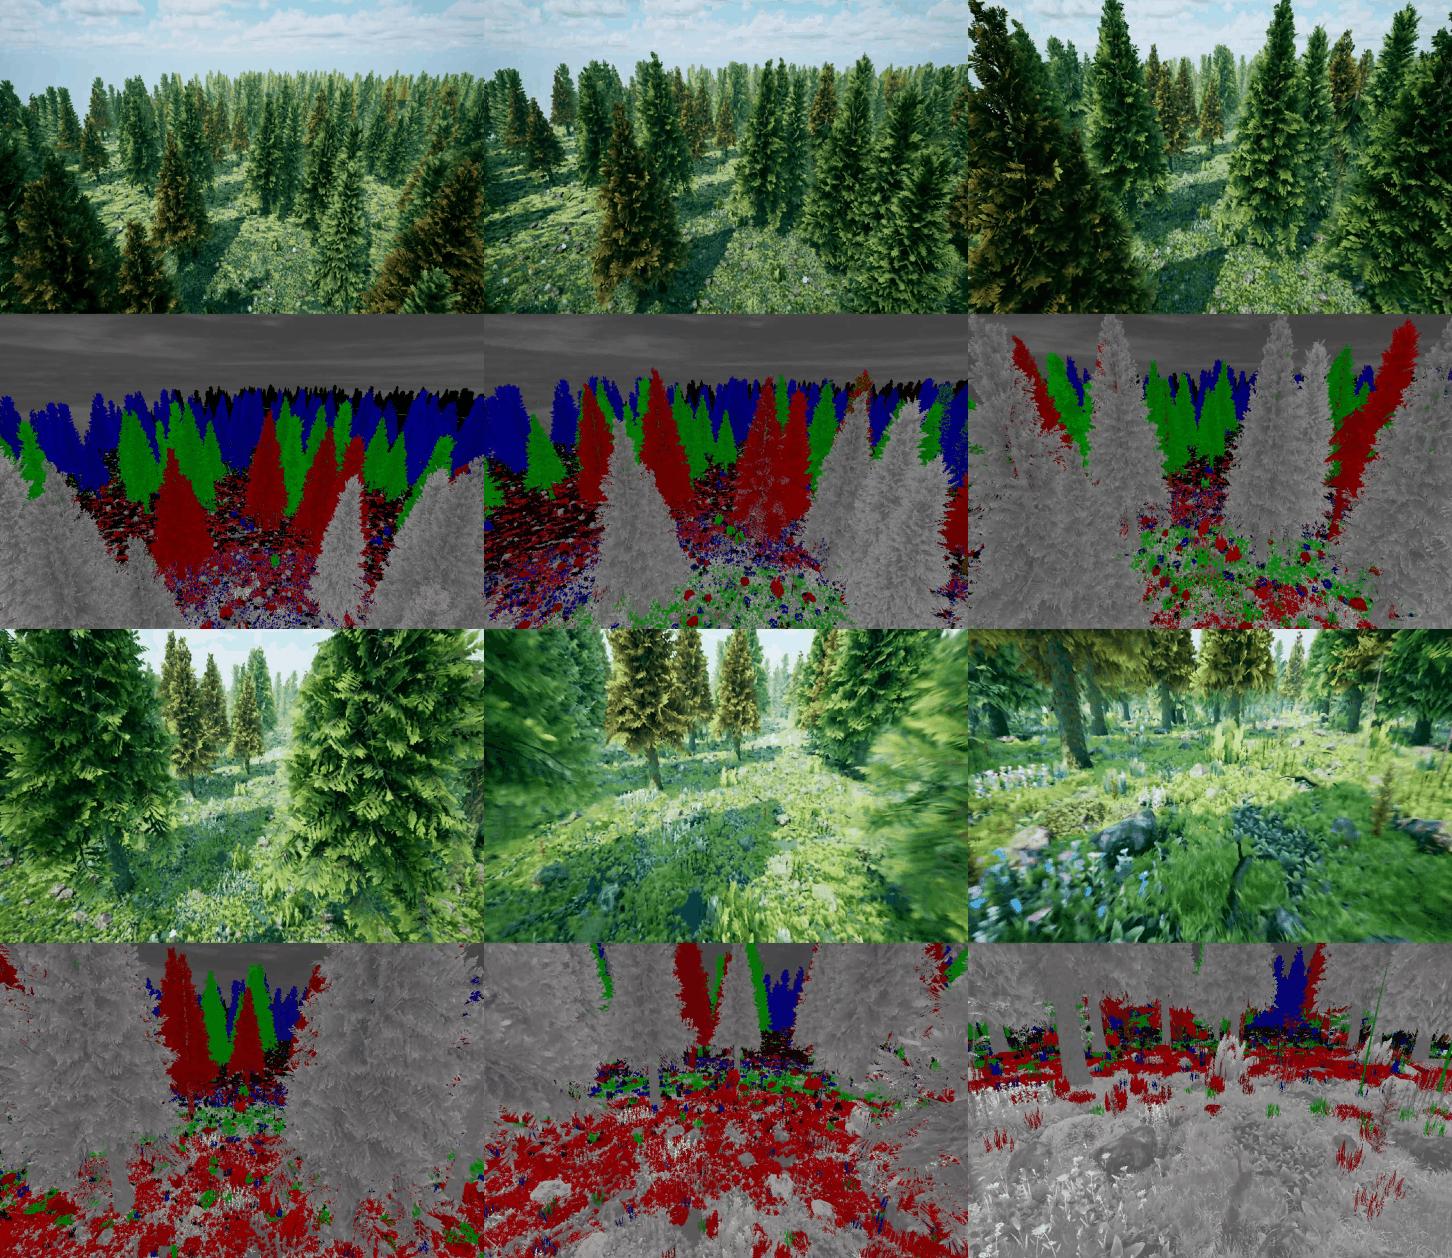
I also checked that my trees with the same trunk texture were exported at the same time under the same texture name. This was to make sure that, once in the engine, only 1 trunk texture would be used for several hundreds of trees at the same time.
To continue improving my optimization process, I used SpeedTree’s LOD system to keep detailed trees where the camera would be close (white and red models) while presenting low-resolution models in the background (green, blue and black).
I also used a “Dithering” (soft) transition between LODs to avoid brutal LOD popping as the cinematic camera moved quickly through the scene.
The final challenge in presenting my gigantic world: I needed some scenes to have more than 140 000 foliage assets. Though my past optimization steps were increasingly efficient, my last LOD of trees were still around 2000 to 5000 triangles, too much for the scale of the scene.

Here, all the little green dots each represent a tree
To make it possible I used the Imposter Baker Tool from Ryan Brucks, based on the topic of octahedral imposters. Ryan Brucks explains:
The idea behind impostors is to capture the object from a variety of view angles and store each view to a texture.
Depending on the camera placement compared to the tree, a specific texture is displayed: if the camera is above the tree, the tree’s captured texture from above would be displayed just as a camera seeing the tree from the right would view a captured texture from the right of the tree.
The gifs below were created by Ryan Brucks and are available on his blog

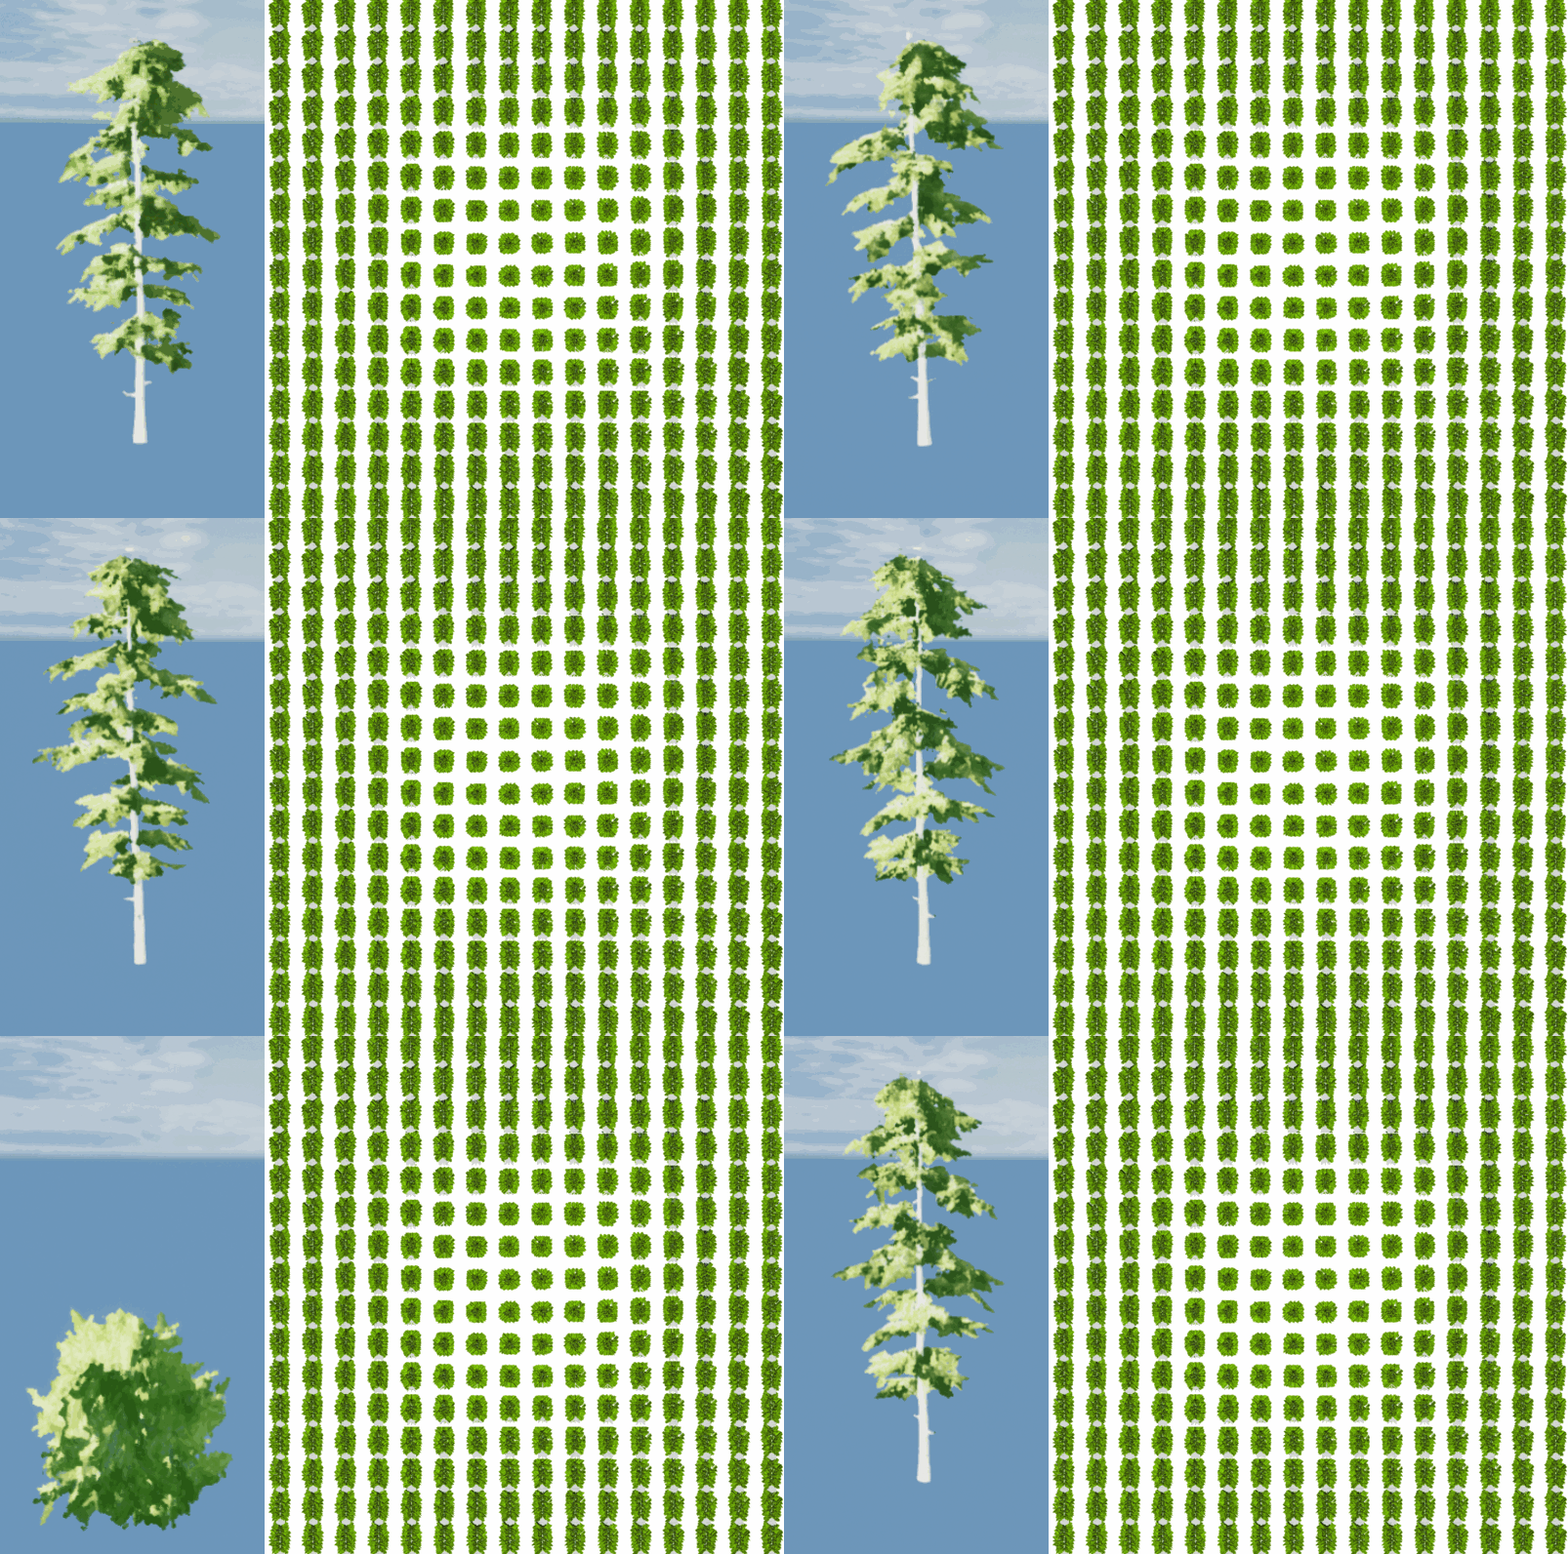
Here is the Octahedral imposter Base Color map for my birch tree (allowing for display from all directions)
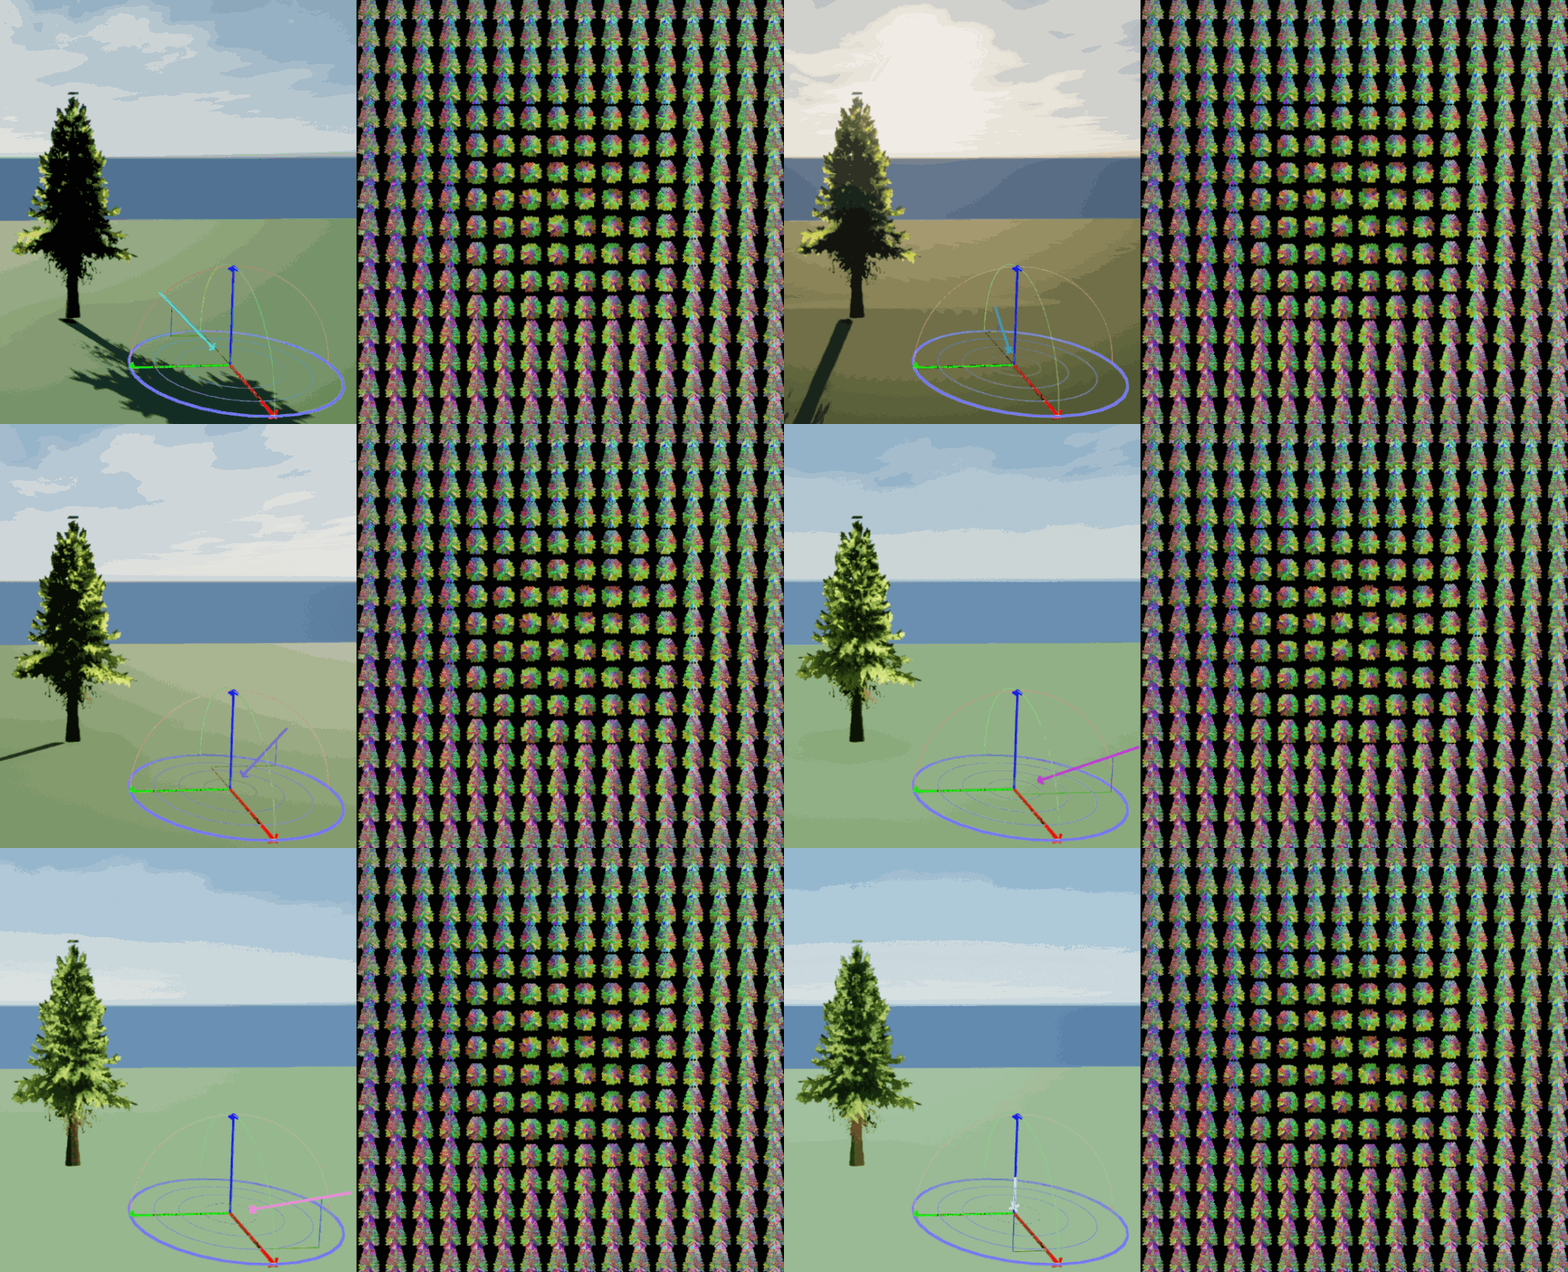
Here is the Octahedral imposter Normal map for my pine tree (allowing for dynamic lighting from every direction)
What are you looking forward to creating next?
With SpeedTree, my next step would be to create plants and trees using ZBrush bases, like a trunk or a photogrammetry asset, and build much more diversity in both shape and texture.
I would also love to explore procedurally grown vines more, as I’m planning on doing in my future middle-east ruin project, which will be the next part of the Aorta Valley’s story.
I think I would push the polycount a bit higher in the future to obtain foliage that would be more suitable for the current AAA standards but still maintain a certain number of LODs to keep it optimized.
To conclude
This project really helped me to discover how much I like creating environments and, more specifically, foliage. SpeedTree allowed me to focus on creativity, optimization, and overall coherence while the software managed most of the technical parts of building foliage and mesh placement; I simply adjusted these at the end as a final touch. Working in tandem with two procedural softwares (SpeedTree and Substance Designer) helped me to iterate more to find the best solution for my project. It brought me new ideas that I would not have considered by tweaking the large spectrum of available options.
