
A Day at the Virtual Beach
Hassan Nisar (Quixel 3D Generalist) wanted to hit the beach, but like so many of us, he couldn’t travel during the COVID-19 pandemic. In honor of the vacation he longed for, Hassan used a Megascans – SpeedTree – Maya workflow to create a hyper-realistic environment that’s almost as relaxing as the real thing. Keep scrolling to learn from his “Tropical Beach” breakdown.
This article is edited from an interview conducted by Amanda Windsor.
Introduction
My name is Hassan Nisar and I’m a 3D generalist currently working for Quixel. I learned Photoshop when I was in high school and started doing photo manipulations for fun, and it quickly became my passion. I wanted to learn more, but couldn’t afford formal education at that time. Then I found out an institute was offering a one-year 3D diploma on sponsorship for people who know Photoshop, so I applied. They took some tests and I got the sponsorship, but that was just a start. I learned many things on my own after that.
I worked in two studios before joining Quixel as a 3D generalist: the first was a VFX studio where I worked on a live-action movie and many animated commercials, the next was a gaming studio where we made a VR game. Now, I’m a 3D artist making assets for Quixel Megascans.
I started “Tropical Beach” on summer break. Usually, I go to a beach at that time, but because of COVID I couldn’t. So, I got the idea to make a small virtual beach scene; the simple goal was to get the quality I wanted and finish this project on time.
I found out about SpeedTree when I was doing R&D on how it was used to make vegetation in Avatar, then I started learning how to use it. I used it in a few projects and found it amazingly helpful and efficient. For this project, I wanted to make a workflow using SpeedTree with Megascans.
The first challenge was to get a realistic look. I am never fully satisfied when I start any project. Rendering a scene with a high polycount in Maya is a bit of a challenge and if you have to render a video on a single PC, you need to get everything right or you end up doing days of rendering. I use almost every renderer in Maya and I think Redshift is very efficient, but that’s personal preference.
“Tropical Beach” Breakdown
The Plan
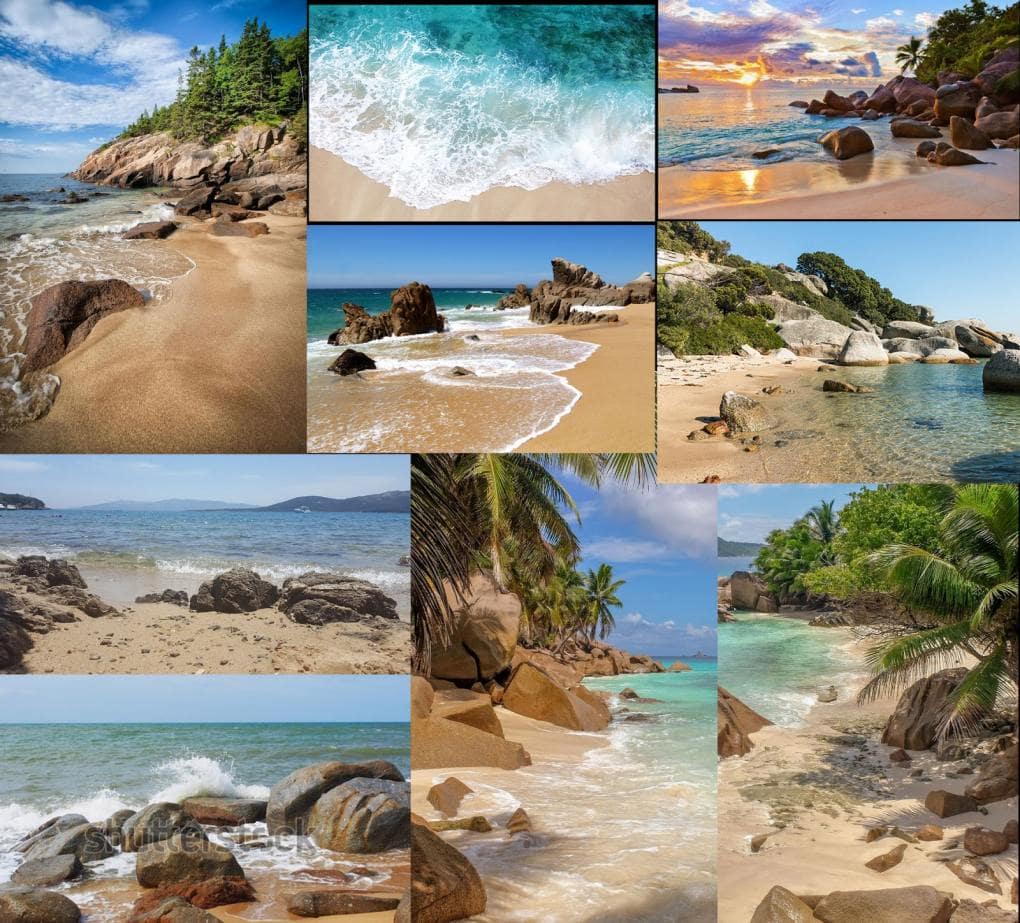
To begin, I gathered a few references, one of the most important things in every aspect of CG. It is important to dedicate enough time to collecting references so your life will be easier in production. I wanted examples for lighting, atmosphere, and vegetation.
Modeling and Selecting Assets
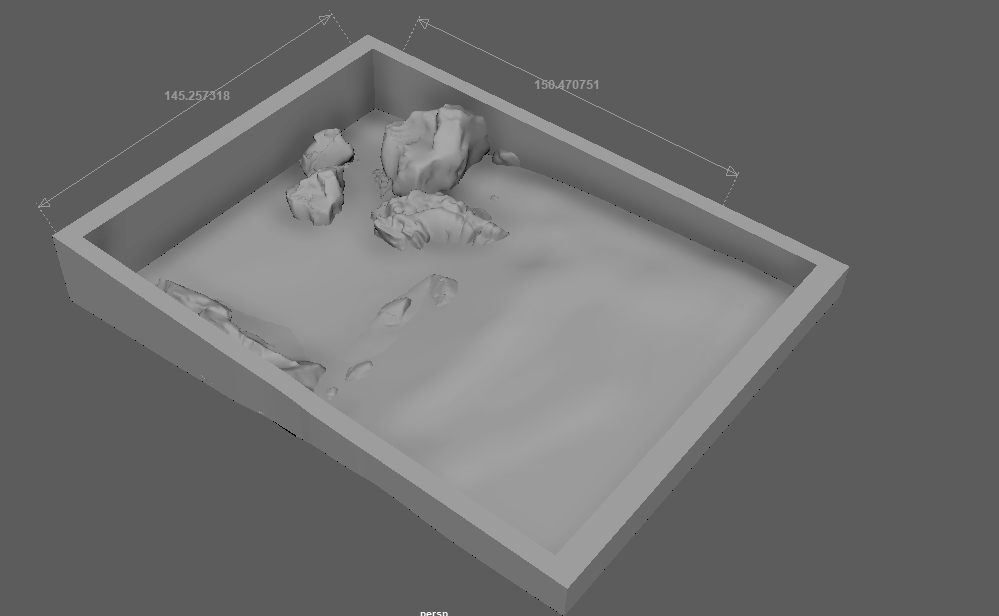
After collecting references, I did a quick blockout of the scene to get the rough look and scale. Scene scale is really important if you want to do simulation. (Note: Maya scene scale is set to centimeters and default RealFlow units are always in meters.) The best approach for beginners is to load a sample scene and export that to use as a scale reference.
For modeling, I used Maya and started selecting/downloading assets that fit my references from Megascans. I used LOD0 to keep my scene optimized. All the models were combined into one mesh to use as a collider. Models should be closed and have thickness.
Simulation Settings
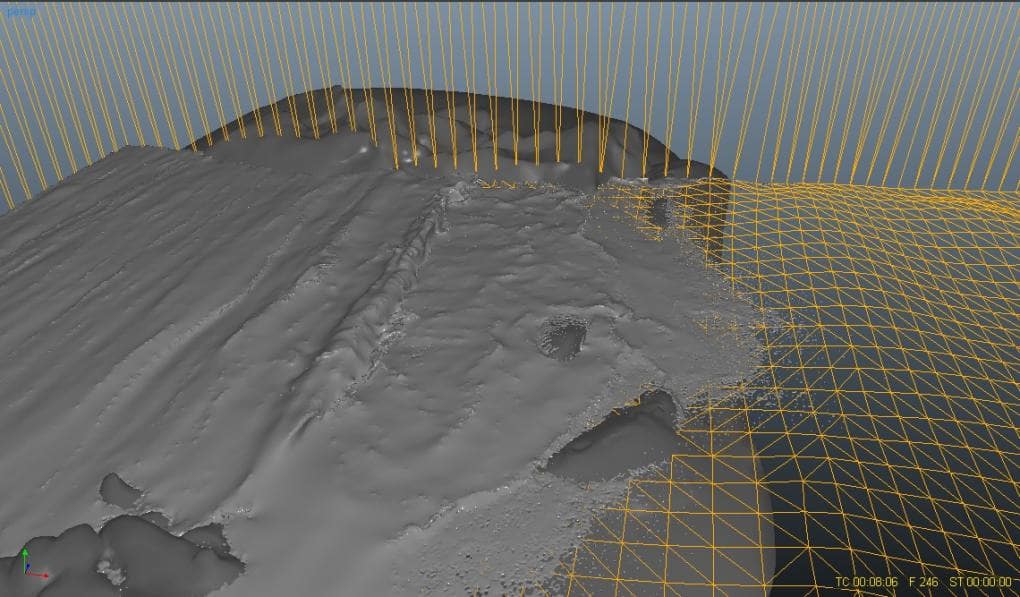
I used Hybrido in Realflow for the simulation, using Open Domain and adding an Ocean Force. After some research and testing, these are my force settings:
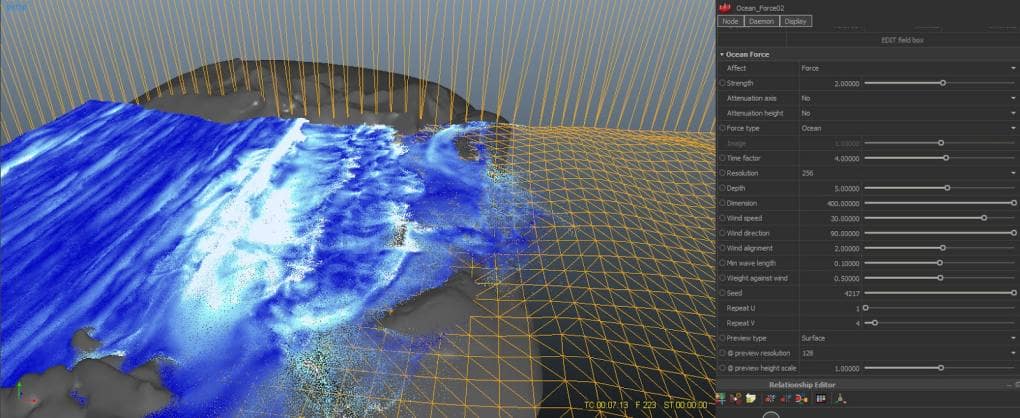
I used another Ocean Force for secondary waves. Once I got the desired result, I baked my mesh and simulated foam particles, then imported my mesh into Maya as an Alembic file.
Palm Tree Breakdown
I used SpeedTree because of how quickly you can get high-quality results. I had a few references of palm trees because it is one of the most important elements of the scene. I imported the Megascan atlases, added a few nodes, tweaked a few parameters, and voilà!
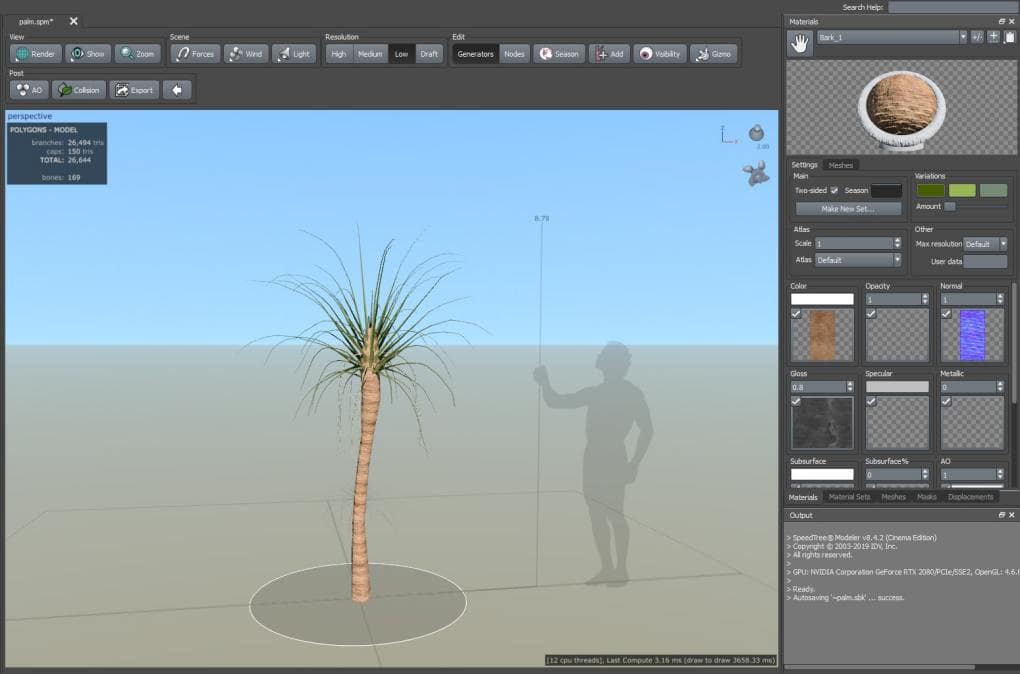
After creating a trunk, I tweaked a few parameters and added branches. I created a material from the imported Megascans bark, including albedo and normal maps, then applied it to my trunk.
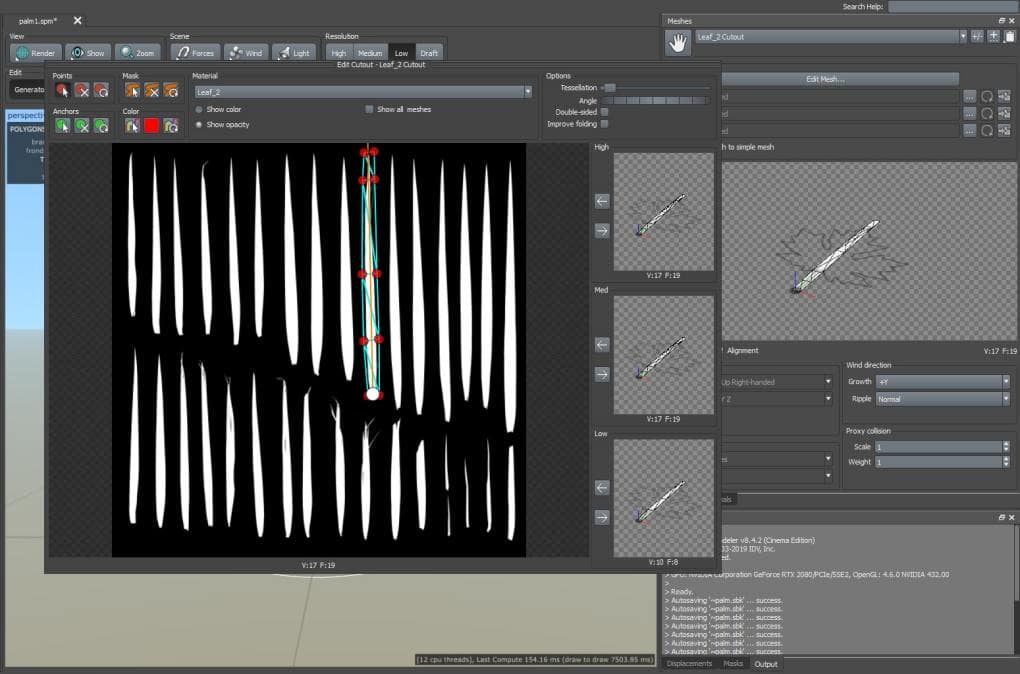
To create the fronds, I imported Megascans palm leaves, with albedo and alpha maps in one material, then I created four meshes on different leaves according to opacity. I duplicated my material and assigned each mesh a different version for variation. Next, I created a material set and applied it to the leaves: one set was for dead fronds.
My tree was ready! I kept it simple for this scene, so I didn’t add more materials. For other trees, I use multiple materials and different maps using this same method. Now, satisfied with the final look, it was time to tune my wind effects and export.
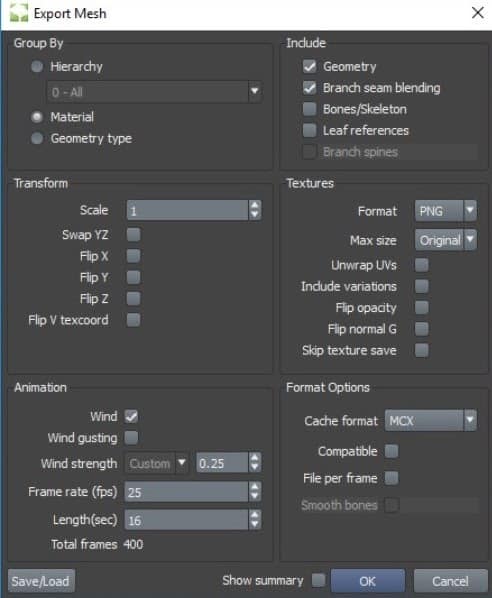
Here are my export settings (right). Mostly, I use Group By: Material; it’ll be easy to apply shaders later. No need to export textures because I already had them.
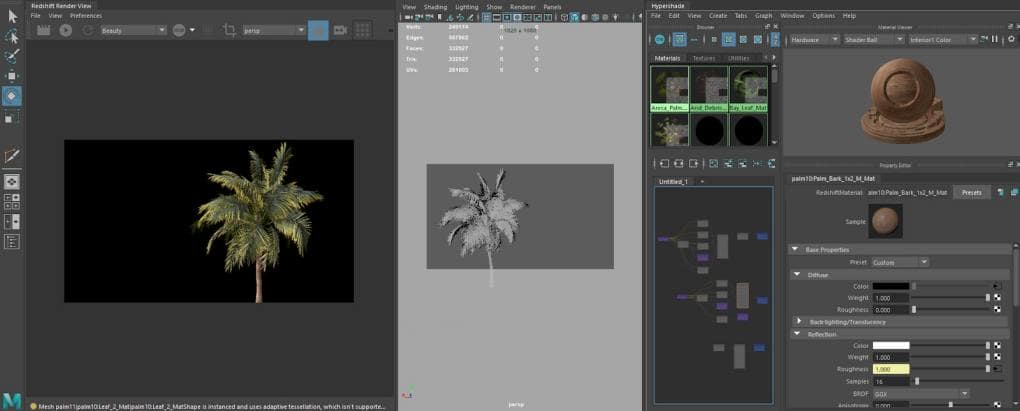
After importing the tree into Maya, I selected the bark and applied the same bark material from Megascans Bridge; I used the same process for the leaves. If you used multiple material sets in SpeedTree, you’ll have multiple meshes of leaves; be sure to name material sets properly in SpeedTree to avoid confusion. After setting up materials, I did a test render.
Scene Composition
This GIF is my final shot, which I found after many composition and camera angle iterations; I always adjust the camera until the last stage. At this point, I had a pretty good idea where my scene is going, so up next was getting a natural-looking scatter of assets.
Lighting and Compositing
The way I think about any scene I want to light is how to make the scene as neutral as possible, the way you would see it in real life. After that, if I want, I can change the colours in post-process. I treat the scene as if I was taking photos: I set the time of the day I want to capture, tweak it, do test renders, and adjust the image in post-process to get the final look.
For this scene, I used an HDRI map and one directional light which is pretty much oriented to the sun on HDRI. I usually start with the Redshift physical sun and sky, but HDRI will give you more realistic results.
I always render passes while doing video production. It really helps in case some things need little corrections so you don’t have to re-render. Here’s the render composite in After Effects with a bit of color and background corrections:

Final Thoughts
This project took me one week from start to finish, including simulation and render time. It presented some challenges, but I had a lot of fun and enjoyed working on it. I wasn’t satisfied until the very end, and even after I finished it, I kept noticing small errors I wanted to improve. But, I think that’s okay. That feeling means that you still have room for improvement and it keeps you motivated to achieve the best result on your next project.
Thank you for taking the time to read my breakdown. I hope you found some helpful techniques in this article. I post my art on my ArtStation so if you like what I do, you can follow me and see more of my stuff!
You can see more of Hassan’s work on ArtStation and Vimeo, and you can connect with him on Linkedin!

Stay in touch with SpeedTree: