
Building Pine Flatwoods In SpeedTree
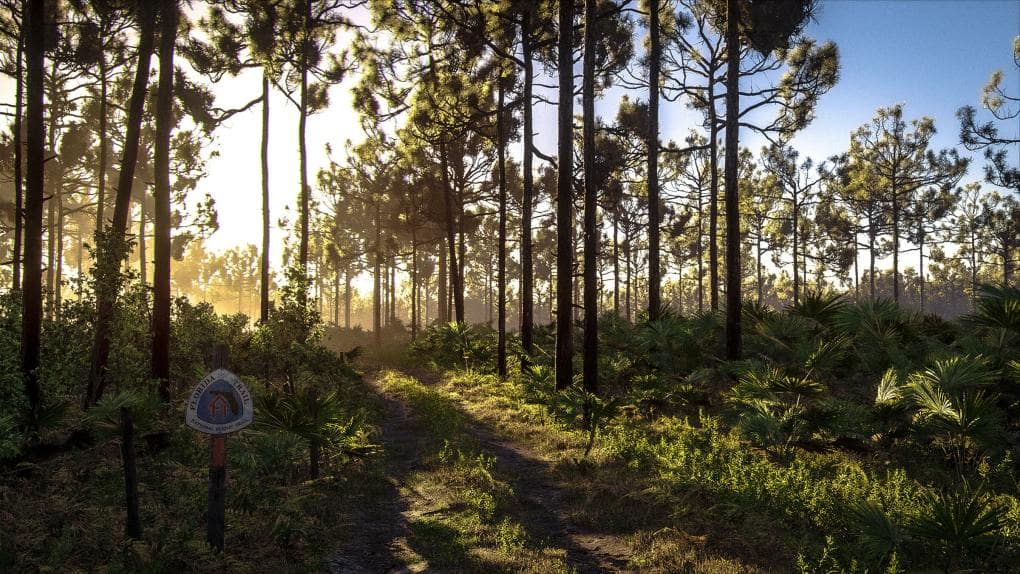
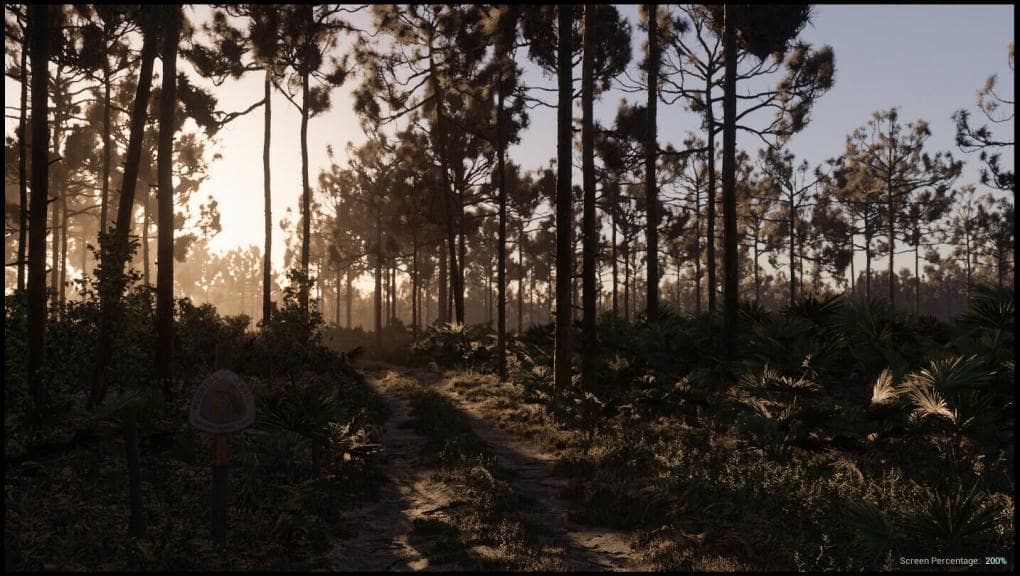
Quixel Community Manager Jonathan Holmes’ “Pine Flatwoods” is full of towering pines and prickly palms that remind us of our own favorite forests (we’re mostly southerners here at SpeedTree). Here, Jonathan breaks down the SpeedTree workflow behind his impressive scene.
Introduction
Hey there! My name is Jonathan Holmes. I work for Quixel, now part of Epic Games, performing community management and product support. I perform support duties at Quixel, but not just product support! Community management is a vital part of my duties, and being able to work with our art tools and our content library is critical to being able to effectively manage a community of artists. I’m very active in the Quixel Art Community on that note, which is a fantastic resource for artists of all skill levels to learn from one another and grow.
This particular project was done during evenings over the course of a couple of weeks. In this writeup I’ll be covering my process with SpeedTree.
SpeedTree Foliage Breakdown
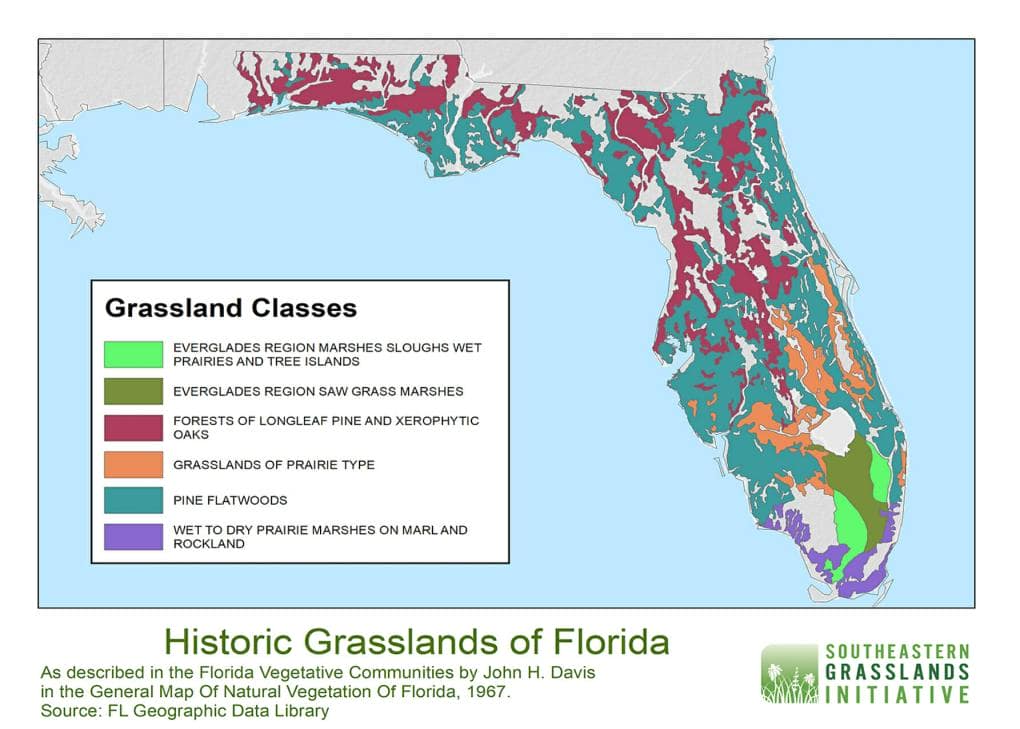
I spent a significant amount of time working in SpeedTree to get the foliage looking appropriate to the pine flatwoods ecosystem, which is a very large part of the Floridian peninsula. To give you an idea, check out this map courtesy of the Southeastern Grasslands Initiative:
This scene used several versions of longleaf pine and saw palmetto, aptly named for its razorblade-like stems. I worked with SpeedTree because it’s the best solution I’ve found for creating real-time foliage. For Unreal, I use it in a way that’s more targeted toward offline usage. Here’s the process behind working with it:
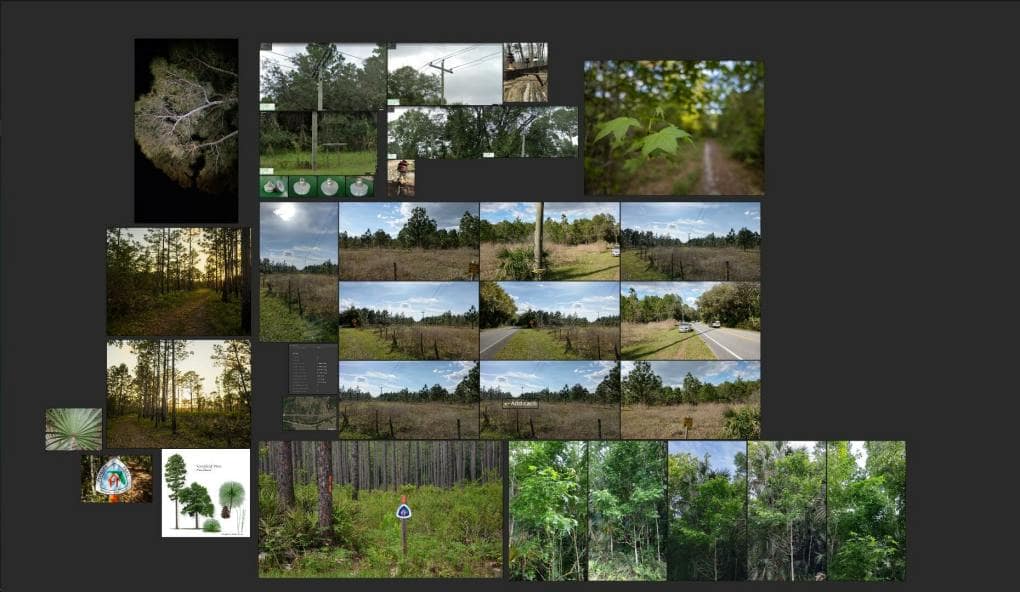
I use PureRef to manage the references I’ve gathered. Most of these I shot myself. Some are taken from Google Images, and some are taken from Street View. Having a wide variety of references guarantees a much more accurate result than what you’d get working from a single image or subject.
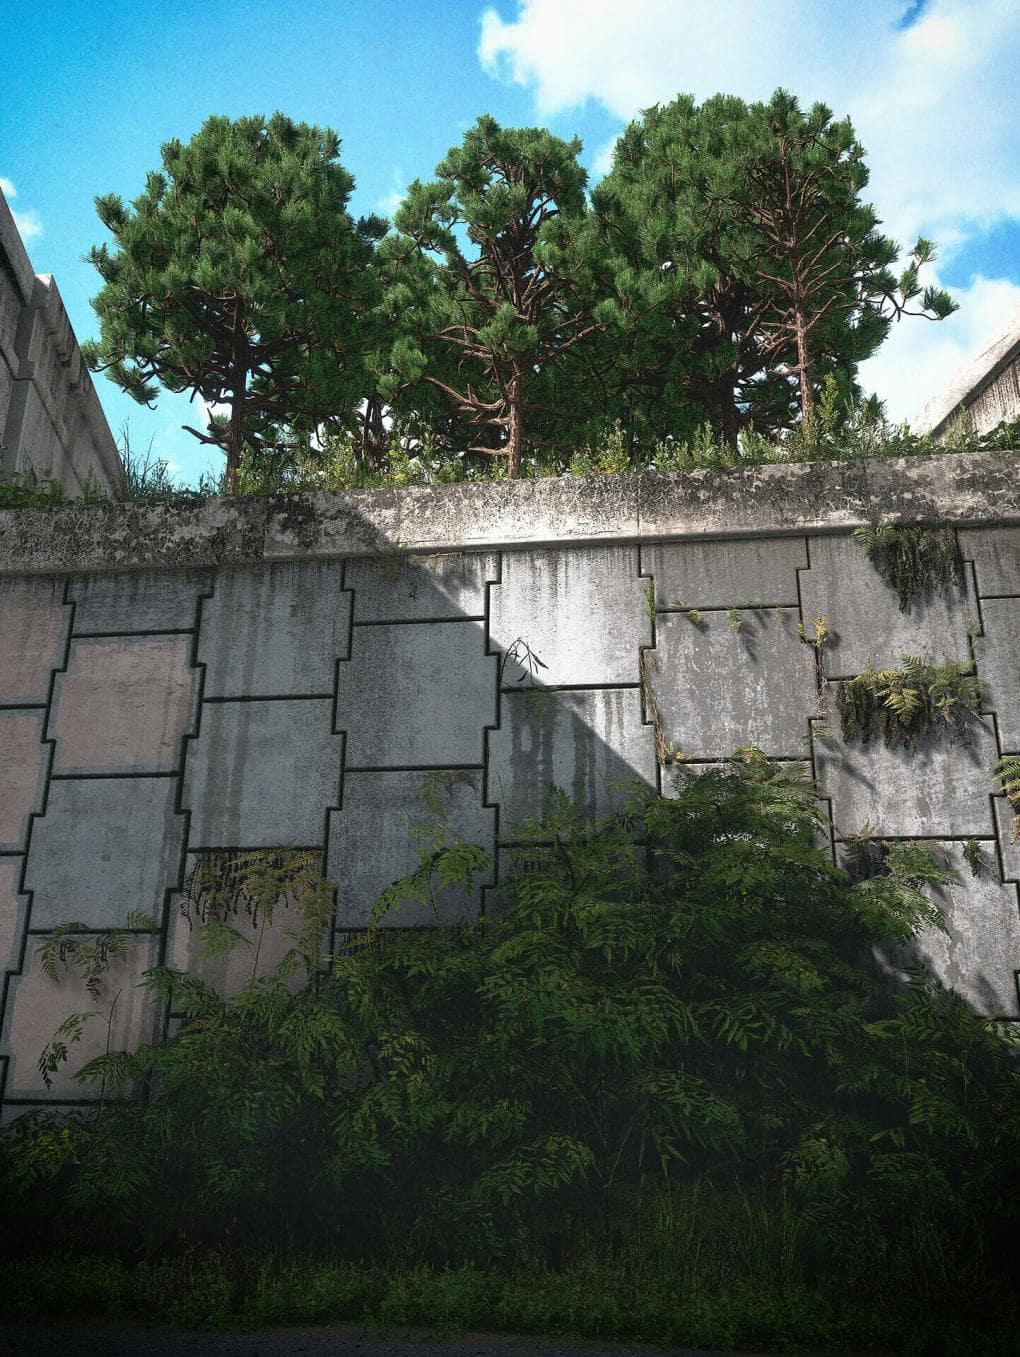
After references were gathered, I set up a simple leaf model using a pine atlas from the Megascans library. I had to do it this way particularly because longleaf pine assets do not exist in the library… yet! Getting the look of a longleaf requires large bushy pine needle clusters generally pointing upward at the end of an arrangement of branches.
This asset is made up of several planes that were rotated until it was full and bushy. It’s not terribly convincing to create assets like this with just a single plane. The duplication, rotation, and vertex noise help sell the final look from up close and afar. I’ve added modified vertex normals as well – you can read about this on the Polycount wiki.
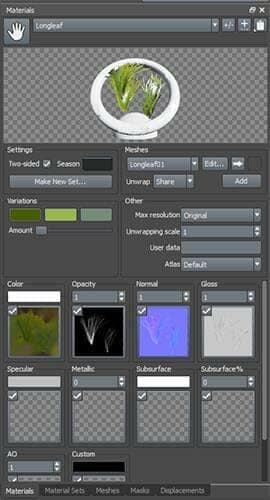
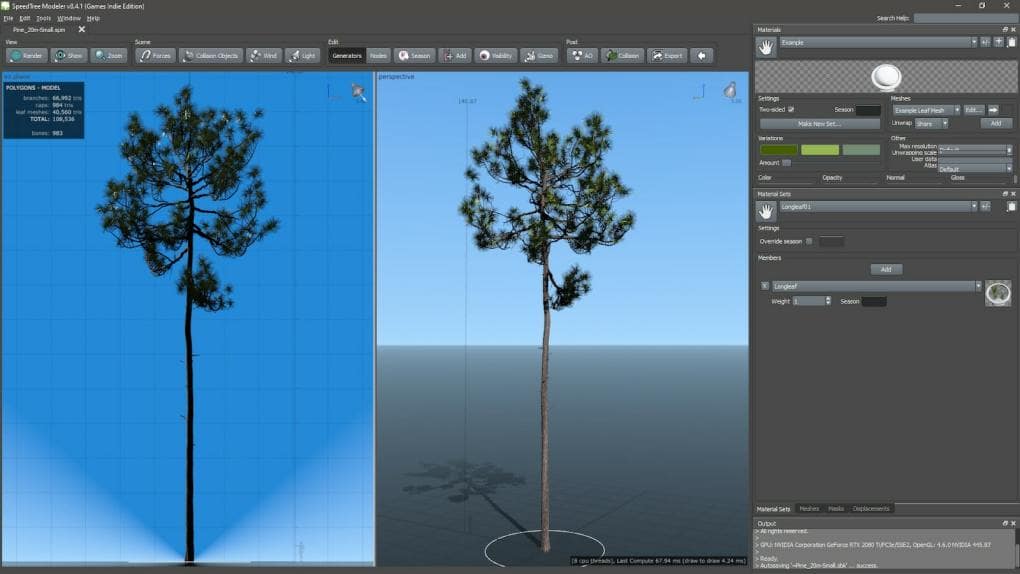
Once the modeling for the atlas is done, it’s exported as an FBX at the origin (with an appropriate pivot point centered in the needle bush) and loaded into SpeedTree. This is done by using the Material window → Manage Materials (below).
I created a material called Longleaf and added all of the textures for this asset into the slot. Most of this is arbitrary (aside from the albedo/opacity texture) since I’m not going to use SpeedTree to create texture atlases – it’s simply creating geometry that I’ll refine with materials in UE4 later. The Material window should look similar to this when you’re done adding textures (right).
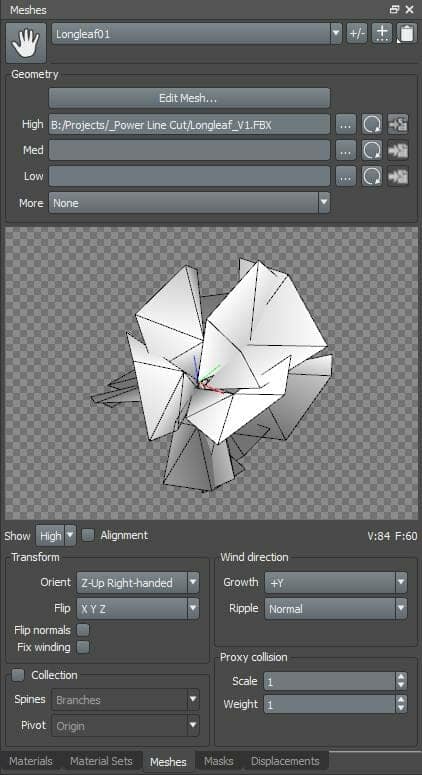
The next step is simply adding a custom mesh (identical to how materials are added) and assigning it to the Meshes tab in the Materials window (right).
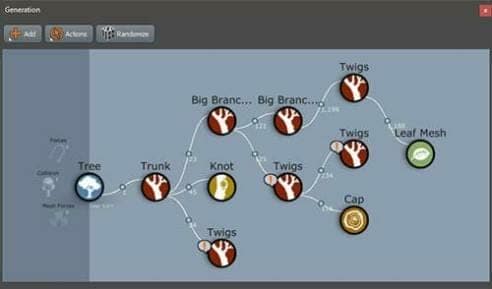
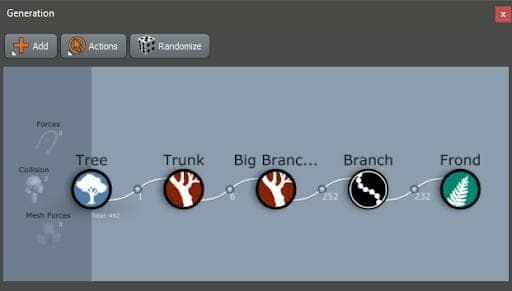
This can then be dragged and dropped via the hand icon directly onto a leaf generator in the viewport or in the Generation window. You can see my Generation window below.
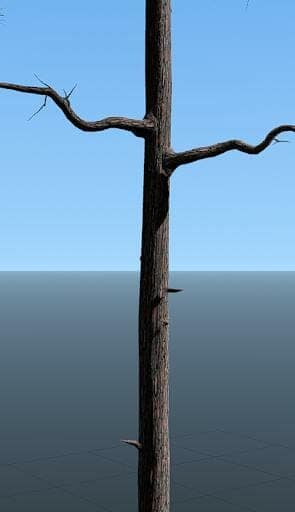
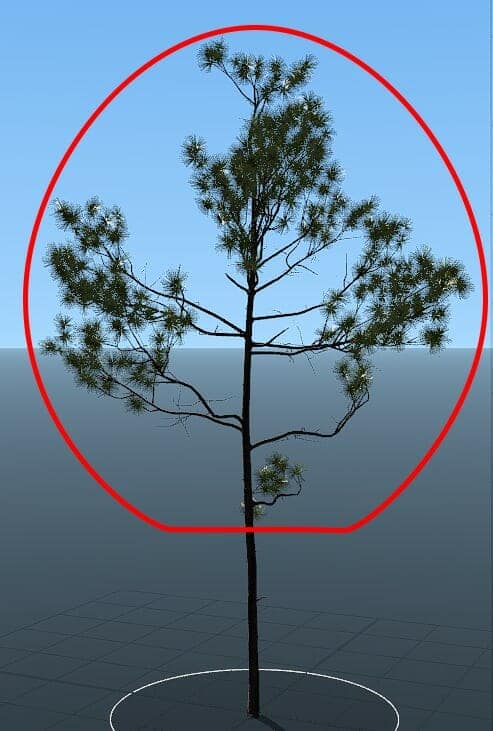
SpeedTree makes setting up trees relatively easy. Let’s do a deeper dive into how to create a tree that realistically represents the type of tree you need. The tree hierarchy is the focal point of everything, much like the foundation of a building supports the structure of the dwelling. If the hierarchy isn’t built correctly, nothing else will be either. Note again that these trees are set up to be mid-poly/high-poly and aren’t optimized for game use. I use Unreal as an offline renderer, so I’ve modeled everything, except for the individual needles, instead of using atlases for branches connected to the needles.
Starting from the Tree generator, we move to the Trunk. This is essentially the root of the entire tree. I didn’t add literal roots to it because they wouldn’t be visible in the scene due to the amount of ground foliage I added. The Knot and Twigs generators are there to add visual interest in the trunk and break it up so it doesn’t look like a long pole. We do have knot materials in Megascans, but I was looking more for breaking up the silhouette of the trees rather than adding the knot textures to the final project.
Here’s how the Trunk was set up (right).
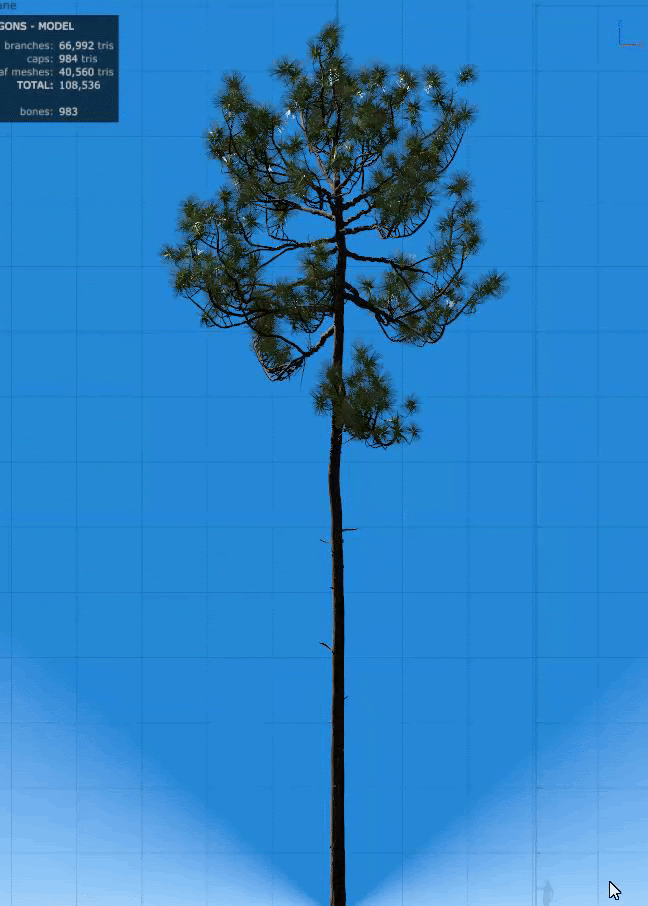
150 Absolute Length and 50 Radial segments may look a bit crazy, but these are my hero props for the scene. I needed that polygonal density to sell the look I was going for and give these trees the level of detail they needed from the distance they’d be seen at. The default level of optimization does a wonderful job of putting polygons where they’re needed, and reducing them in flatter areas that require less visual detail.
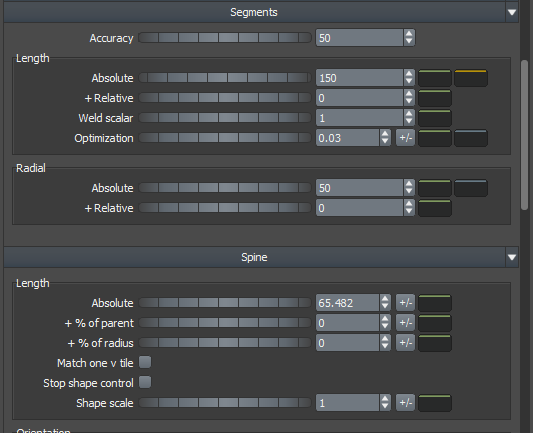

The Length was set to 65 here, but I made several variants of this tree. Each one had a different Length to represent trees in various stages of growth.
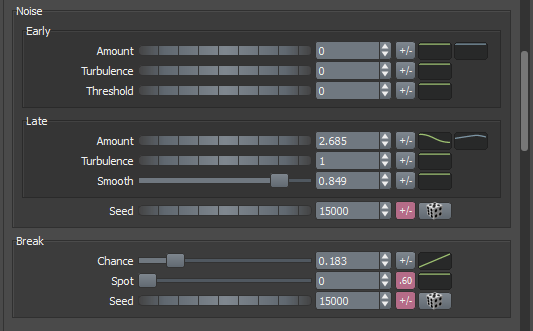
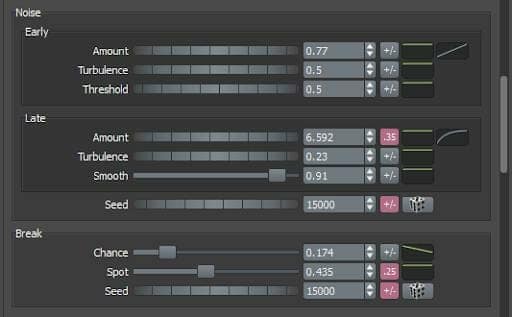
Noise helps create visual distinction in the longleaf trunk. I use Late noise almost exclusively. The curve helps produce a noisy region toward the middle and upper sections of the trunk, while the topmost and lowest sections of the trunk are relatively less noisy by comparison.
The trunk also uses a Knot node and Twigs node to help break up the surface of the object. Knot uses the same material as the trunk as I mentioned earlier – it’s mostly there just to break up the silhouette. The twigs are there to look like damaged branches from a distance.
Onward to the branch system! Big Branches sets up the core of the longleaf’s look. The first Big Branches connect to the Trunk. Here are the settings I used:
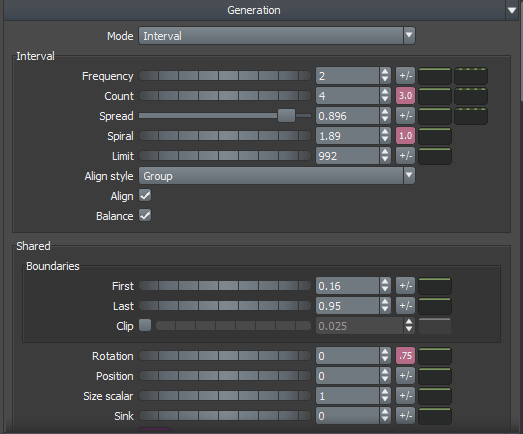
The Steps curve was set to a vaguely W-shaped curve to help randomize where the branches would appear. Longleaf pines have a very randomized shape to them; some trees are uniform, some are crazy-looking with branches splayed out everywhere.
Per Step Spread with the curve applied helped randomize where on the vertical axis the branches would be generated, thus helping keep the branches from sprouting from the same location or otherwise looking “samey” from a distance.
Sweep was set up with a similar curve with the aim of reducing visual repetition along the rotational axis of the trunk.
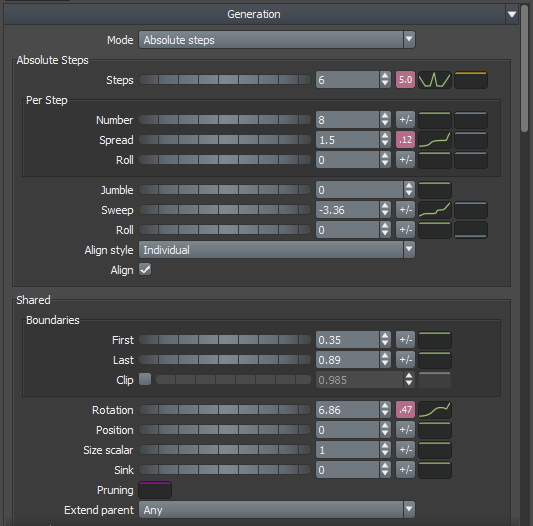
First and Last are both set up to mimic the general vertical branch distribution of an adult longleaf pine. I didn’t want them to sprout from a human-scaled height, nor did I want them sprouting from the top of the tree. Longleaf pines have a bell-like shape when seen from a distance. It’s important to keep that major silhouette intact in the design phase.
Rotation worked in concert with Spread to help reduce visual repetition of the branches along the rotational axis of the tree trunk. All other values were left at default in the Generation tab.
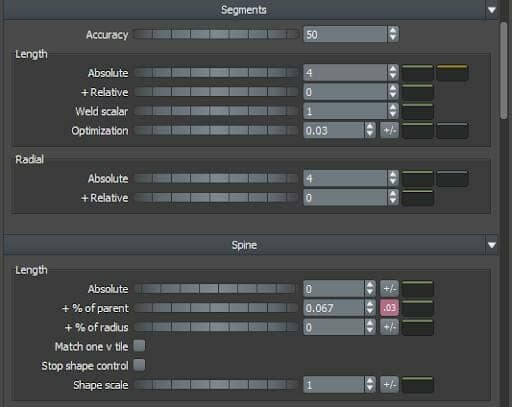
Absolute Length segments were changed to 18 to have a minimum level of polygonal density as the branches spread out. It didn’t need to be perfect at the distance these trees were visible from, but it did need to avoid being too low-poly in appearance. This was eyeballed from playing with different values and exporting the changes to UE to see how they held up. It’s a time-consuming process but well worth it!
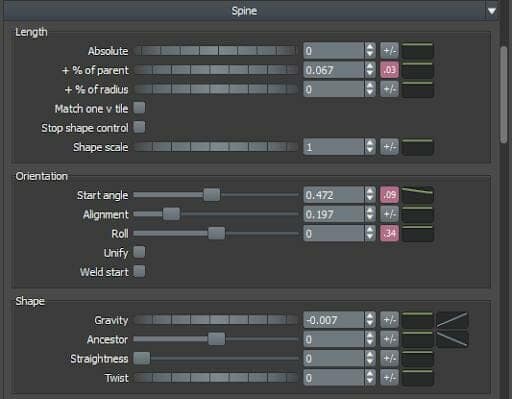
Radial segments were set to 8 to have a decent level of radial density without killing the GPU. It also helps create believable blends where the branches intersect the trunk. With low poly blending, it can be a bit iffy looking no matter how you work – this is an issue of working in low polygons with any software and is unavoidable if you use low values for radial segments. The Absolute length of the spine was set to nearly 20, with a curve that helped create the rounded bell shape I mentioned earlier.
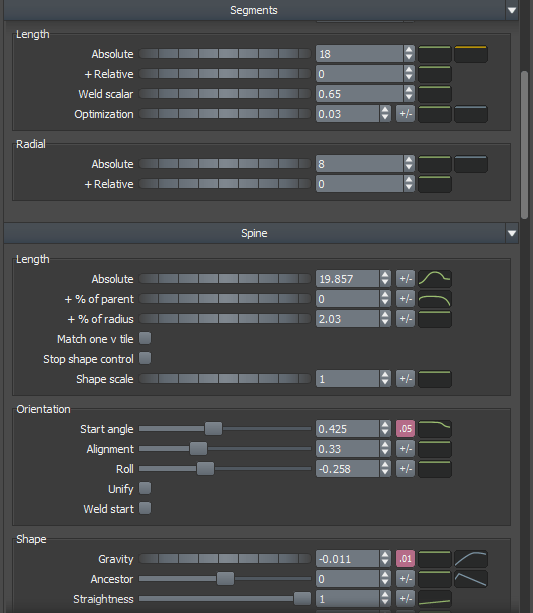
The shape of the curve determines how the tree’s branches splay outwards as it grows. It’s one of the critical factors I’ve found in determining the overall look and feel of a realistic tree that resembles the original tree you’re looking to recreate.
+% of Radius was set to 2 just to give the branches a bit of relative size compared to the trunks and keep a consistent scale compared to the radius of the trunk as the trunk narrows toward the top of the tree.
Orientation Start Angle was set to a value near 0.5. Longleaf pine branches generally don’t tend to droop much. Having the branches splay outward in a semi-rigid way helped sell the look. The curve applied to the angle helps the newer branches at the top of the tree point upward a bit more than the older branches as they’re not working as hard to maintain their rigidity.
Gravity has a very slight value to it with a large sloping curve to help produce additional force against the branches to ensure that they keep the slightly drooping, but still semi-rigid appearance I was going for.
Late noise was set up with a curve affecting newer branches toward the top less than older branches at the bottom of the tree. Longleaf pines have a bit of warpiness to the branch systems that noise is necessary to replicate.
Break chance was set to just under 0.2 to help with visual variation when creating duplicates of the tree.
On to the twigs!
I basically copied and pasted the twig settings by duplicating the Twigs node and applied each copy to the Big Branches and the Twigs node itself. The result is Big Branches → Twigs → Twigs → Cap multiplied by 2, with leaf meshes on the second Big Branches → Twigs → Twigs setup.
The Twigs are set up in a similar fashion to the Big Branches, as seen below.

The Twigs are set up in a similar fashion to the Big Branches, as seen here (right). The Leaf meshes were super simple to set up, which is fantastic! The most technical work involved in SpeedTree was getting the general appearance of the branches and trunk correct. Here’s the only things I needed to change to produce what was seen in Pine Flatwoods.
Size: 1.5, with 0.22 variation per mesh. No curve. Longleafs are quite bushy in appearance – this needs to be represented by adding a bit of scale to the final product (see images, right).
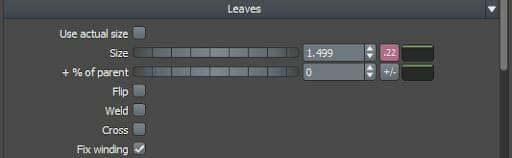
Final Adjustments were set up so that the needle meshes generally pointed upward but with a bit of variation to them.
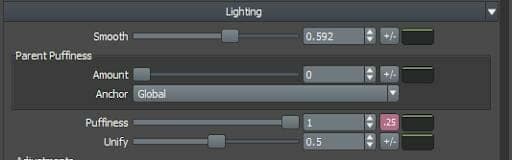
Lighting adjustments were made to Smooth in order to allow the normal maps from Megascans to be more prominent, and Puffiness was increased to 1 with 25% variance to help push the normals more.

Using the references I mentioned earlier, I set SpeedTree up for modeling much like how I work with 3DS Max: perspective and orthogonal views.
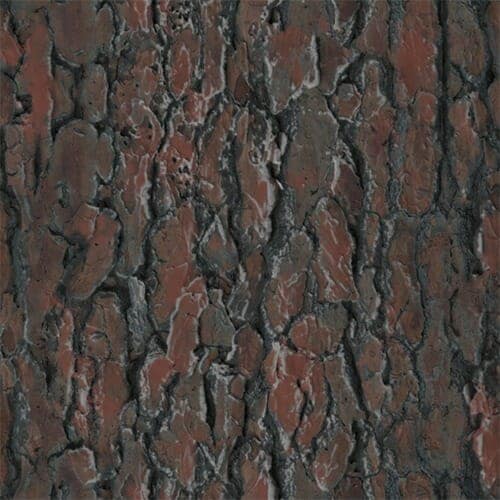
The bark was made with Mixer using older pine bark scans. Longleaf pines have a tinge of red and white in the bark as they grow older and this helps differentiate them from the similar loblolly pine. The UV placement was generally left to be adjusted via material instancing in Unreal, but I did try to get the UVs looking relatively accurately tiled from a distance in SpeedTree. I try to keep the UVs on the branches scaled about the same as they are on the trunk. At the distance these trees are seen, it’s mostly just to avoid any weird artifacting from MIP mapping.
The material is somewhat stylized in Mixer so that the defining pine characteristics show through at a distance. This was achieved using several curvature layer blends in Mixer with varying bits of noise in the layer masks breaking up the surface.
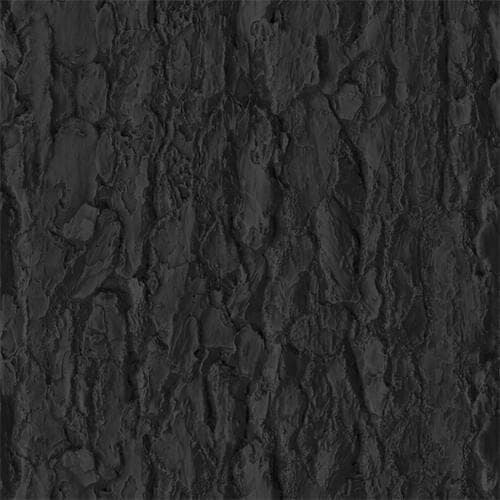
I created a charred version of this texture as well as any accurate flatwoods recreation needs to have some evidence of burning, as flatwoods only exist due to frequent fires. This was mixed together in Unreal using a simple vertex paint setup with the displacement map from Mixer controlling the blend.
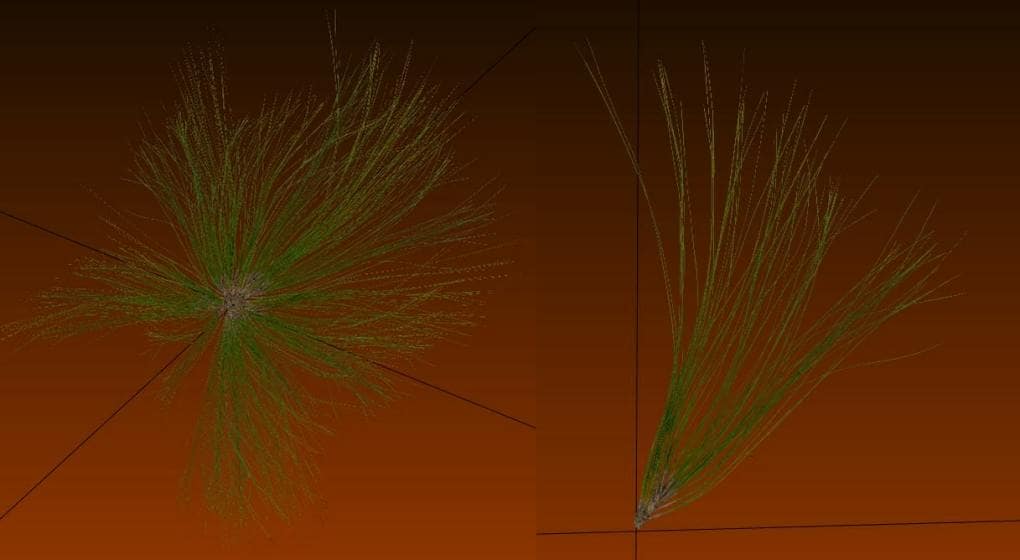
The saw palmettos were created using this palm asset from the scan library. We have several ready-made palm fronds which I could have used, but would have led to a lot of easily visible repetition.
The saw palmettos were created with individual frond geometry in 3DS Max. I traced over each frond piece using a plane and shaped the plane to fit the shape of the frond texture, with a line down the middle to allow it to fold and bend where the fold exists on the texture. This offered me total control over each frond and how it was visually represented.
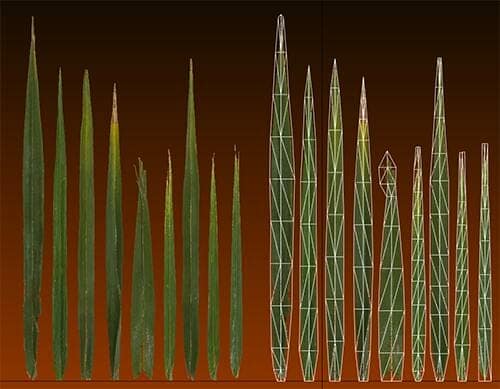
Each frond was exported individually at the origin and imported into SpeedTree in a manner just like the pine needles, except I assigned all of the palm frond components to a single material so that each frond would use all of the frond components at random to help keep it from creating easily recognizable patterns.
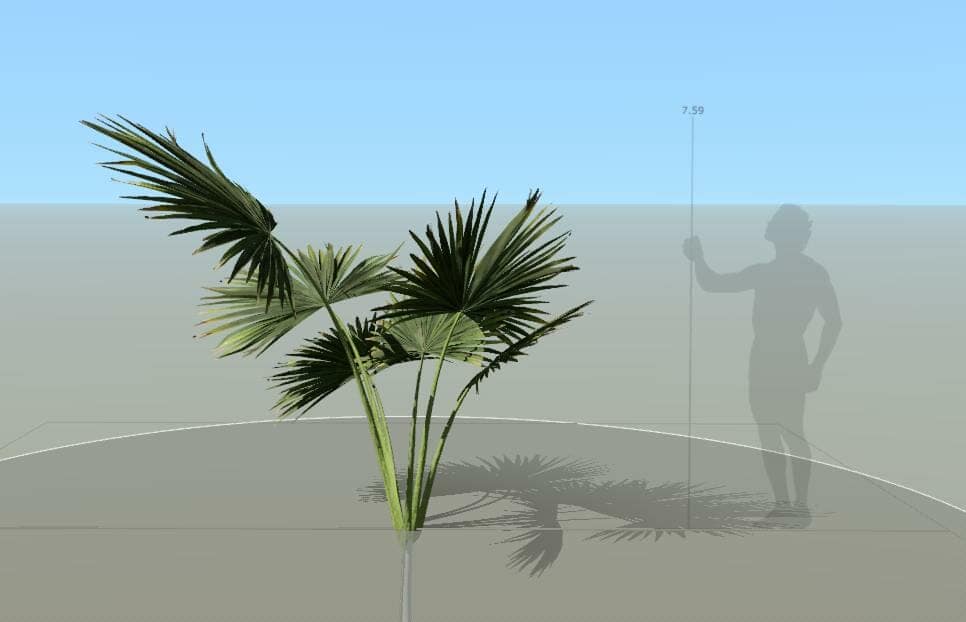
The palmetto was set up in a nearly identical manner to the pine. This is because SpeedTree is really easy to work with, so there’s no reason to alter the basic behavior of a tree unless it’s radically different in overall composition. If it has what could be considered a trunk, that’ll be the focal point. In this case, I just made sure to offset the Trunk vertically so it sunk underground, and had all of the Big Branches sprouting from it at different positions on the mesh (First/Last property in Generation). From that, Branch pops out. This is where it really differs from the pine. The branch is an invisible guide to how the Fronds grow.
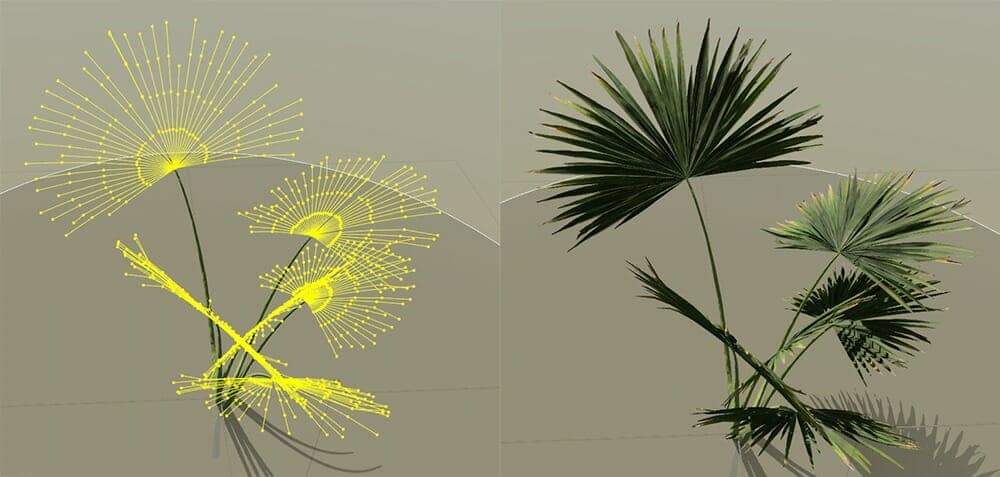
The Fronds simply path themselves along the spines of the Branches. This is done by setting the Skin property of the Branches to Type: Spine Only. It then becomes a framework that the Fronds are laid on. There’s varying adjustments you can make, but ultimately I chose what would best represent a saw palmetto from a distance; these aren’t meant to be seen up-close, although they definitely hold up well enough to do so.
Conclusion
I hope this more in-depth writeup helps you realize your goals with SpeedTree! To read the condensed form of this writeup, you can check out Building Pine Flatwoods in UE4 on 80 Level. There you’ll find more information on how to integrate into UE4 and a wealth of info on material setups, free UE materials, and a deep breakdown on visuals using raytracing in Unreal Engine.
Thank you for your time!
You can see more of Jonathan’s work on ArtStation, follow him on Twitter and Instagram, and find him in the Quixel Art Community on Facebook.
Stay in touch with SpeedTree: